
There are several different types of notifications that you can configure. You can either get:
Email notifications
Mobile push notifications
Email notifications
In order to get email notifications you need to add your email under the Notifications menu:
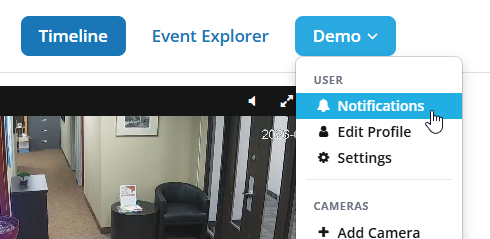
Once there, simply add your email to the list.
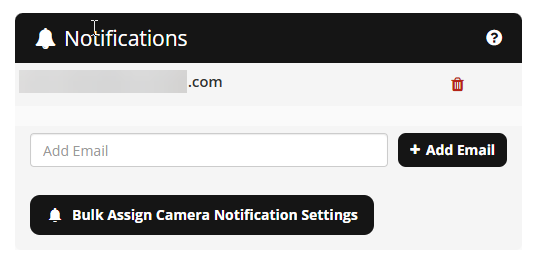
You can add any valid email here or anyone else you want to get your notifications.
There is no validation for the email. Make sure to type the email correctly!
Mobile push notifications
By default all notifications will be configured on the web and apply to mobile. When you first open the app for the first time, it'll ask you to allow notification or not. To turn on/off mobile notifications you need to go to your mobile app (Apple or Android) and turn on/off notifications in the OS settings.
For iOS:
Open the Settings app on your iPhone.
Tap Apps.
Scroll down and select your app.
Tap Notifications.
Turn Allow Notifications Off/On.
For Android:
Open the Settings app on your Android device.
Tap Apps (or Apps & notifications on some devices).
Select your app from the list of installed apps. If you don't see it, tap See all apps first.
Tap Notifications.
Turn Allow notifications Off/On.
Configuring Notifications
You can either configure notifications at a per camera (per user) basis or multiple cameras.
Single Camera
Click the drop-down arrow next to the camera in the timeline and then select "notifications":
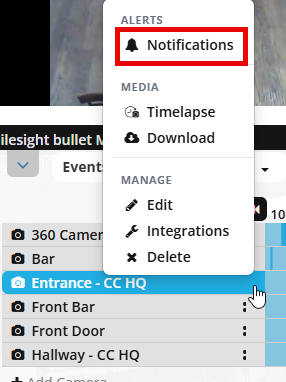
You are presented with an interface to completely customize your notifications.
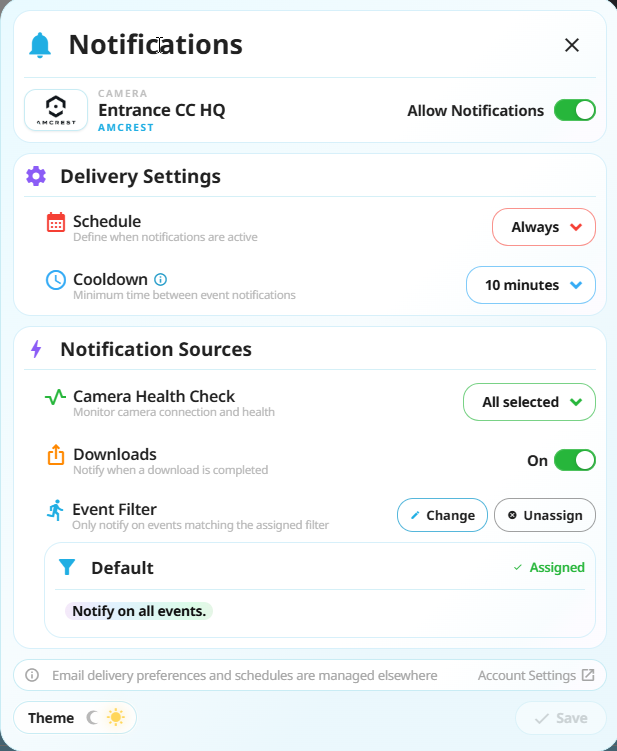
Of course at the top you must have "Allow Notifications" turned on.
There are several tabs for customization of your notifications:
Schedule can control what time of day and which days you get notifications - to setup schedules you need to go to your settings page.
Cooldown sets the time between notifications - default is 10 mins. We highly recommend keeping a cooldown time. There is not need to get multiple notifications in a row when someone lingers around the camera for an extended time.
Camera Health Check (CHC) gives you alerts when cameras go down or have any issues
Downloads will give a notification when a queued download is ready
Event Filter - this is the main notification "builder" that lets you setup any type of notification. See the Event Filter section for more information.
Bulk notifications
Go to the notifications tab under your account name dropdown menu.
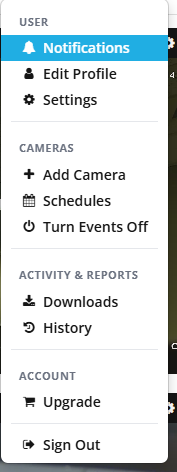
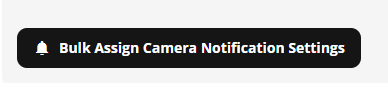
Then go to bulk notifications.
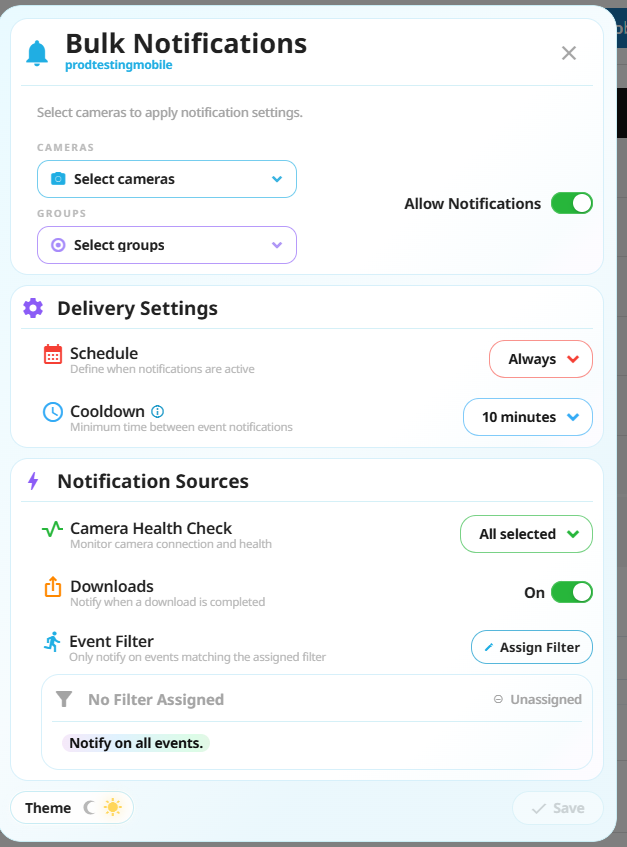
There are several tabs for customization of your notifications:
Cameras allows for certain cameras to be bulk selected and have the notification rules apply to all of them
Groups will apply all the changes to cameras in the group selected
Schedule can control what time of day and which days you get notifications - to setup schedules you need to go to your settings page.
Cooldown sets the time between notifications - default is 10 mins. We highly recommend keeping a cooldown time. There is not need to get multiple notifications in a row when someone lingers around the camera for an extended time.
Camera Health Check (CHC) gives you alerts when cameras go down or have any issues
Downloads will give a notification when a queued download is ready
Event Filter - this is the main notification "builder" that lets you setup any type of notification. See the Event Filter section for more information.
Event Filter
The event filter gives many options for filtering notifications. These filters can be customized to find any condition similar to the filtering that is used in the Event Explorer.
Keep in mind that notifications allow you to create a single rule (with as many conditions as you want) per camera. This is different than the Event Explorer which allows you to create as many conditions you want and easily switch between them.
Creating a filter with a combination of conditions can be very useful. For instance, combining people and cars so a notification is only sent if both a person and a car are caught on the camera at the same time. The cameras affected will only send notifications for what is specified.
Tip: Use the Event Explorer to create a filter and test out the results. This way you can fine tune your results and apply that to notifications.
Start by creating a Sample Filter or Build New Filter to create your conditions.
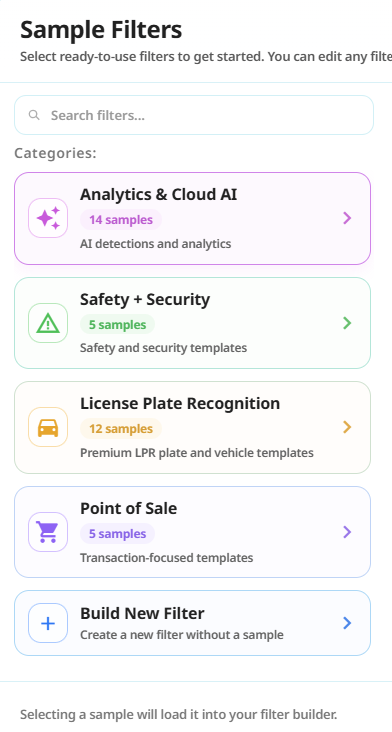
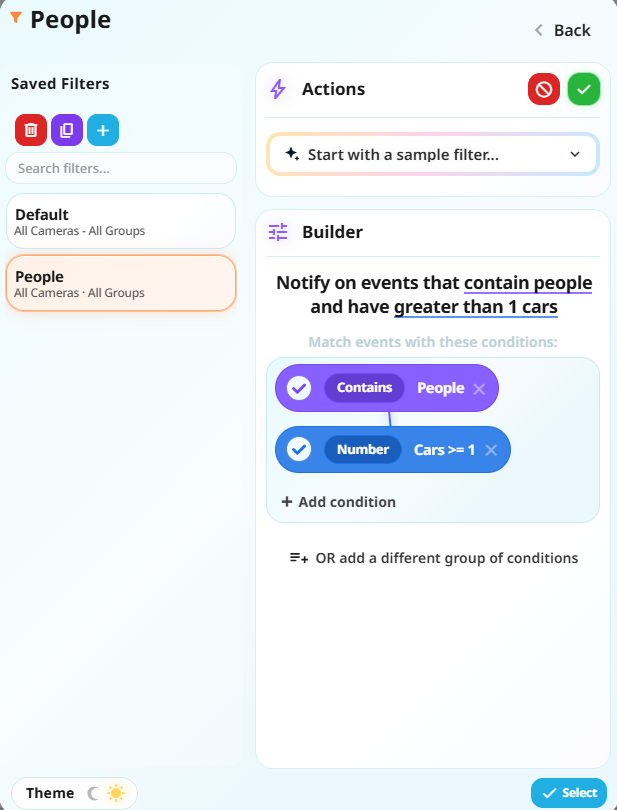
If you already created filters using the Event Explorer, you can search for a filter and select one or simply build a new one.
The options for notifications are endless!