Audience: Authorized Resellers ONLY
Understanding your Accounts
When you sign up as an authorized reseller you are provided a "Reseller Admin" account that gives you 5 free licenses. In addition to managing your billing, you can use this account for two purposes:
Create and manage your customer accounts in the Admin Portal.
Use this as a demo account in the customer portal (or download the mobile app)
In order to manage customer accounts you can use the Administration interface called the Admin Portal. To access the Admin Portal you would go to:
https://partner.hostedcloudvideo.com
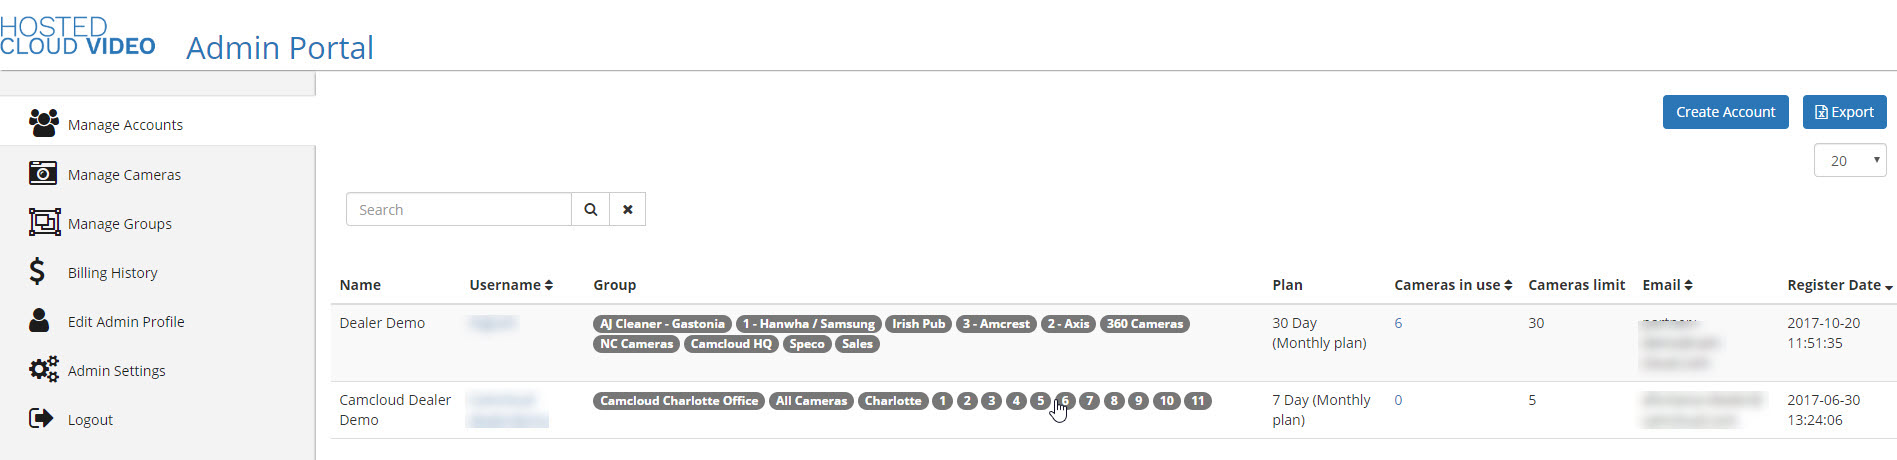
When you log in with your authorized reseller admin account you will be presented with a number of tabs at the left. By default it will start in the "Manage Accounts" tab. The main window will show all of your created customer accounts as well as your own reseller account (identified by the 7 day plan and 5 licenses). Almost 99% of everything you do will be in the "Manage Accounts" tab.
With this same account you can log into your customized domain provided. It will look like this:
<company name>.hostedcloudvideo.com
For example, customers and your demo account can access the web portal with: https://AcmeSecurity.hostedcloudvideo.com
When it comes to adding customers you have the choice to manage it on your own (in other words you own the account as the main admin user) or you can create a user accounts with delegated access.
Creating a New Customer Account
1. Click the Create Account button (Top right of Manage Accounts section). This will create a customer account. Remember you can own this customer account if you want to manage the entire account or you can give this to the customer by inputting their email.
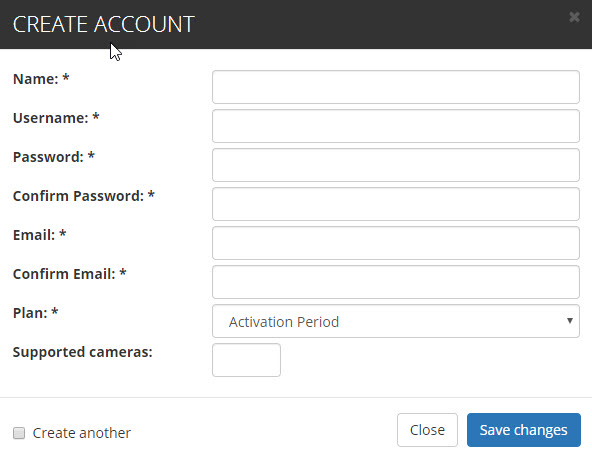
2. Fill in the appropriate data where:
Name: You can use the name of the customer/company. This will be the name shown on the top right of the customer web portal.
Username: This will be the login username for the Customer. This can be used by the customer or administrator on the customer portal and in the mobile app. This account will have full permissions. These credentials are often used for reseller administrative purposes (deployment/troubleshooting etc). Additional Users can be created to provide customer access if they do not require administrative functionality.
Password: Customer password for the web portal and mobile apps. See this page for details on password creation.
Email: Desired email address to be linked to this customer account, this will be the email used to receive alerts (such as motion detection and Camera health check).
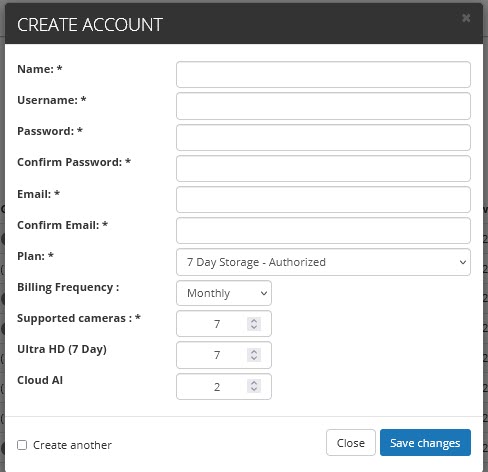
Plan: If this is a deployment that will take several days, or is a short term trial of the software for the customer you can use the Plan “Activation Period”, which will stay active for two weeks. Change this to a monthly plan before the end of the 2 weeks.
Supported Cameras: This will be the total number of supported cameras the customer will be allowed to add, this can be adjusted later in the Plan/Payment section.
Note that if you select a plan you will be given the option to enable add-ons at this point:
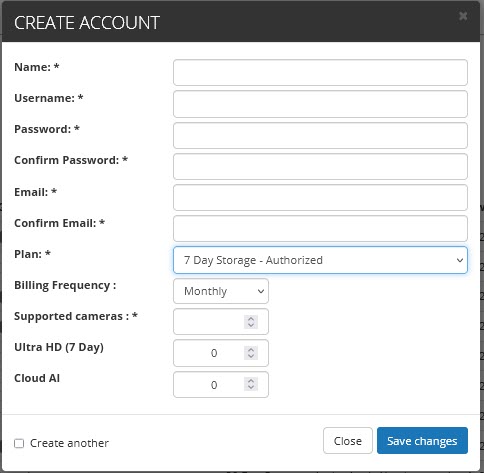
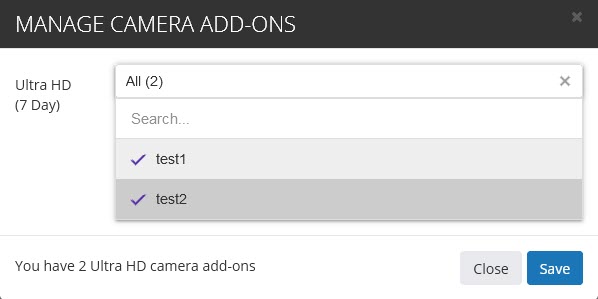
The way add-ons work is that you are charged per camera for each add-on, so if you have a total of 7 cameras on an account, you can select for example 7 ultra HD add-ons and 2 Cloud AI and then once the account is created you can apply the Ultra HD add-on to all 7 cameras after they are added, as well as select 2 cameras to receive the Cloud AI functionality (see Add-ons section for these steps):
Account Management
To manage accounts, stay in the Manage Accounts tab and click the username of the customer where you want to either add cameras, add groups, view status, change plan/payment and much more.
Add-ons
If you navigate to the plan/payment section this is where you will be able to increase or decrease your overall supported camera limit on the selected account (will need to click confirm after making changes), change the retention time as well as enable add-ons with:
AI capabilities such as Person and Vehicle detection - Cloud AI Add-on
Increase resolution and bitrate - 4K Ultra HD Add-on
Extended storage for up to 2 years - Cold Storage
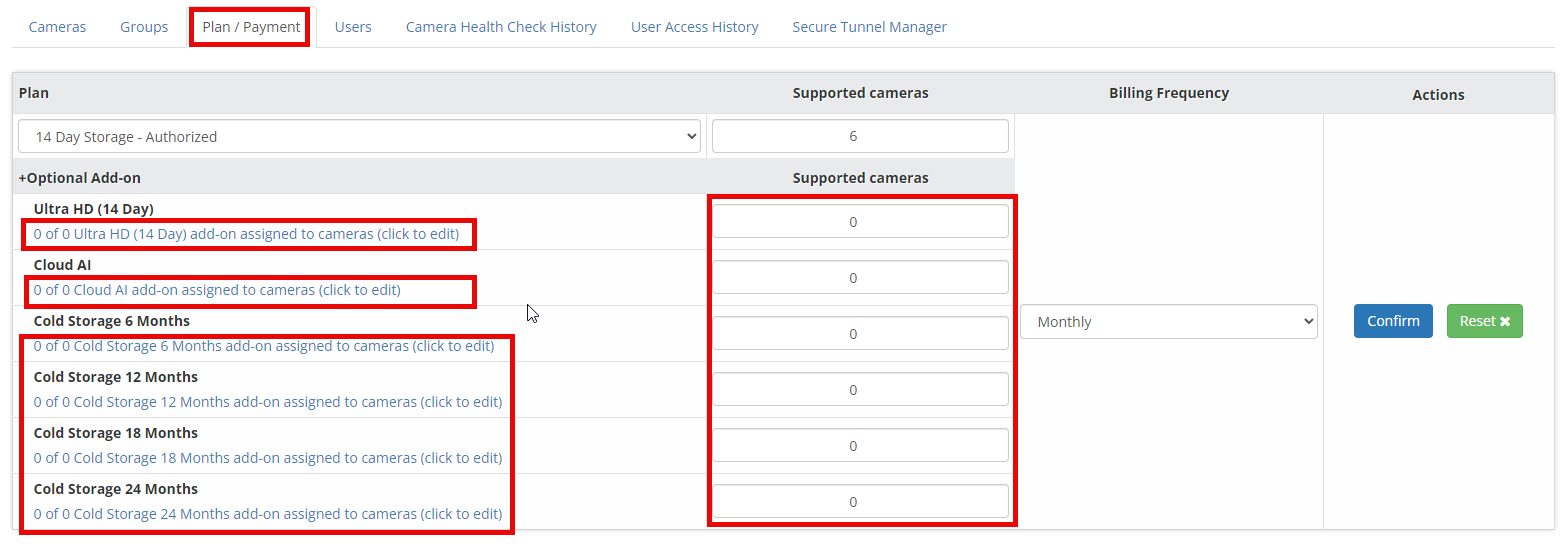
As mentioned above you can apply add-ons per camera so the total of add-ons doesn't need to equal the total of cameras on the account. Once you select the number of cameras you'd like to have those add-ons available for you then click the "add-on assigned to cameras" link to open up a page to select which cameras will receive those add-ons:
Add Camera
Click the name of the account in the Manage Accounts tab. You should see the Add Camera button below:

To add a camera see the support articles for your camera type: https://support.camcloud.com
Alternatively you can log in with the customer account in the web portal or mobile app and add cameras from those platforms.
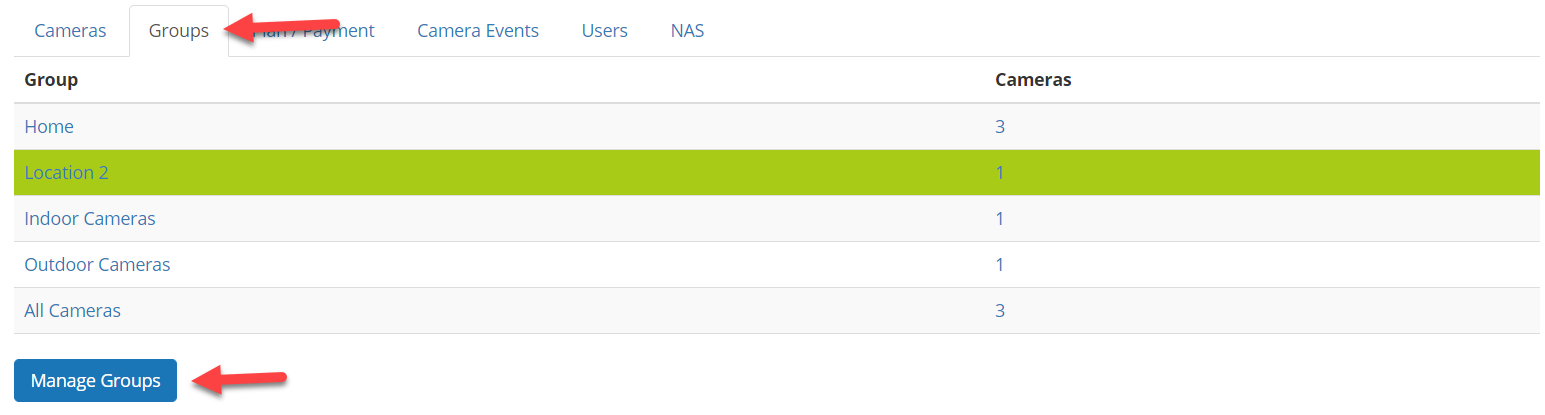
Create Groups
Optionally you can create groups (often called labels). This is a way to label your cameras accordingly. It can be anything such as a location or thing (front door).
Groups are necessary if you plan on assigning users to the system. This is how you give access to specific cameras.
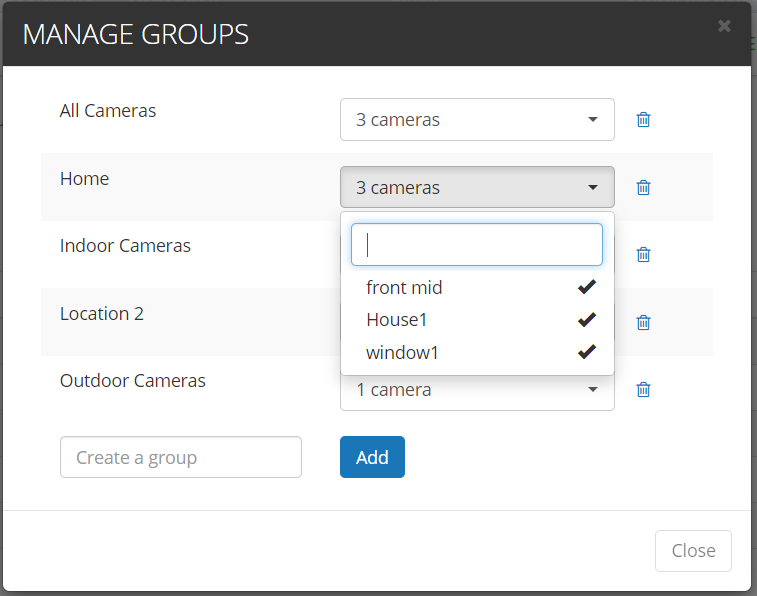
Select the "Groups" tab and then select "Manage Groups" at the bottom left:
From here you can add new groups and then select the drop-down next to the group and select the cameras you would like to add to that group:
Add Users
Non-Admin Users have the ability to view, playback, and download footage.
Non-Admin Users are created by selecting the "Users" tab and then selecting "Add User" at the bottom left:

Enter the customer's Email address and Name, and then select the Group(s) you would like them to have access to:
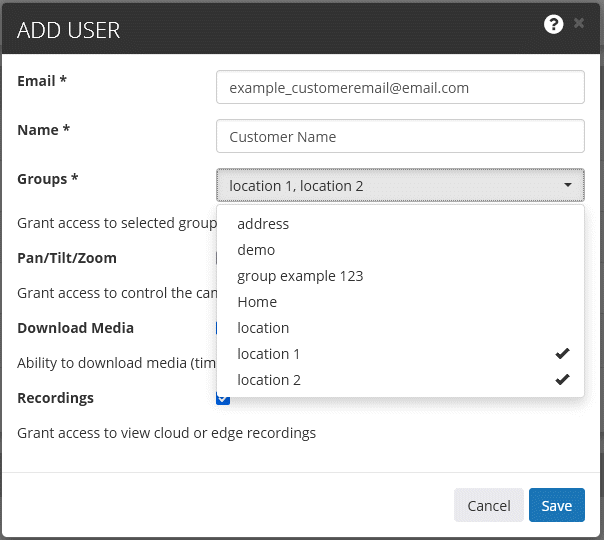
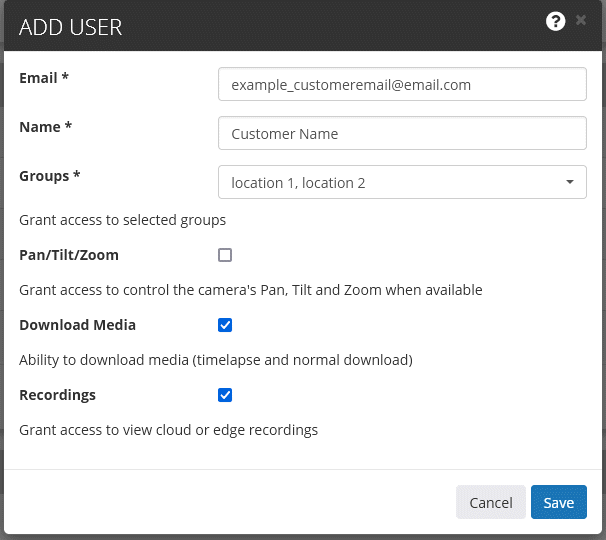
There are a few options you can choose from when creating the account, the default is to have Pan/Tilt/Zoom unchecked (this gives the user the ability to move the camera position if it has PTZ functionality), while Download Media (ability to download normal footage or time-lapse footage) and Recordings (Ability to view recorded footage, turned off they would have live view only) will be on by default. Note that turning Recordings off automatically turns off Download Media.
Once you click on save, an email will be sent to the customer asking them to set up their password. They will now be able to access the cameras via the Web portal or the Mobile app using their email address and the password they chose.
Keep in mind that the email is also their username.
Admin Alerts
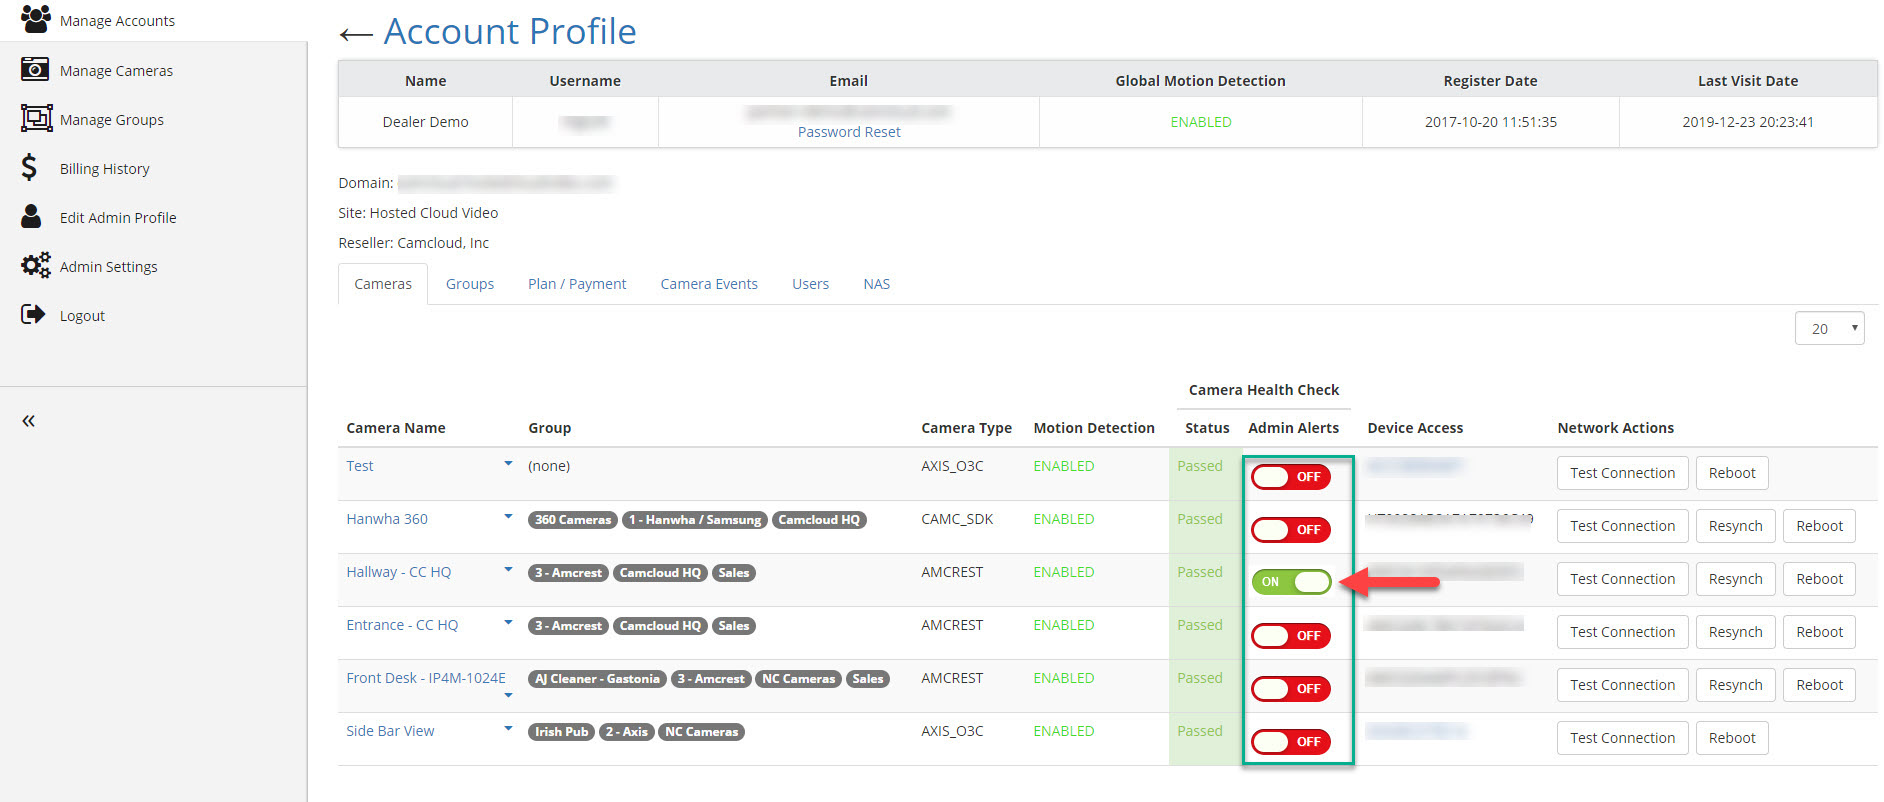
For Camera health monitoring purposes it is always a good idea to set up admin alerts for all customer cameras. This will send notifications to an email or a list of emails of your choosing whenever a camera fails a health check. When you first add the camera you can enable this by clicking the toggle in the camera health check section shown below:
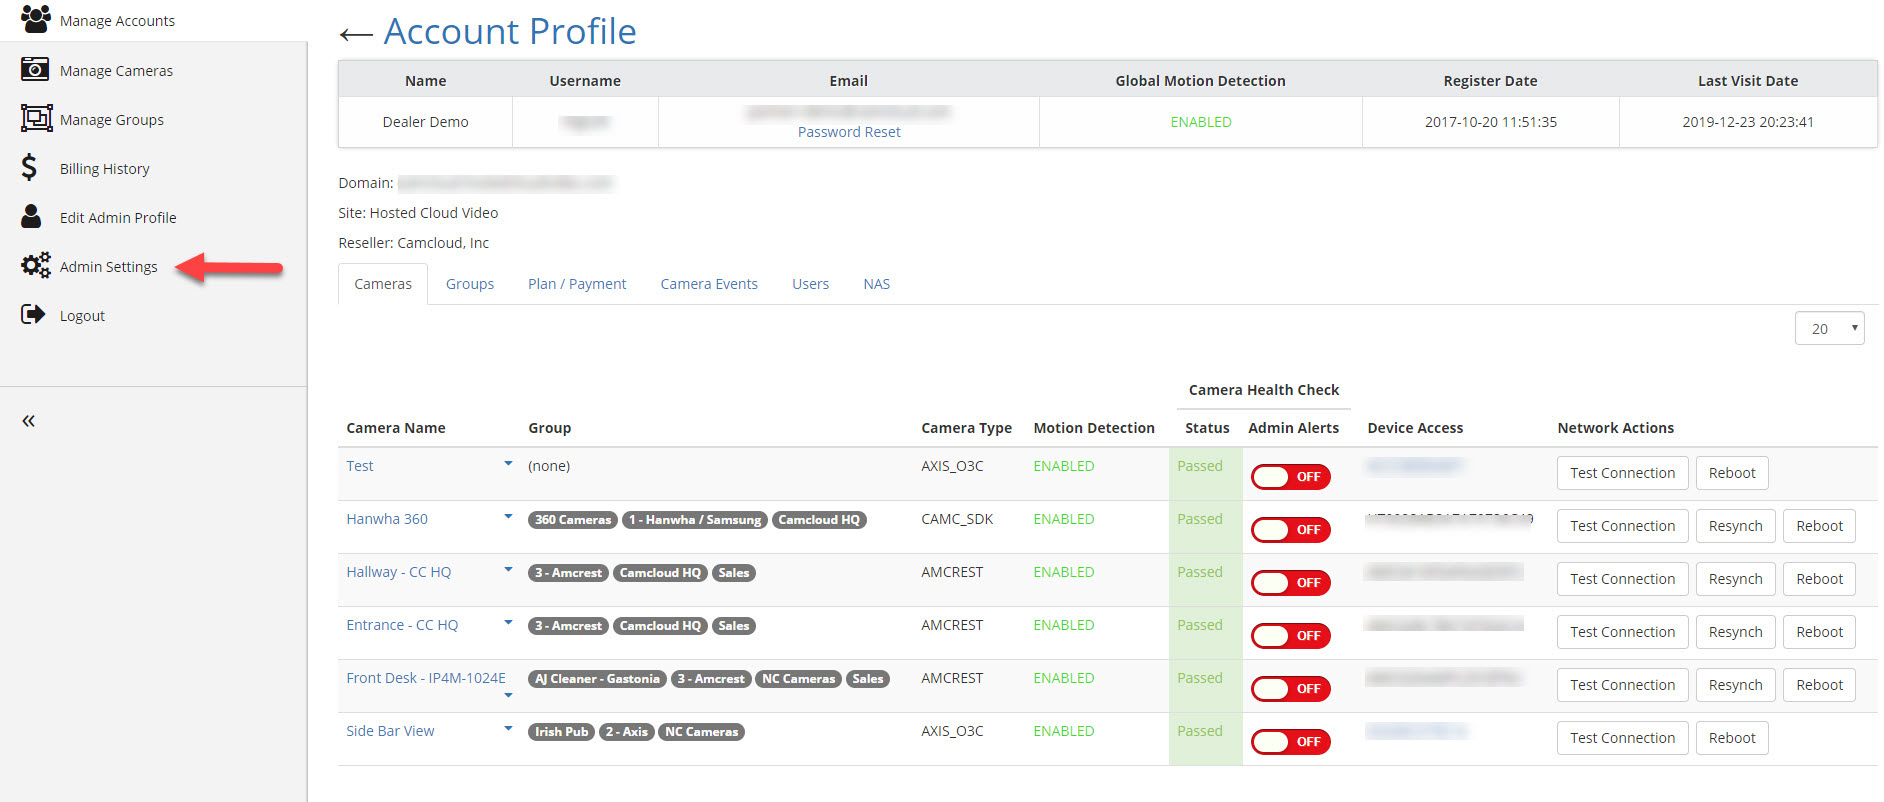
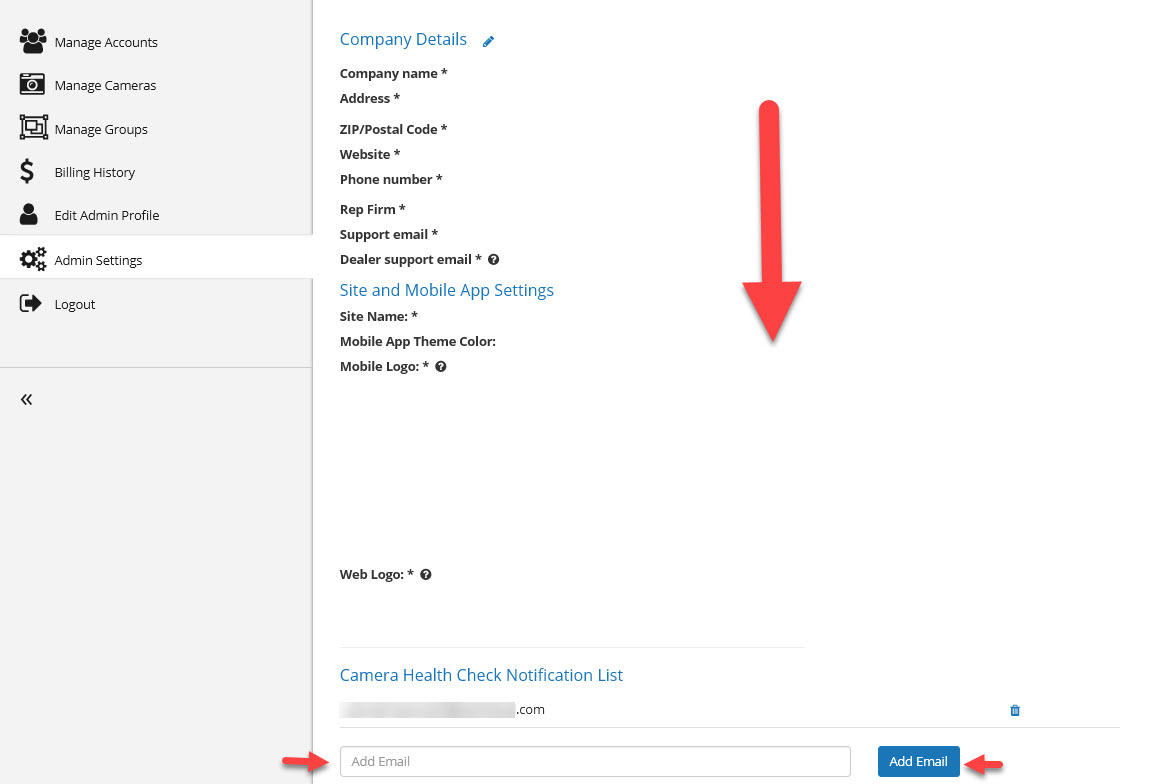
You can customize which emails are on the recipient list by navigating to the "Admin Settings" section, scrolling to the bottom of that page and adding additional emails to that list:
In order for this to work properly you will need to make sure you do not disable "Camera Health Check" notifications when adding or editing the camera:

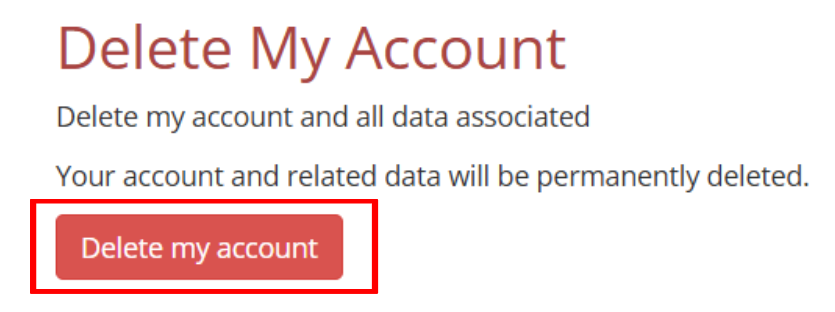
Deleting a Customer Account
You must delete an account to avoid charges. Removing camera licenses will NOT stop billing.
Click on the Plan/Payment tab

Click on Delete My Account button,
Deleting/Removing a User from an Account
Click on the Users tab

Search/select the user you want to delete/remove from the account
Click on the delete icon

Troubleshooting
Make sure you are using a compatible browser (Chrome, Firefox, and Edge). Any other browsers can result in inconsistencies or error pages.
Make sure you are logged in! There is an automatic timeout, so if you go to add/edit a camera or create groups etc and you have been logged out it may not be obvious at first. If you refresh the page you will be taken back to the login screen. It is always recommended to refresh the page before doing anything if the page has been idle for a bit.