Hanwha Vision cameras have been integrated with Camcloud to provide a reliable, simple and user friendly setup process.
Make sure to visit the supported Hanwha Vision camera list before proceeding.
There are three ways you can setup a Hanwha Vision camera:
Open Platform SDK Install - This is a plug and play option as long as it's one of the support types.
Port Forwarded - This method bypasses the SDK install completely but allows for continuous recording and other cloud features.
Secure Tunnel Manger (STM) - Allows you avoid port forwarding but requires a machine to run the software. We won't cover this in this article but you can find more information here.
Open Platform SDK Install
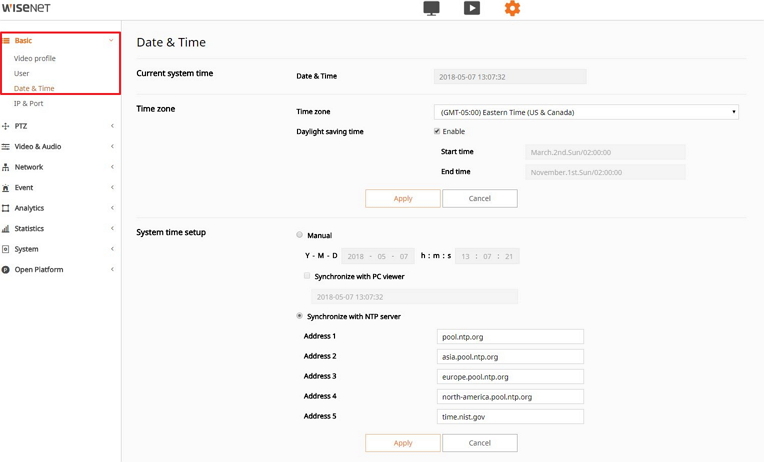
Date/Timezone
1. Camera date/time zone - This must be setup in order to successfully connect to the cloud.
Basic → Date & Time:
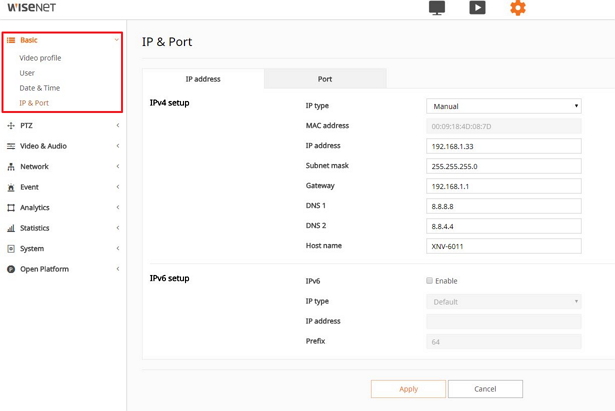
DNS
2. DNS - If you are using an NVR the DNS might be altered and not working properly. In addition the default DNS may not function as expected. Google Public DNS is often a good alternative: 8.8.8.8, 8.8.4.4
Basic → IP & Port:
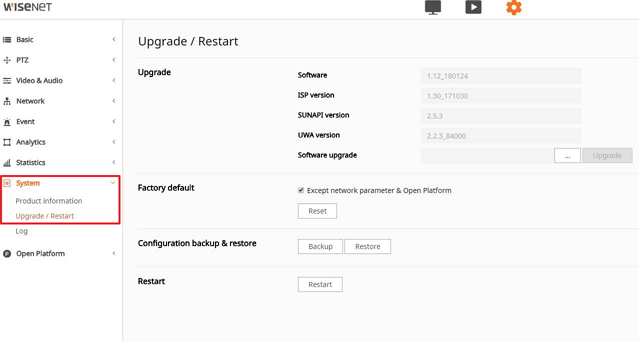
Firmware
3. Firmware - Make sure to run the latest firmware, this is always recommended.
System → Upgrade / Restart:
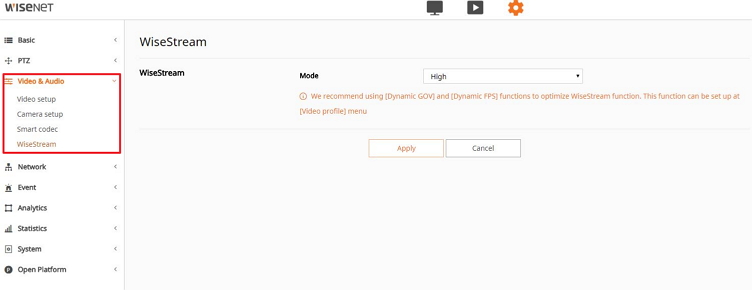
WiseStream
4. WiseStream - Ensure this is set to High
Video & Audio → WiseStream → Mode → High:
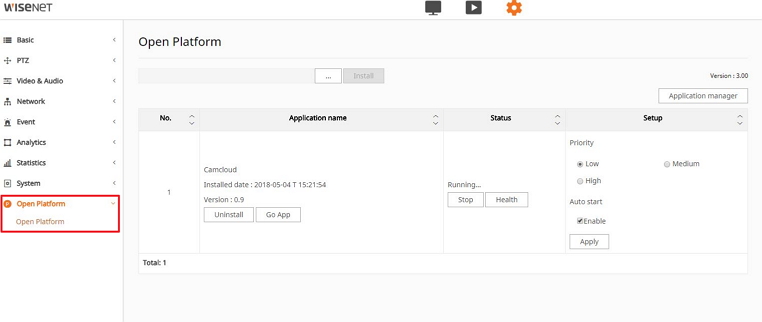
Open Platform SDK app install
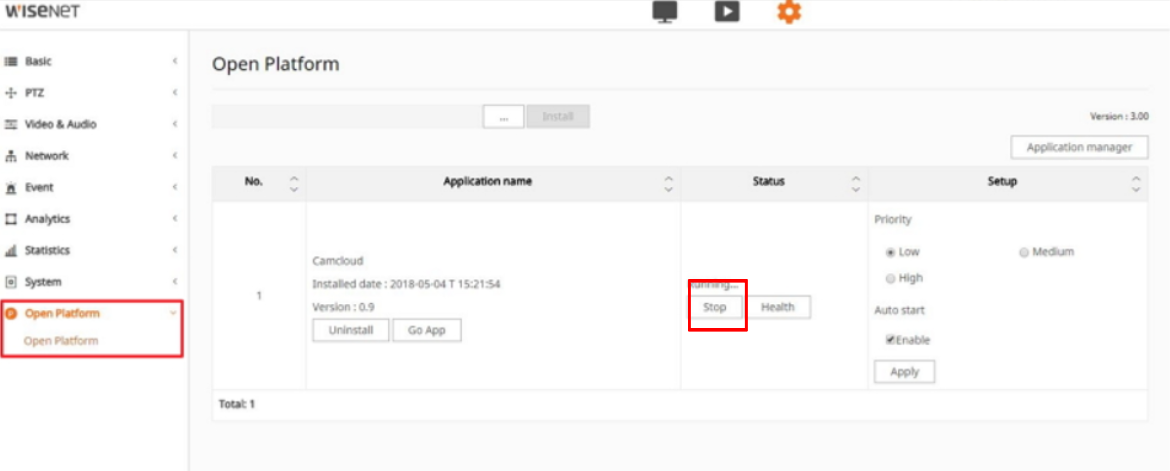
5. Open Platform SDK app - Obtain the latest SDK and install that first. You can download the latest app. Make sure to find out the platform version first so you download the correct app.
Next, ensure that “Auto start: Use” is checked otherwise the application will not be started after a reboot or crash and also make sure that it is "started" and the status is listed as "Running...".
IMPORTANT: Make sure the correct firmware was installed before performing this step. Otherwise you'll have to go back and factory reset the camera.
Open Platform:
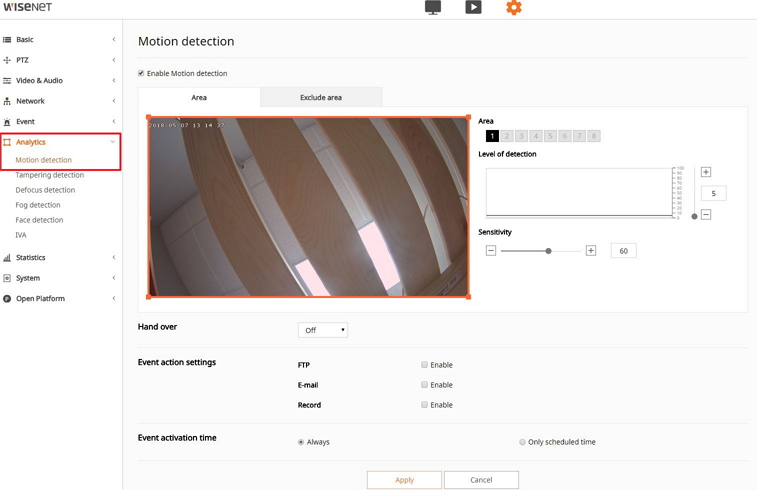
Motion Detection (optional)
6. Motion Detection - Off by default, it needs to be enabled to receive motion events.
Analytics → Motion detection
Enable Motion detection
Set Area(s) - some models will have the ability to engage multiple detection areas
Set Sensitivity
You should now be ready to head to the webpage to add the camera to the cloud!
Add Camera to the Cloud
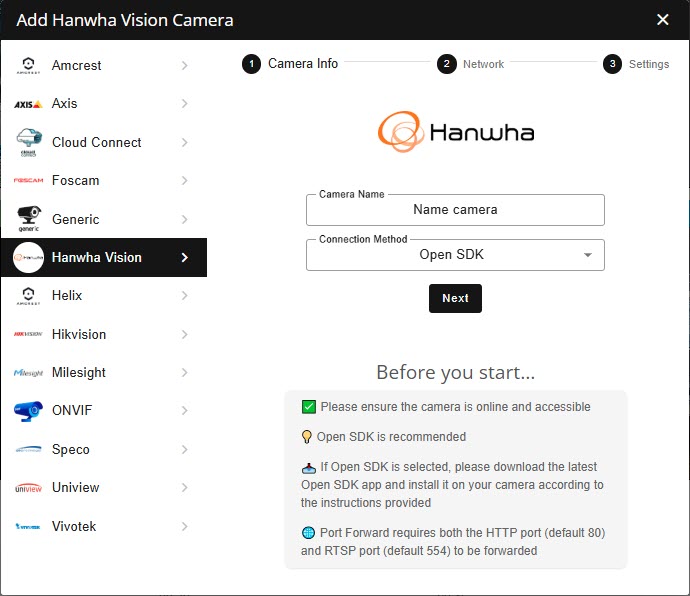
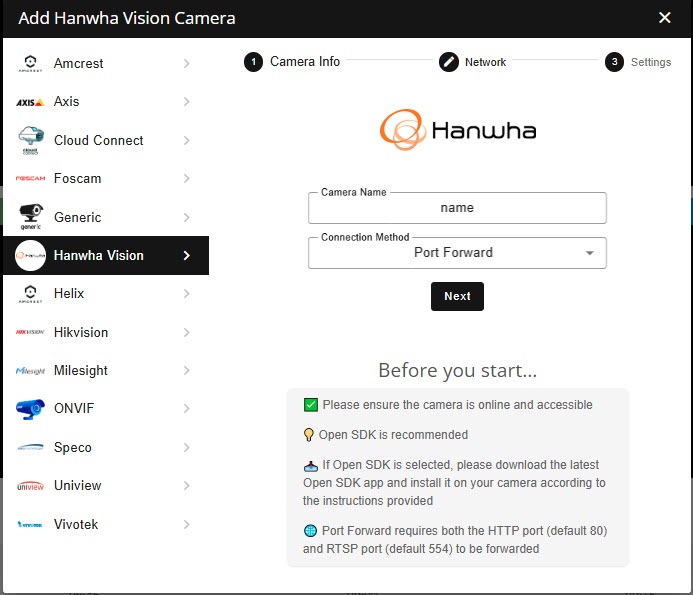
Click on "Add Camera" and pick "Hanwha Vision". Then name your camera whatever you'd like and select "Open SDK" as the connection method:
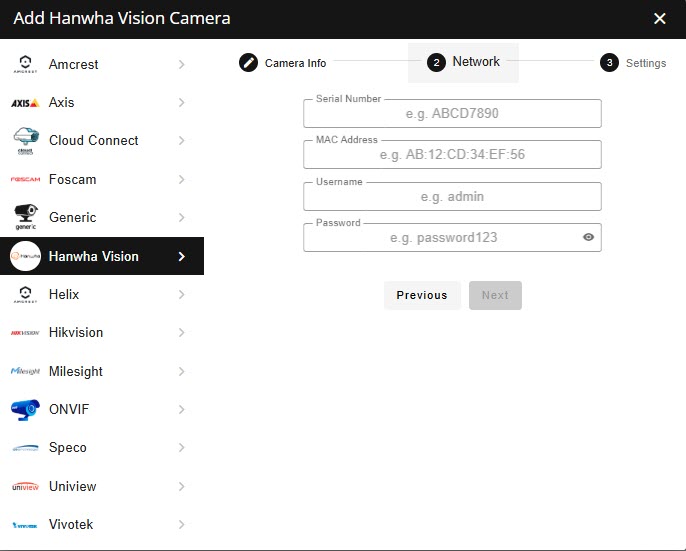
Once you click on next, you'll have to add your camera's serial number, MAC and username/password:
Click on Next.
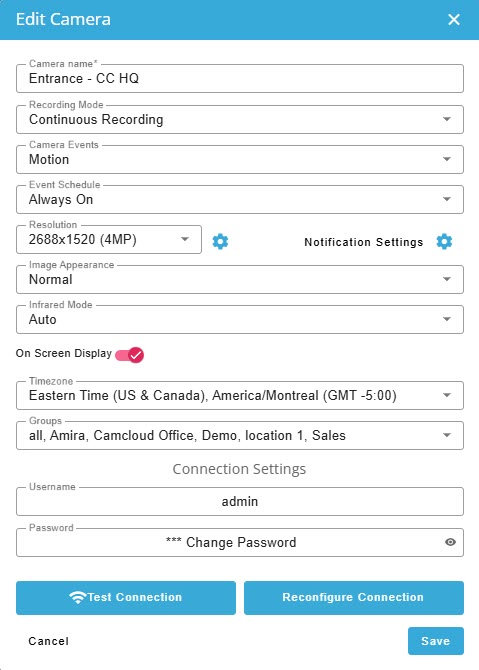
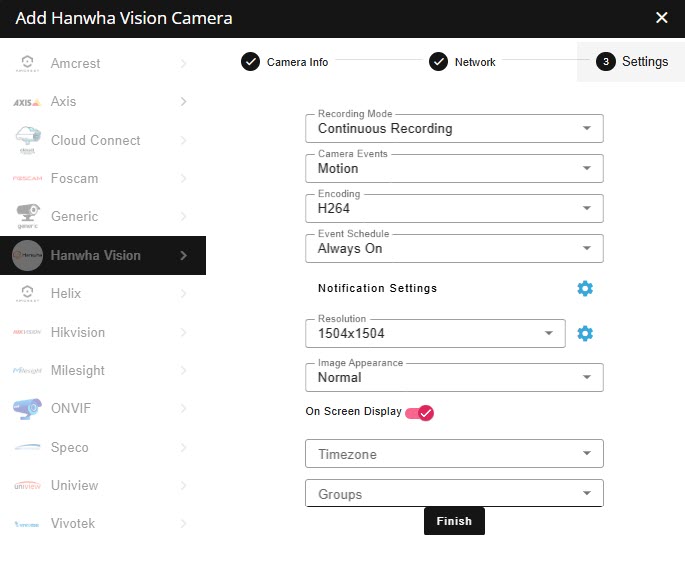
In the Camera Settings menu you'll be presented with some optional camera settings and the ability to assign the camera a preexisting group. All the settings here can be accessed at a later time through the "edit" camera menu as well:
Select "Finish". Check to see if the "Live" view is working and continuous recording is happening on the Timeline!
Port Forwarded setup of a Hanwha Vision camera
Note: If you choose to install the camera without the SDK; ensure that the camera is port forwarded
Step 1. Start the "Add Camera" Wizard
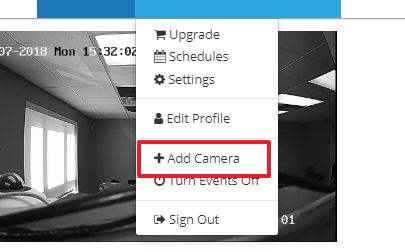
Click on "Add Camera" and pick "Hanwha Vision". Then name your camera whatever you'd like and select "Port Forward" as the connection method:
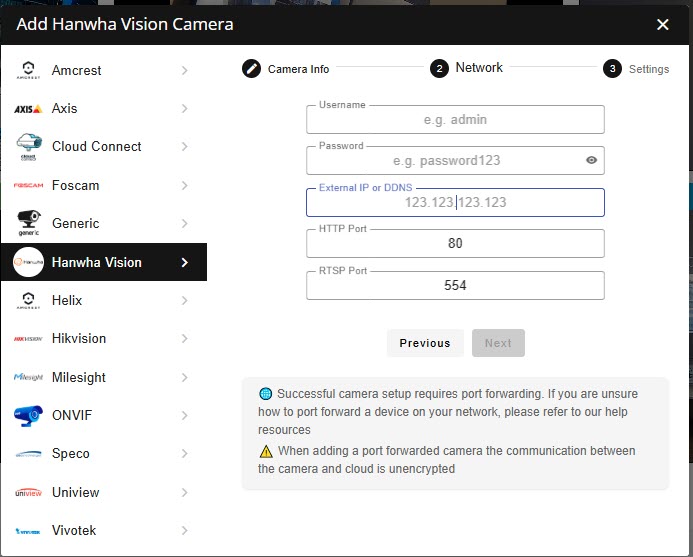
Step 2. Add network information
Here you will enter the External IP address or DDNS of the location along with the forwarded RTSP and HTTP ports for this camera:
Click on Next.
Step 3. Select settings
In the Camera Settings menu you'll be presented with some optional camera settings and the ability to assign the camera a preexisting group and set the time zone. All the settings here can be accessed at a later time through the "edit" camera menu as well.
Troubleshooting
Logs
Having issues getting the camera to connect? Contact support and provide the logs:
http://<camera ip>/home/setup/opensdk/apps/Camcloud/Camcloud.log
Live View not working? Unable to add camera to the cloud?
Make sure to check these:
Correct time zone
Updated firmware and Open Platform SDK installed
Verify the app is running
Verify DNS is setup properly
Are you using HTTPS with a public certificate? Change it to HTTP
If using port forwarding, verify the required ports are open in the outgoing direction
No Motion Events after adding camera to the cloud?
Reboot the camera and stop/start the app
Unable to install/upload Open Platform SDK, "Failed to upload" error?
Make sure the .cap file is saved to your local machine connected to the network which the camera is connected to.
Failed to upload
Are you trying to install the Open Platform SDK remotely? It needs to be a local setup.