What is Secure Tunnel Manager? Secure Tunnel Manager is a lightweight software package that allows you to create a secure tunnel to our servers instead of port-forwarding. This software enables you to add open standard compatible cameras and Generic cameras without the need for traditional port-forwarding.
Secure Tunnel Manager can be used to tunnel cameras directly to the cloud but can also be used to have a local video wall so you can monitor your cameras on site with a monitor or TV.
Secure Tunnel Manager can be downloaded from the link below. It is a software package that can be installed on a Windows, Linux or Arm based devices. It will need to run 24/7, so ensure the system being used is stable and meets minimum specifications.
Minimum Hardware Requirements
Hardware | Minimum (up to 20 cameras) | Minimum (up to 50 cameras) |
CPU | 4 cores | 8 cores |
RAM | 4 GB | 8 GB |
 Windows Installation Steps
We recommend Windows 10 at a minimum.
Download the Secure Tunnel Manager Windows installer from here.
Run the installer and follow the setup prompts.
⚠️ If you see a Microsoft Defender SmartScreen warning (“Windows protected your PC”), click More info, then Run anyway to proceed.Upon installation completion, start the service when prompted.
You can find Secure Tunnel Manager running in the system tray (bottom-right corner of your taskbar).
Click the tray icon to open the Secure Tunnel Manager web page.
From there you can proceed with adding Open Standards method or Generic RTSP configuration (see How to Use Secure Tunnel Manager).
STM is not started as a service on Windows (only on Linux). It's a startup app that will remain running as long as the computer is logged in. If the computer reboots you need to login to start STM again. Make sure to setup an auto login for that machine.
Windows Startup Script
Since Windows is a startup app it's important to make sure to keep your computer always running, auto logged in and avoid updates.
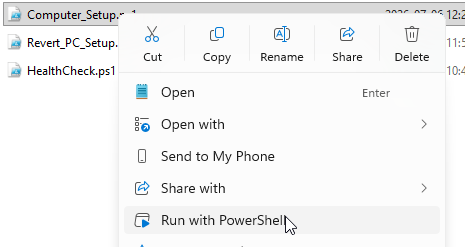
This PowerShell script allows you to setup the PC. Right click on PC_Setup.ps1 and select Run with PowerShell.
You cannot use "Windows Hello" (pin, fingerprint, etc.) with this script. You need to use the username and password (if you have one setup).
Download the script here.
The package also includes a script to revert those changes and a health check script to verify what settings are currently in place.
🐧 Linux Installation
This section outlines how to install Secure Tunnel Manager on Ubuntu 24.04.x LTS (or other .deb-based distros).
Supported CPU Architectures
x86_64
arm64
📦 Installation
Download the Linux installer from here - Choose the package appropriate to your architecture.
Install the package:
JavaScriptsudo apt install <HOME>/Downloads/secureTunnelManager_xxx.deb
🚀 Launching Secure Tunnel Manager
Via Terminal:
Run the following command to open the browser UI:
bashsecureTunnelManager✅ How to Check If Secure Tunnel Manager Is Running
Check the systemd service status:
bashsudo service secureTunnelManager statusExample Output (Service Running):
bash● secureTunnelManager.service - Secure Tunnel Manager Service
Loaded: loaded (/etc/systemd/system/secureTunnelManager.service; enabled; vendor preset: enabled)
Active: active (running) since Mon 2025-04-28 10:15:42 UTC; 1h 30min ago
Main PID: 2345 (secureTunnelManager)
Tasks: 5 (limit: 19000)
Memory: 50.0M
CPU: 10min 25.789s
CGroup: /system.slice/secureTunnelManager.service
        └─2345 /opt/securetunnelmanager/secureTunnelManager
Example Output (Service Failed):
bash● secureTunnelManager.service - Secure Tunnel Manager Service
Loaded: loaded (/etc/systemd/system/secureTunnelManager.service; enabled; vendor preset: enabled)
Active: failed (Result: exit-code) since Mon 2025-04-28 12:45:10 UTC; 1min 5s ago
Process: 6789 ExecStart=/opt/securetunnelmanager/secureTunnelManager (code=exited, status=1/FAILURE)
Main PID: 6789 (code=exited, status=1/FAILURE)
⏹️ How to Stop Secure Tunnel Manager Service
Stop the service with:
bashsudo service secureTunnelManager stopVerify it has stopped:
bashsudo service secureTunnelManager status📋 How to Use Secure Tunnel Manager
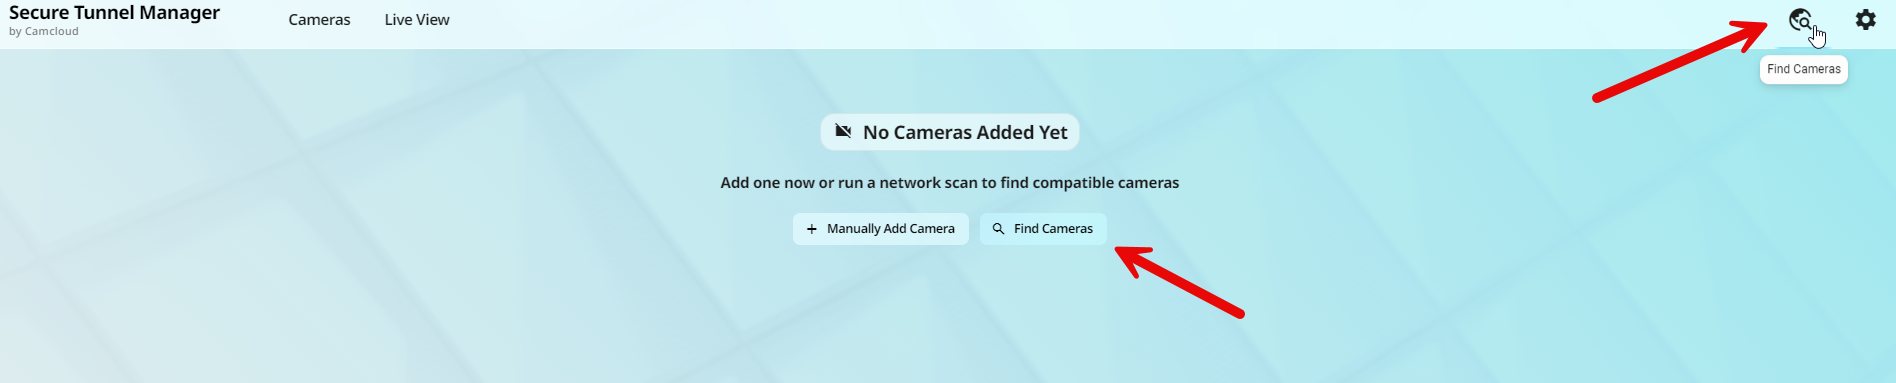
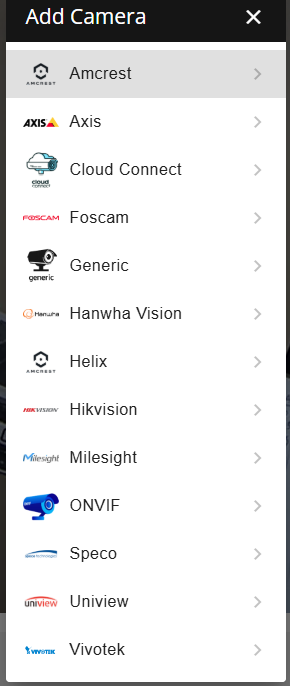
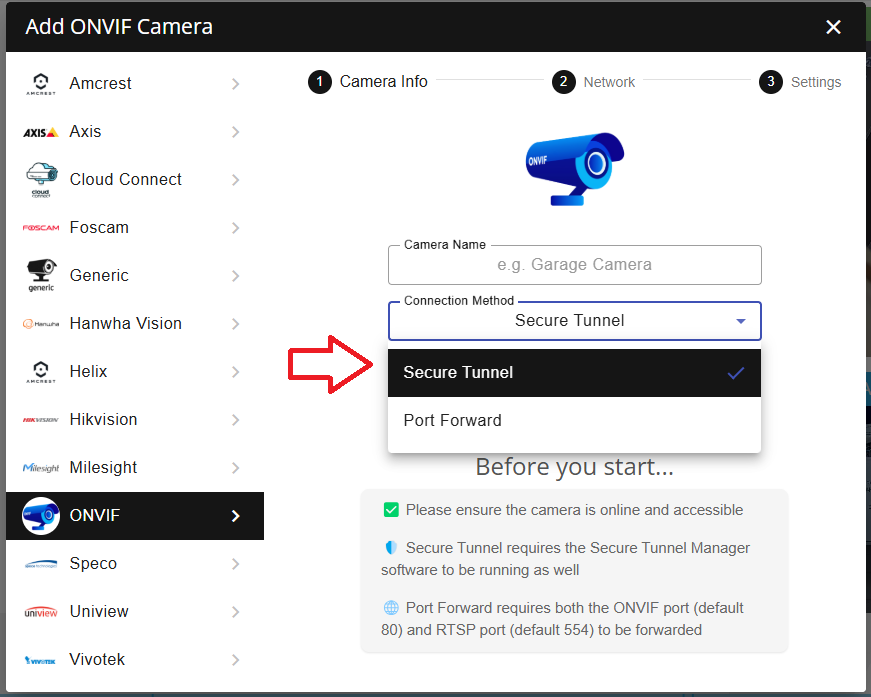
First, find the camera and create a tunnel. Use Find Cameras if your camera supports open standards; otherwise click the + Manually Add Camera button on the Cameras page:
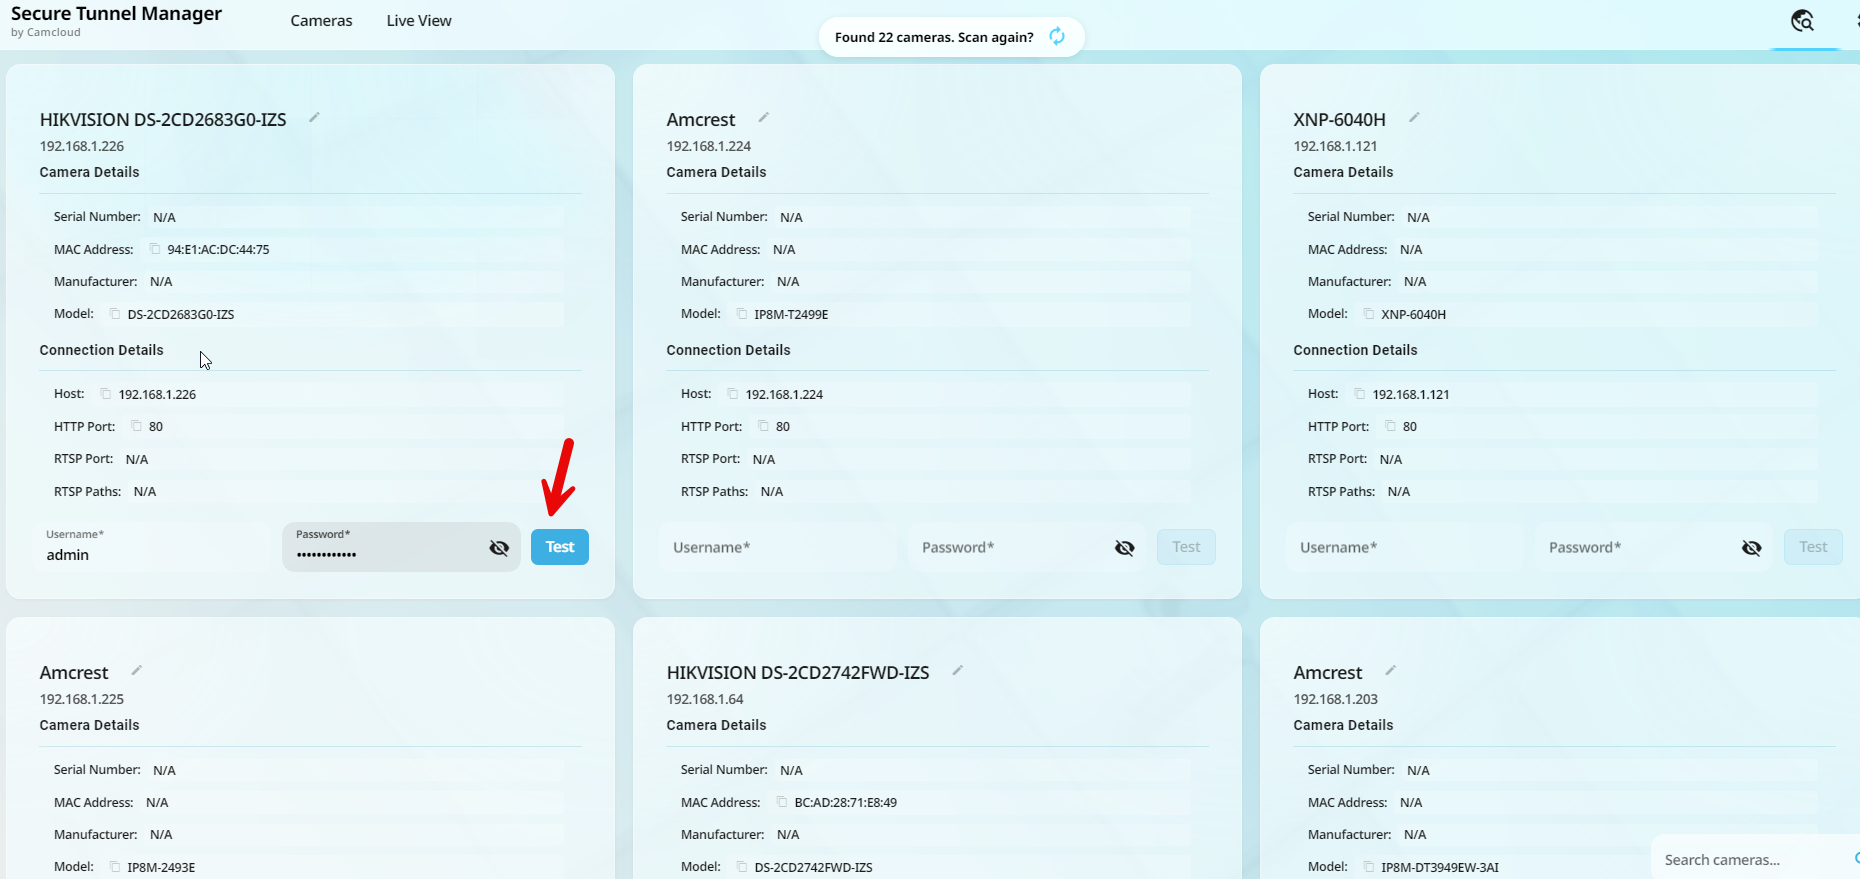
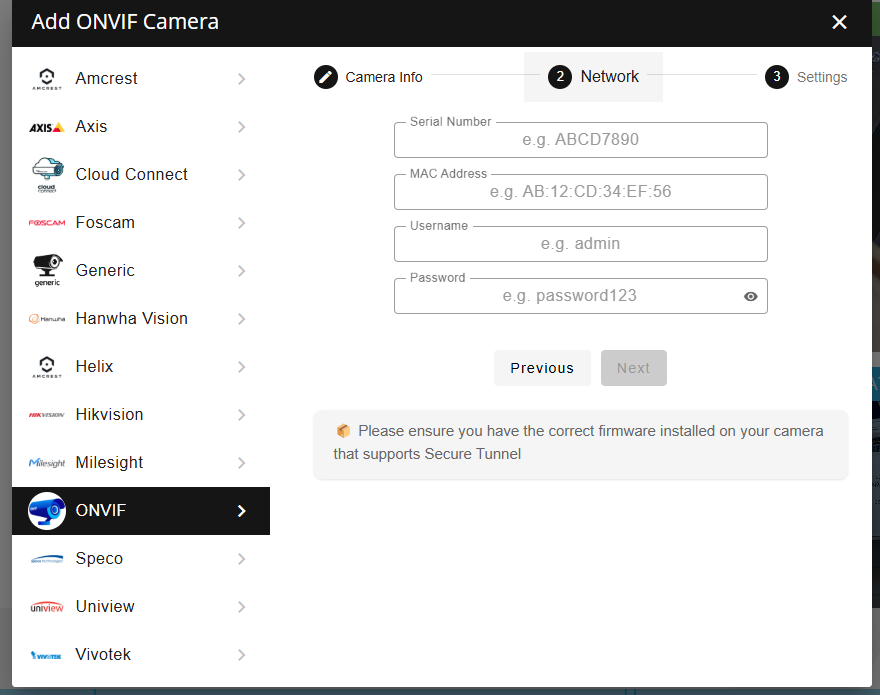
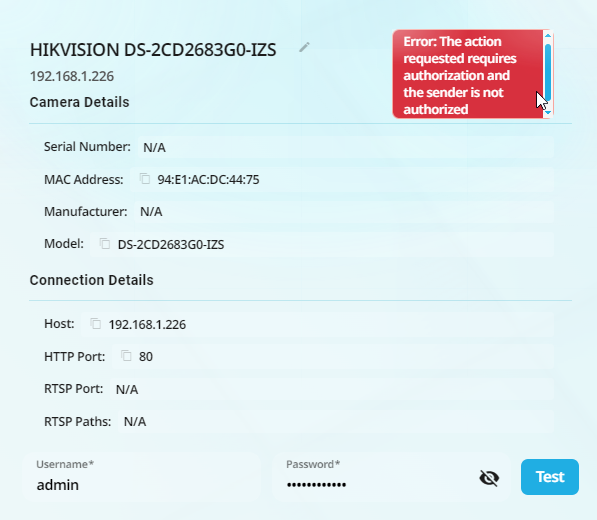
Select the camera, enter credentials, and click Test.
If the camera properly authenticates, a preview image appears, click Add Camera
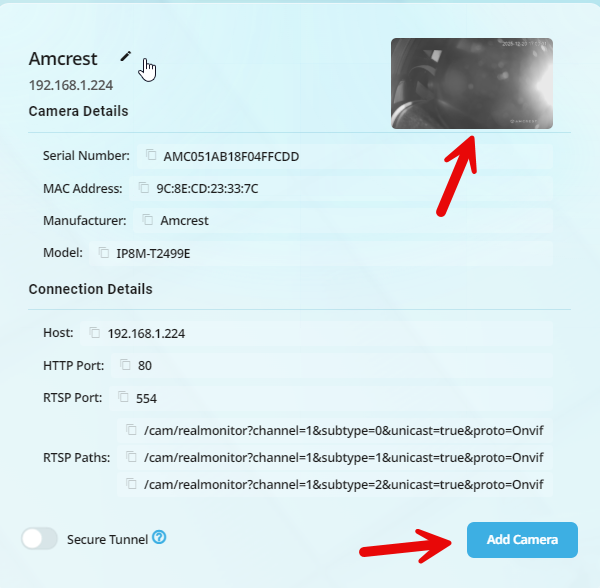
Camera is not added and available on the Cameras page. Here it will provide the Serial Number and MAC Address. Take note, you'll need that for the next step. Now you can click Secure Tunnel so the camera connects to the cloud.
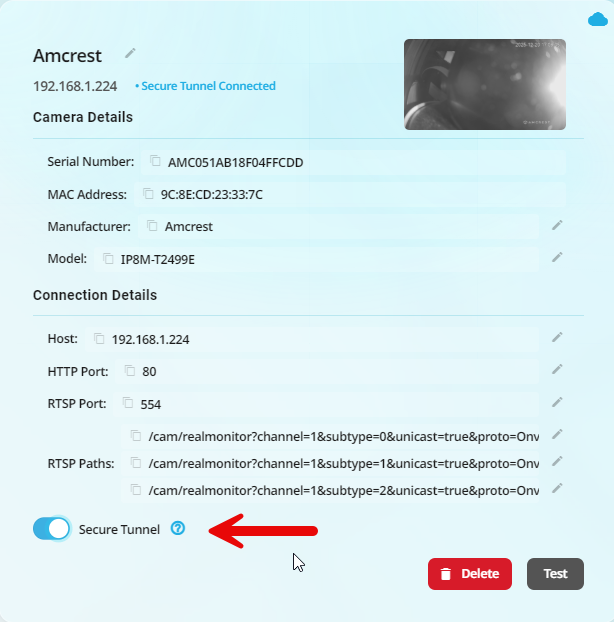
The tunnel is now ready. Add the camera to Camcloud using either the Open Standard method or the Generic RTSP method, depending on your device configuration.
Enter the Serial and MAC of the camera that you added with STM above including camera credentials, then click Next:
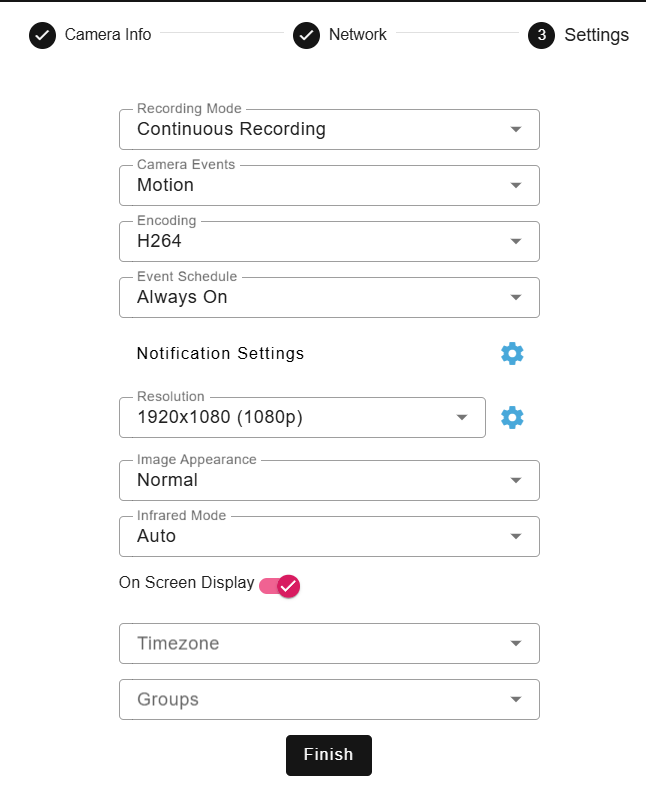
Configure recording settings, resolution, and bitrate (if using the Open Standards method), then click Finish. Note: For cameras configured using Generic RTSP or the Open Standards method you still need to configure motion events separately. See “Configuring Events” in the guide.
That's it. You've got the camera setup for the cloud and it's recording 24/7.
Live View (Video Wall)
You can also use Secure Tunnel Manager to show you live views of all your cameras. Go to your Live View tab:
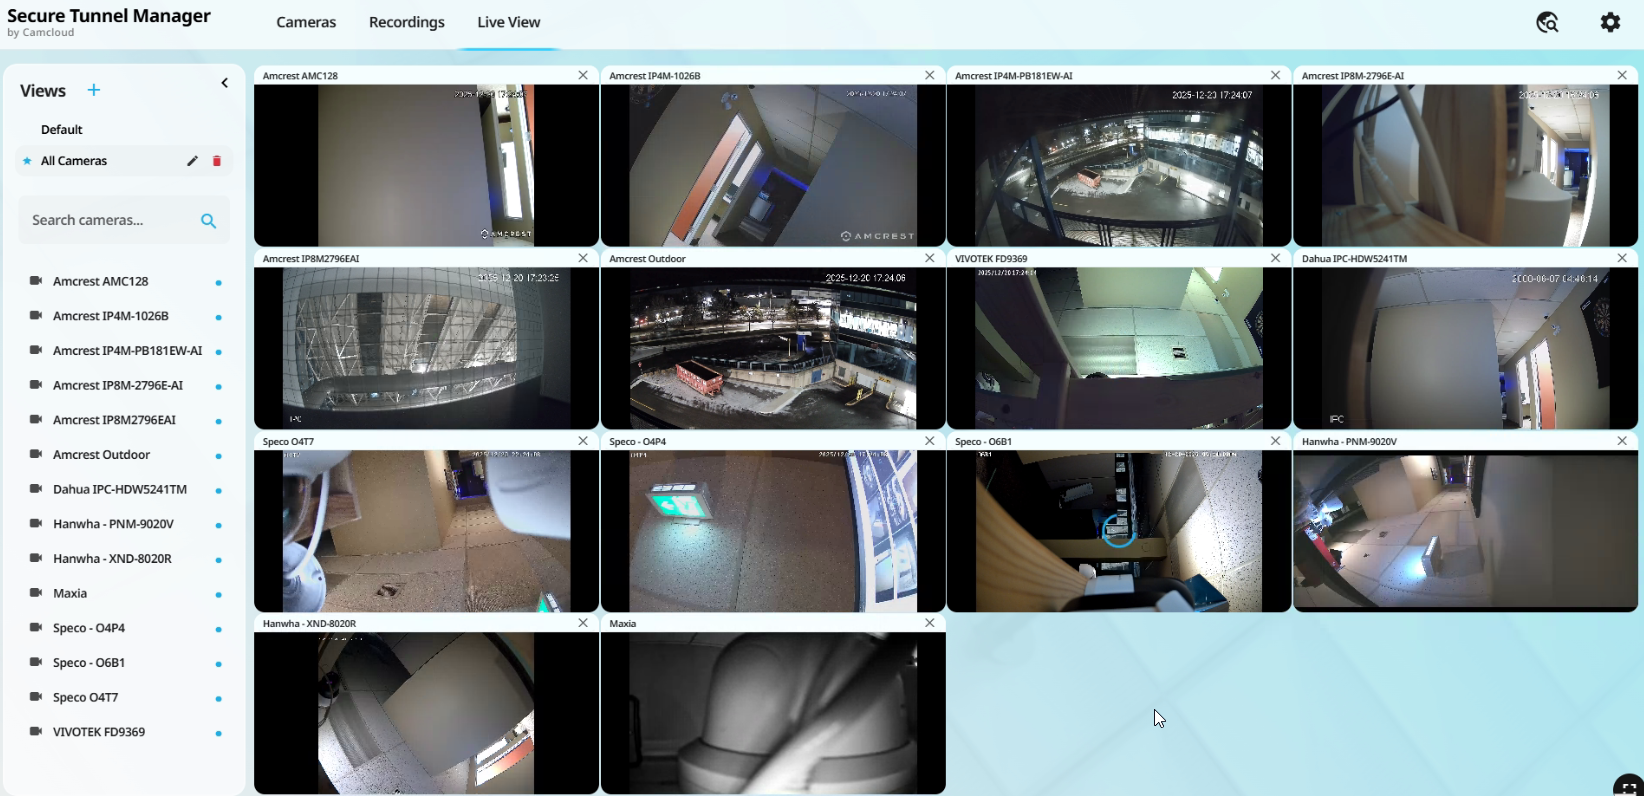
By default you will have a "Default" view. You can simply double click or drag and drop cameras into your view. Move or resize windows as needed.
You can also create new "Views" to save for your device.
Direct Connect
Need to manage your Secure Tunnel Manager instance remotely? You can do that too!
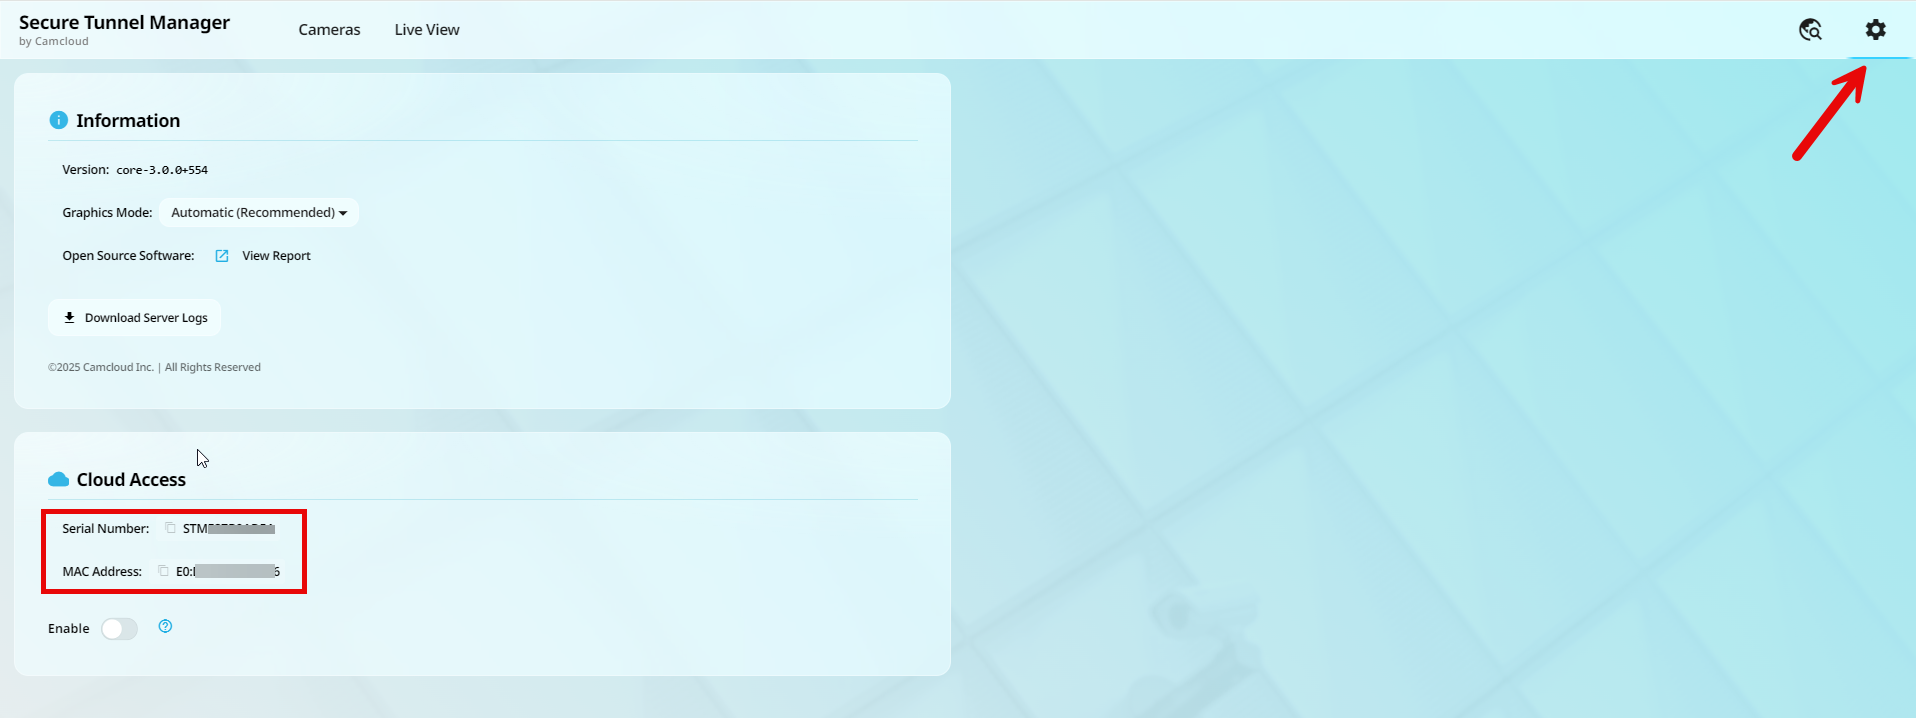
Add your Secure Tunnel Manager instance to your cloud account. First go to the Settings page and take note of your Serial Number and MAC Address for your Secure Tunnel Manager instance:
Log into your Camcloud user portal and go to the main settings menu. Here you can add/edit/delete your Secure Tunnel Manager instances:
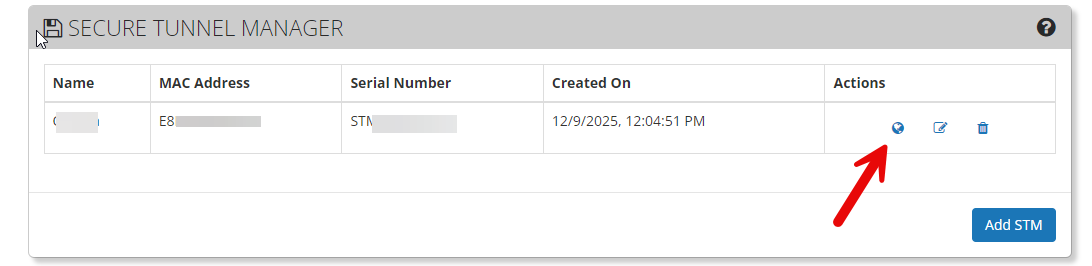
Simply click the "Device Access" icon and you will tunnel right into your very own Secure Tunnel Manager instance from anywhere in the world!
Troubleshooting
Test shows "Live View" failure.
Live streaming is malfunctioning The Live streaming server is unreachable
This means that the RTSP path may not be valid. As an example Hanwha cameras provide an RTSP path by profiles. The first profile is usually the MJPEG path. That's an invalid path to stream on a browser. Typically for this case you just need to delete the first RTSP path in your list.
Sender is not authorized
This type of error message appears when the camera doesn't have proper open standards support. You'll need to add it manually.
Not connecting to the cloud
Grab the logs here and send to support. You can find those under the setting cog.
