

Axis O3C Setup
By far the easiest way to setup your Axis camera is with the One-click cloud connection (O3C) option (older models call this AVHS). If you don't have O3C as an option then refer to the other setup procedures.
Using One-click cloud connection allows you to avoid any port forwarding and it's completely automated. Always the preferred choice.
Before you start
Camera must have a working internet connection. You can check this by going to the network tab in windows and looking for a device such as “Axis <model number> - <MAC Address> or using the Axis IP Utility.
Take note of your MAC address which you'll find on the camera. Also find your OAK. This typically comes on a separate piece of paper in the camera box. If you can't find your OAK see this article.
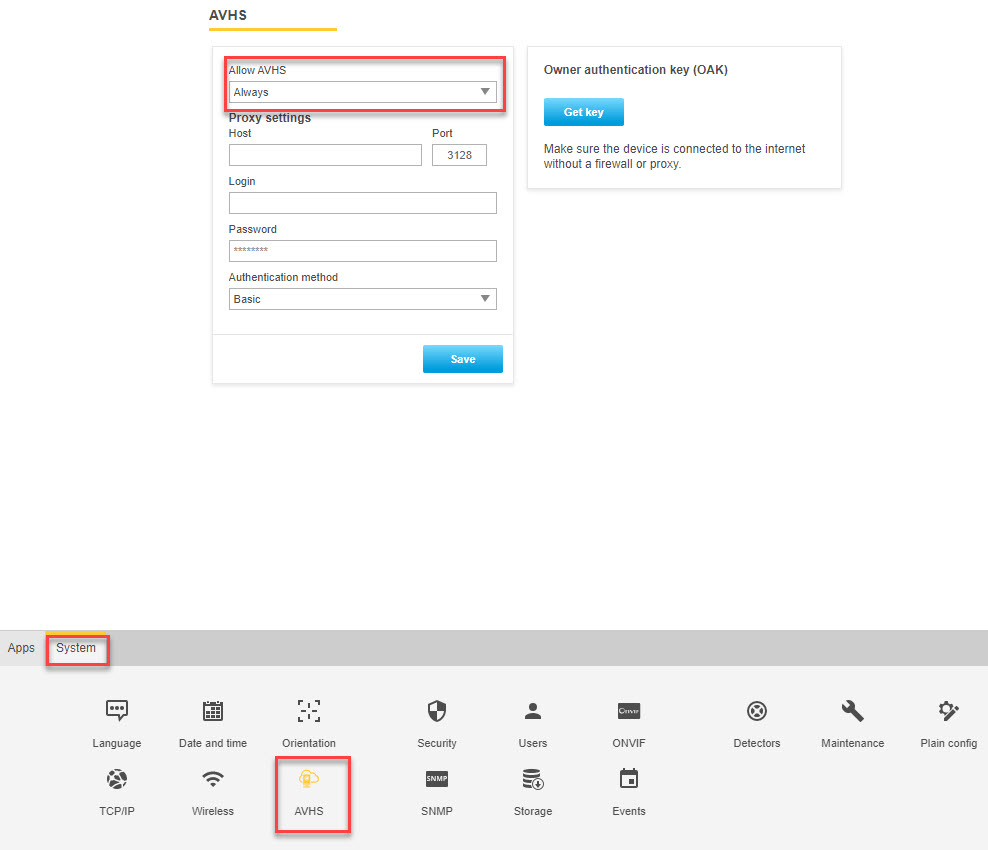
You must enable AVHS (or One-click cloud connection) either in the Network menu (firmware 11+) or System tab (previous firmware) or TCP/IP settings (old firmware) to “Always on”. Make sure to reboot after applying this change.
Add the camera
Add camera of type “Axis”, give it a name.
Select the connection method "O3C".
Put in the MAC address/Serial Number in the S/N box.
Put in the OAK. Click Next. Note: Using MAC and OAK only is the preferred method. Password is almost never needed and only for very old firmware.
Click Next. If everything worked and you have no error, you should be on the settings screen to customize any settings. Finally click finish to configure their camera and start using the cloud
Axis Object Analytics Setup
Axis includes the ability to add AI-based analytics such as:
Person/Vehicle detection
Line crossing
Loitering
and many more
This comes by default on any compatible Axis camera with firmware 10.2 or later. It's highly recommend to use over just plain motion detection.
Step 1: Setup your Object Analytics
Navigate to Apps in the camera menu and open AXIS Object Analytics
Setup any scenario you choose
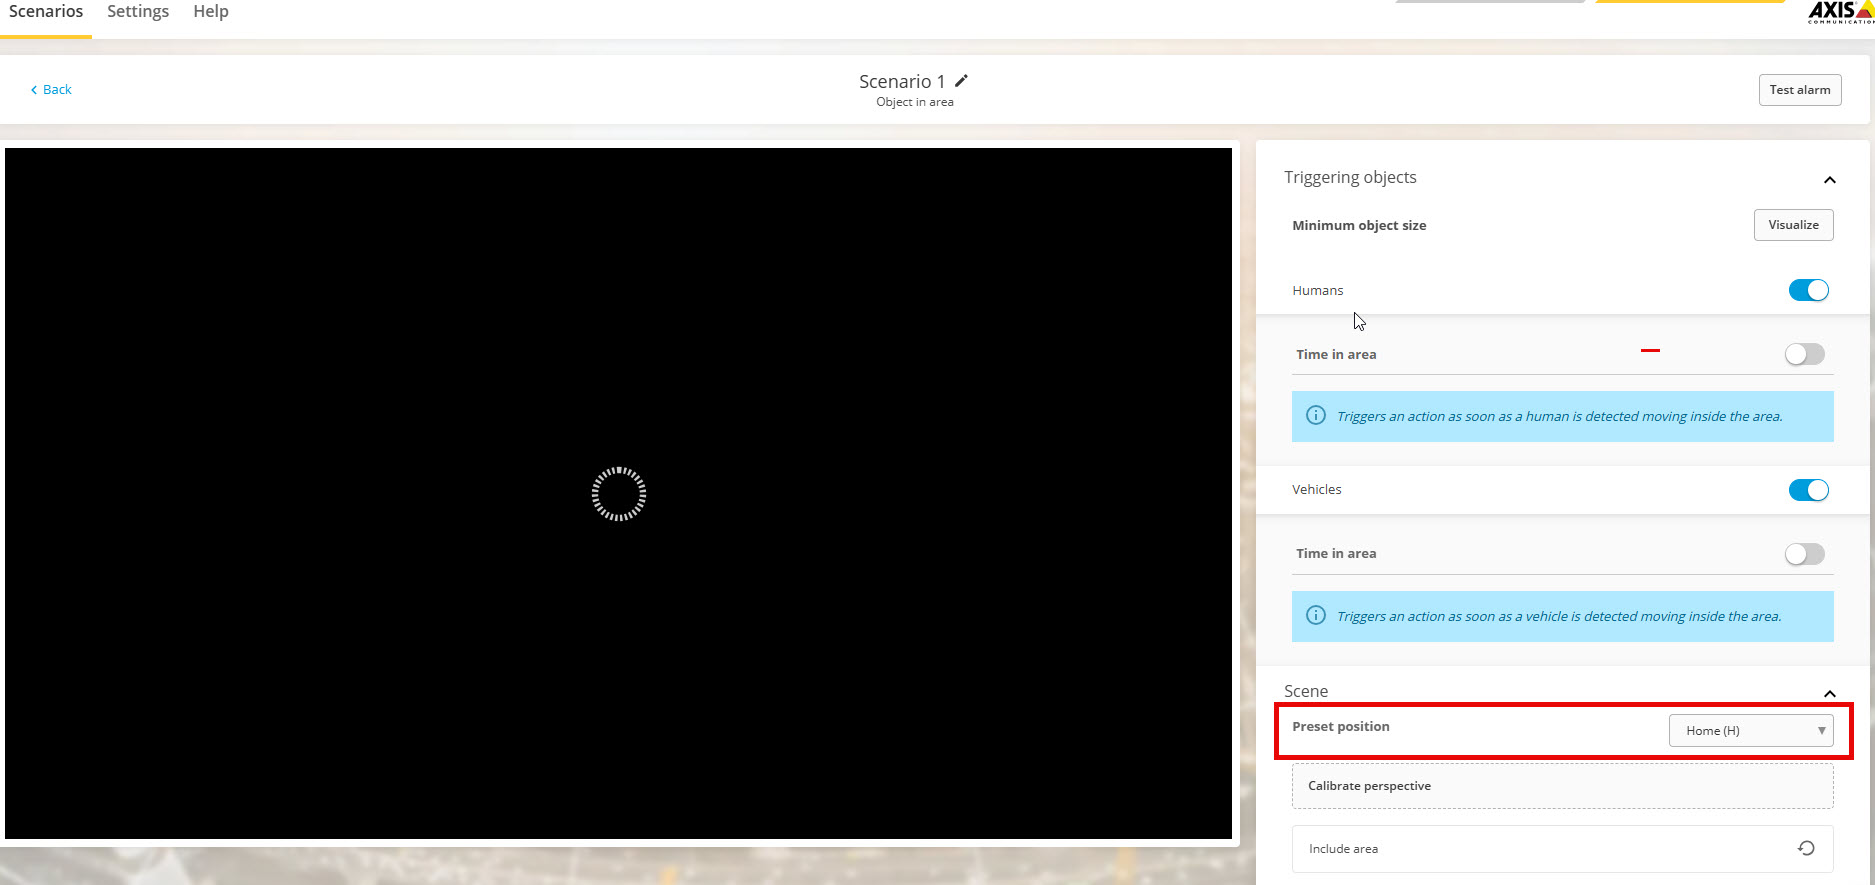
Note: Keep in mind that you need to setup areas in most cases, time in area (or leave it as default) and potentially the "Scene" for PTZ cameras. In the example below an area is created (not shown) along with the default time in area. Human and Vehicle detection was selected along with the PTZ preset position of Home.
Step 2: Adding a Recipient
Navigate to System > Events in the camera’s web interface.
Add a recipient in the Recipients tab and choose HTTPS for the recipient Type
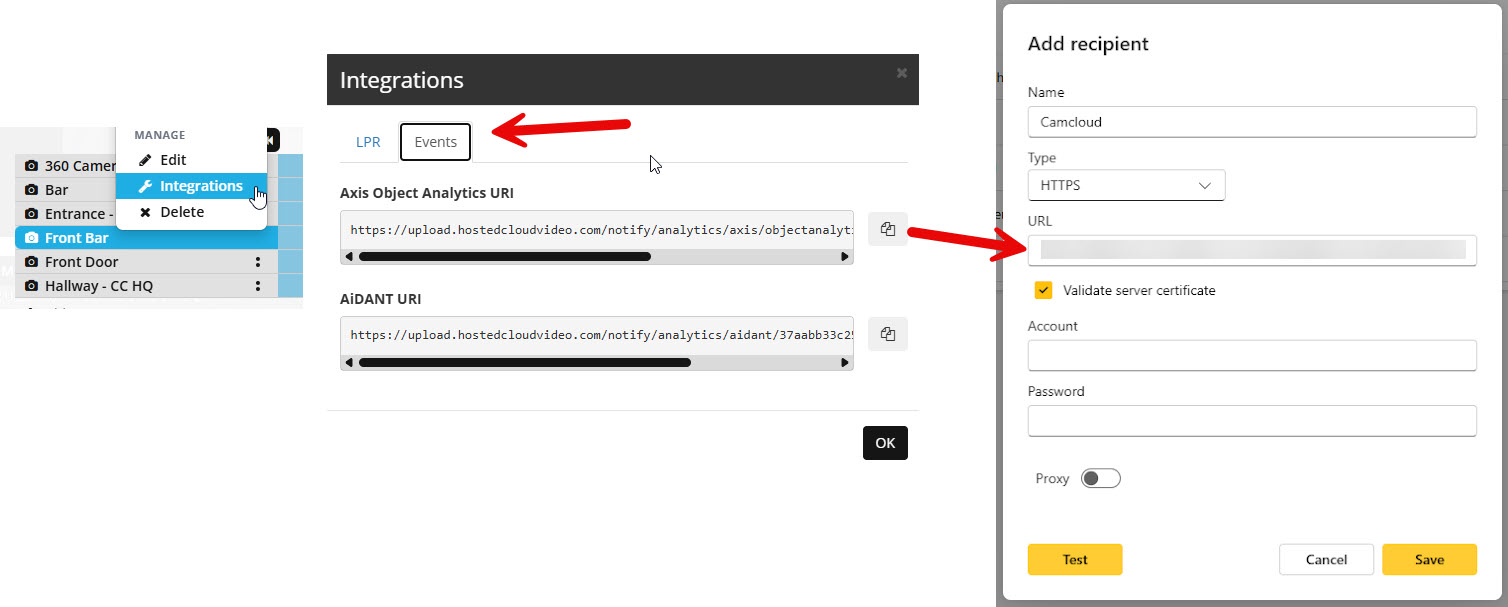
Go to integrations for your Axis camera in your Camcloud Timeline
Copy the Axis Object Analytics URI and paste it in the recipient setup
Save the recipient
Step 3: Adding a Rule
Navigate to System > Events in the camera’s web interface
Add a name for the rule and under Condition choose your Application which is the Object Analytics: Scenario x" (where x is your scenario you created. Alternatively choose "Any Scenario")
Under Action choose "Send notifications through HTTPS"
Choose your recipient that you created above.
IMPORTANT: Add your Query string suffix. Example: scenario=ObjectInArea - see details below on different scenarios. Without the query string, you will get no results.
Choose Method: POST and save your rule.
Adding Scenarios
Axis calls "Scenarios" to represent different types of analytics. You need to create a query string that includes this scenario and object type.
The Query string suffix is the what determines the analytics that appear in the Event Explorer. It seems complex but quite easy once you know the options. See below for query string options.
Query string
The query string provides the context on different scenarios that you can use and show up in the Event Explorer.
Example: Write “scenario=ObjectInArea” making sure the scenario is spelled correctly. The different types of Scenarios you can use are:
ObjectInArea
LineCrossing
TimeInArea
CrosslineCounting
OccupancyInArea
TailgatingDetection
PPEMonitoring
MotionInArea
MotionLineCrossing
Now you can select the Object Type (using the exact term: objectType) which can be any of these of object classified scenarios:
Any - special case for detecting all
Human
Vehicle - special case to detect Bike, Car, Bus and Truck
Bike
Car
Bus
Truck
Other
Object type for PPE:
PPE
Object type for motion-based scenarios
Motion
Add a & symbol to add anything you want to the data and have it shown in the Event Explorer.
Example query string:
scenario=TimeInArea&objectType=Human&Location=Entry-Door&Time=100
This is loitering example where I set the Scenario for a person and added a couple of other random data points of the location of the camera (notice you can't use spaces) and the time I set for the loitering. Location and Time are just informational but you can add anything you want.
Troubleshooting
Provided OAK and S/N but it says my camera is not connected and to check my connection
Make sure the camera has internet access and has been one click activated properly or has O3C set to always on.
Make sure the camera is running the latest firmware. You can only add a camera with O3C if it has firmware 5.5 or greater.
Check your DNS. Often Axis cameras have problems with the defaults. Try using Google DNS instead: 8.8.8.8 and 8.8.4.4.
Factory restore the camera. This will clear everything other than the network settings.
If all else fails, factory reset the camera. You'll have to setup the camera network settings again.
Still having issues? It could be the firewall blocking outgoing ports.
Type in this: <local camera ip>/admin/connection_list.shtml.
If you only see local IPs then the camera is not able to connect to anything outside the network. Alternatively you can look at the server report under "network connections" to see the connection list: <local camera ip>/axis-cgi/serverreport.cgi
OAK and S/N are wrong
Make sure you input the S/N and OAK exactly as shown on the Axis card supplied with your camera.
Password is wrong
You shouldn't be using a password but if you must make sure you input the root user’s password. Also, the default “pass” will not work to register a camera under any circumstance.
Setting up a different view (multi-lens camera)
If you have a fisheye or multi-sensor camera you may not want the default view. There is a way to change this especially when you want a dual or quad view.
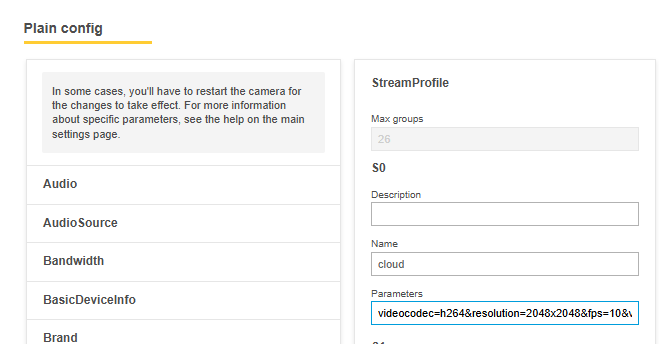
The process involves changing the "Plain config" on the Axis camera adding &camera=quad to the the url (or camera=4).
Go to Plain config -> StreamProfile
Edit the Parameters field for the "cloud" and add one of these options (this depends on the camera model and number of lenses):
&camera=3
&camera=4 or it could be: &camera=quad
&camera=5
Keep in mind the resolution has to match the quad view. Take a look at this P3719-PLE camera example. It only allows 1440p and 720p. So make sure you match the resolution when you setup the camera. In other words don't setup the camera to be on 1080p and expect to get a quad view.
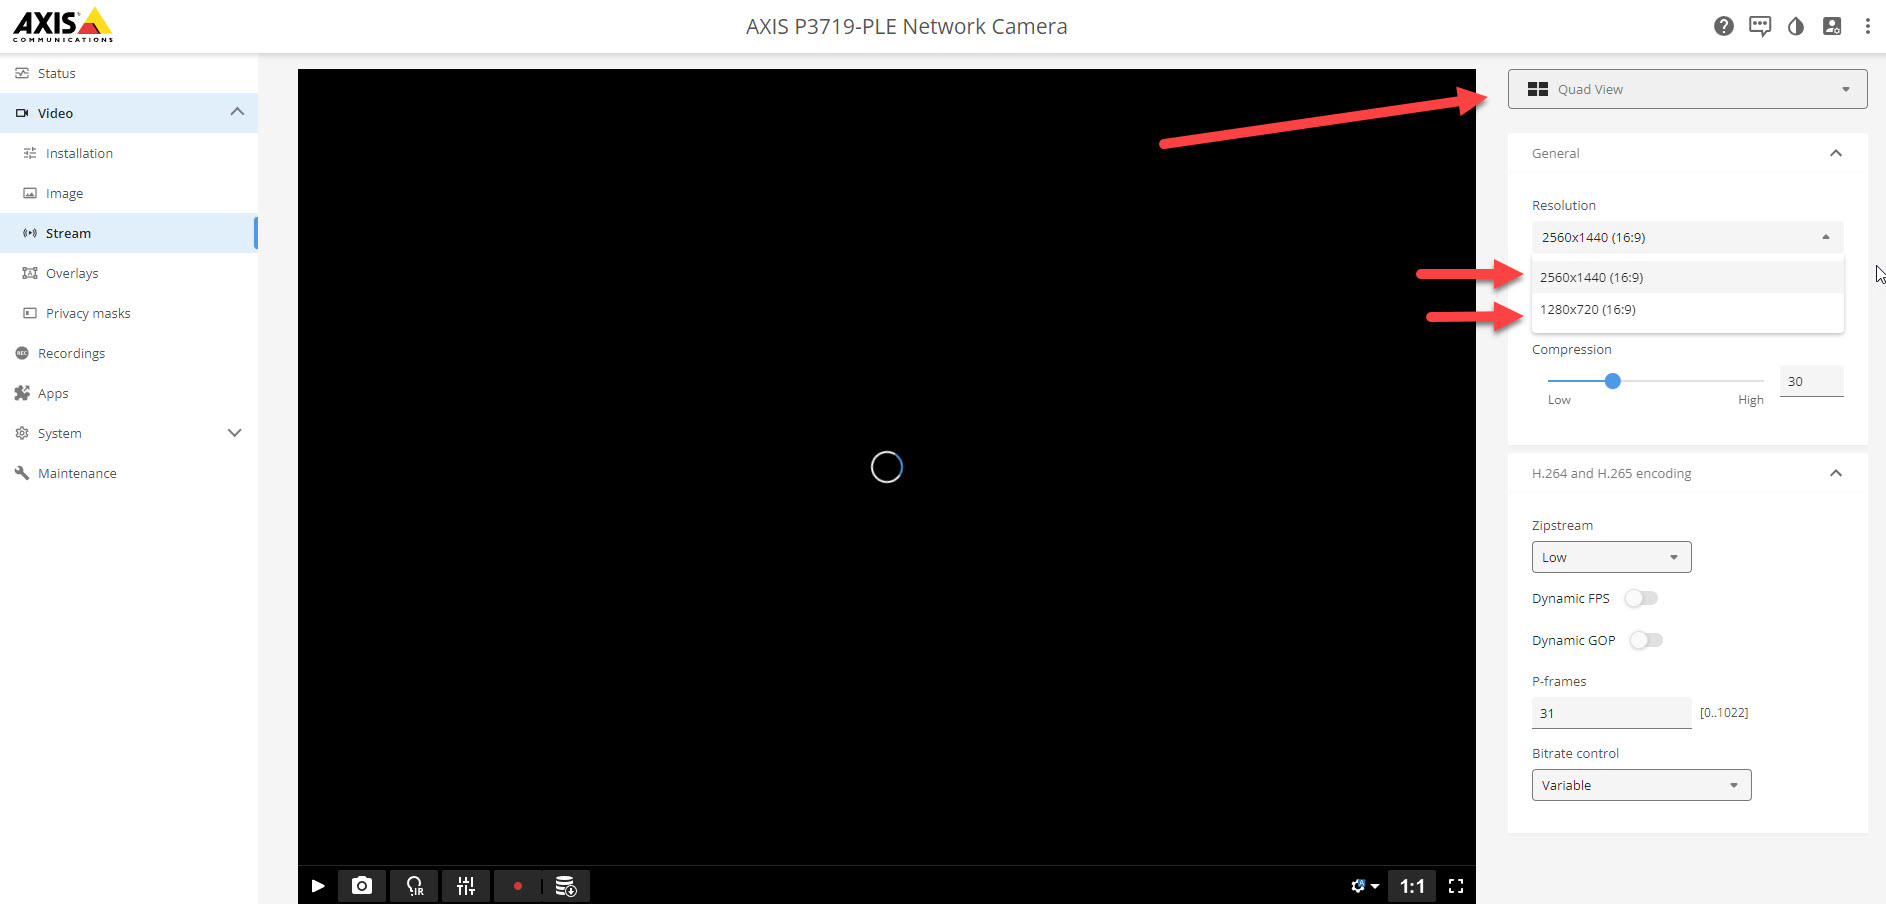
It can be tricky to identify the correct resolution along with the correct view. Contact support, we can help!
Resolution is empty and won't allow me to select anything
When adding your Axis camera and the resolution field is empty that means you must use an admin user such as root to be able to add the camera.
Axis Auto Setup (with port forwarding)
If you don't have O3C available then you can still setup your camera.
This procedure requires port forwarding certain ports to make it externally accessible.
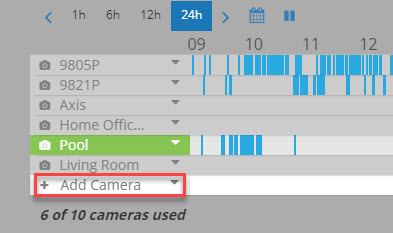
1. Once you're logged into the site you can click "Add Camera". This will launch the Add Camera Wizard.
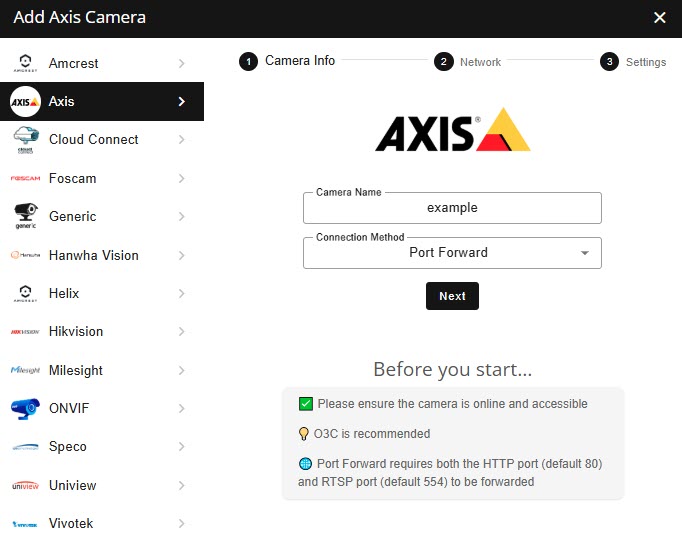
2. Pick "Axis". Change the connection method to "Port Forward", give the camera a name and click Next
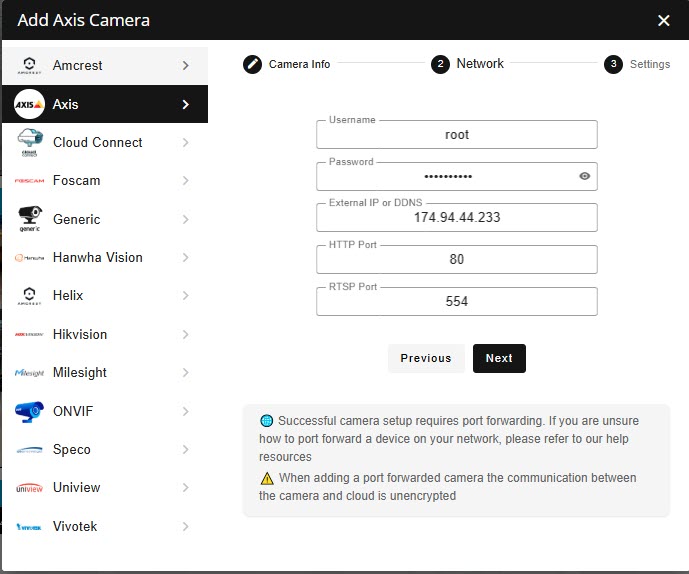
3. Add in your camera's username, password, IP address, HTTP and RTSP ports. This means both your RTSP and HTTP ports need be forwarded on your router. Once you have an Axis camera on your network, you can find the IP address.
4. Click on Next. Settings to change quality and other features are here. You can leave the defaults for now as you can easily change that later. Click on "Finish".
Whenever there's motion activity, your video recordings will be saved and stored in the cloud which allows you to access it from anywhere, including your Android or iOS device.
Axis manual setup - Old cameras only
If you have an Axis camera that is ancient you can still manually add the camera. However you'll select the camera type as "Generic".
Below you'll find the procedure to setup events:
1. Create motion detection window
Typically found in the "Detectors" window or "Events" window
Click New and name it whatever you would like.
Drag the window to encompass the whole screen.
Leave other settings as is.
Click save
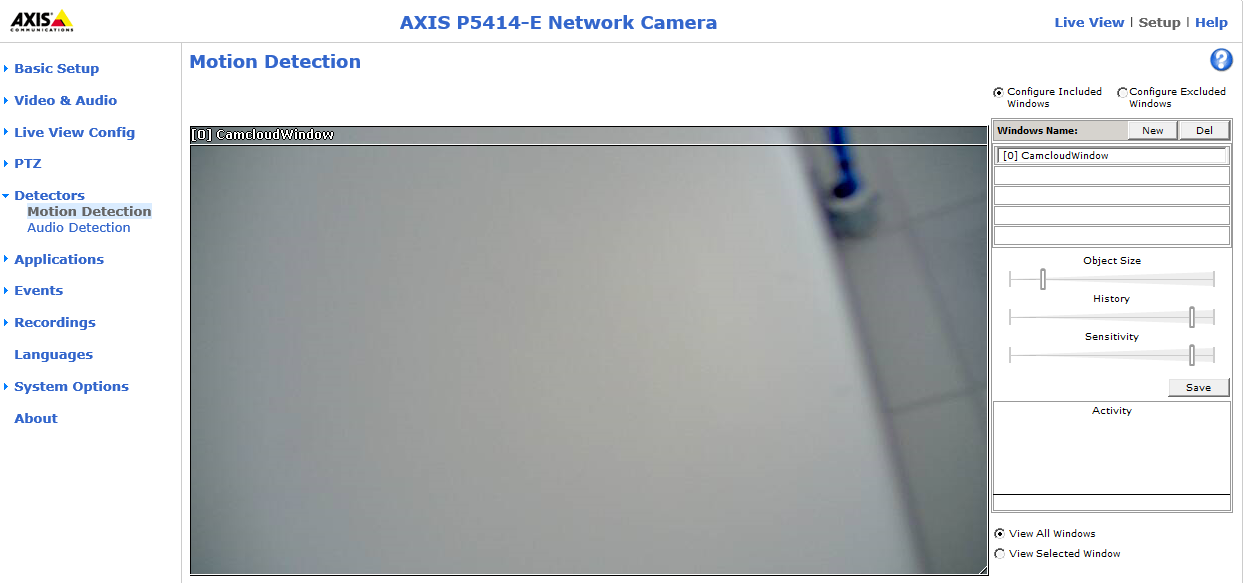
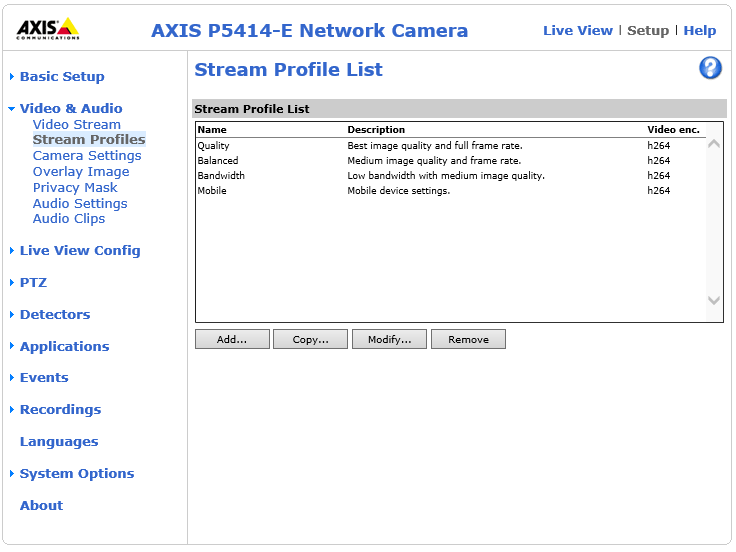
2. Create a Streaming Profile: (Optional)
Click Add, which will open a wizard
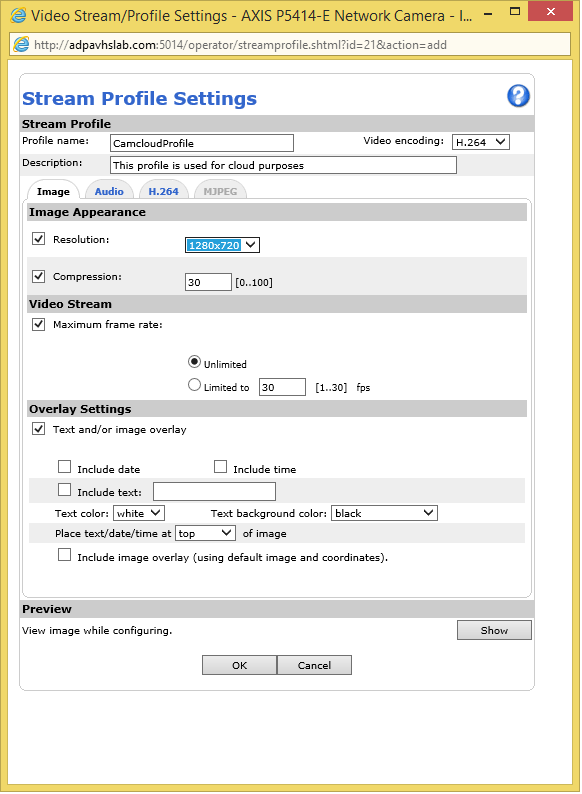
Give your profile any name you'd like, then switch video encoding to h264. Choose your resolution and any other settings you would like your captured clips to have.
Click "Ok".
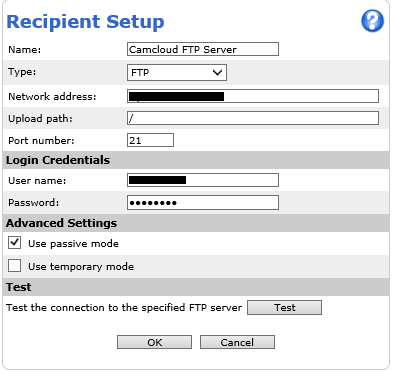
3. Create the FTP Recipient.
Click Add, which will open the wizard
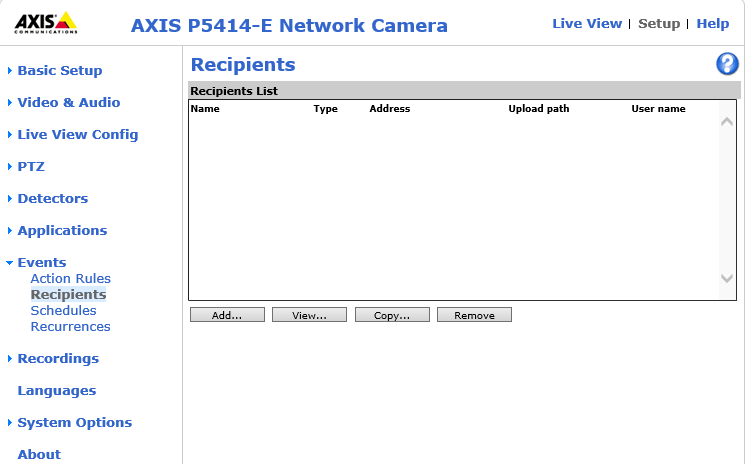
Give your recipient any name you'd like, such as My FTP Server
Type: FTP
Network address: provided when you created the camera
upload path : /
port number: 21
username and password: provided when you created the camera
Make sure to check "passive mode".
Click Ok.
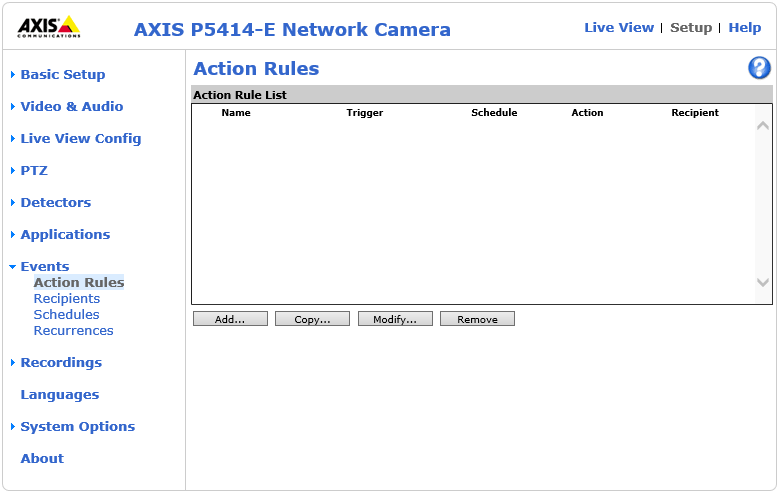
4. Create the Action Rule (if you want images)
Click Add, which will open a wizard.
Choose any name you'd like for your rule.
Make the trigger detectors, motion detection, and choose the window you created. Schedule should be always or your choice.
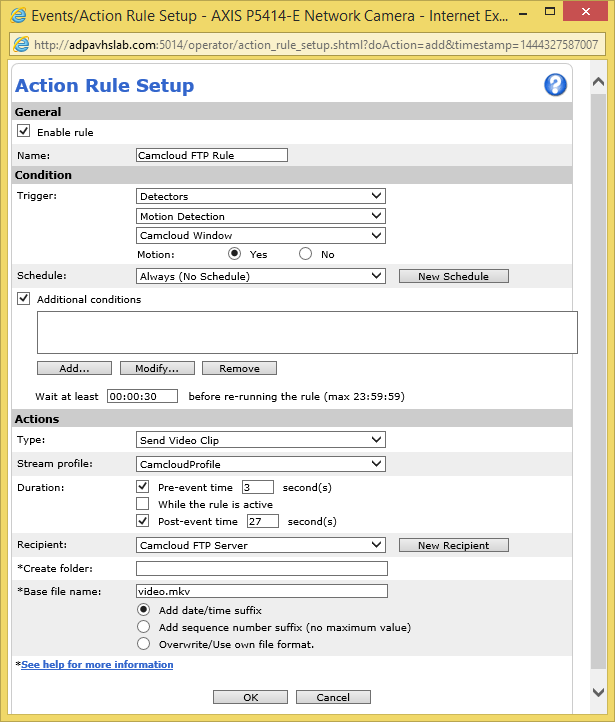
Under Actions: Type - "Send Video Clip" (recommended) or "Send Images" depending on what you'd like.
Under additional conditions, make the trigger interval (pre-trigger + post-trigger)
So in this example, it is 30 seconds, because 3 + 27
Recipient MUST be the ftp recipient you created in the previous step. All other FTP settings MUST remain their defaults.
Click Ok.