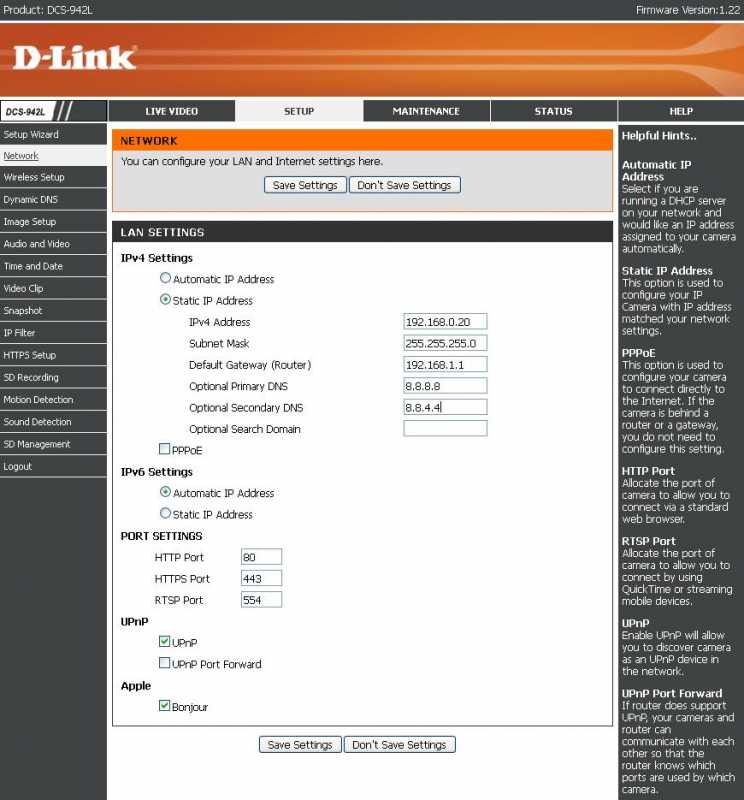
Setting up a static IP and DNS
It’s highly recommended you setup an internal static IP address for your camera (not to be confused with an external static IP you purchase from your ISP) with a properly configured DNS. This will ensure your camera always has the same IP address on your network should the router reboot for any reason.
Once you enable an internal static IP address you will also then need to provide some DNS information. The way to do this varies by camera, however if you go to the Network Settings, you should find the options similar to the D-Link example below.
IPv4 Address - this will be an internal address of your camera on your network
Subnet mask - typically you can leave this as the default 255.255.255.0
Default Gateway - this is the internal address of your router
DNS - you can use any public DNS, in this case we use 8.8.8.8 and 8.8.4.4 from Google
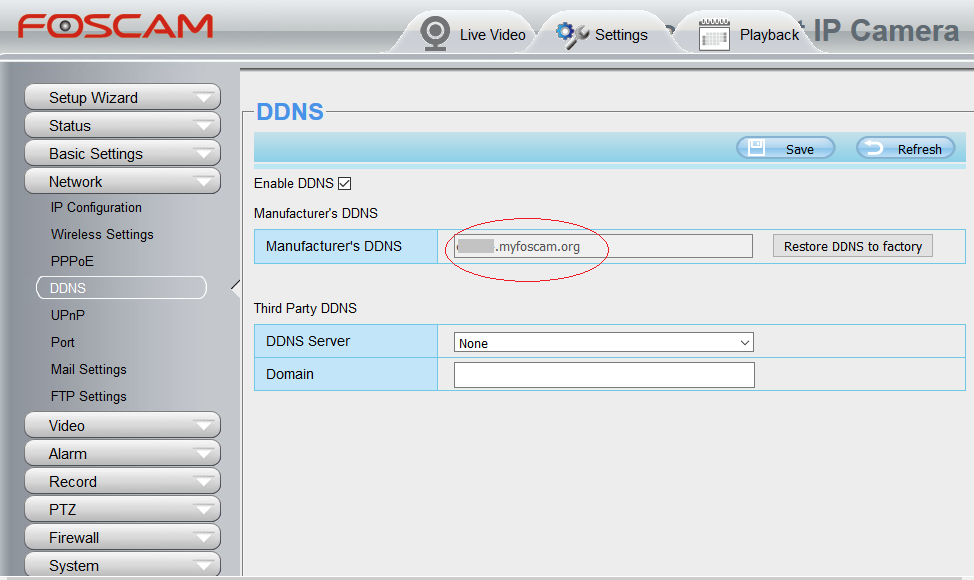
Setting up DDNS
Your Internet Service Provider might change your IP. If they do that your networking will not work. You can use 3rd party vendors such as DynDNS or you can just use the hostname provided by your camera. Some cameras today will give you a DDNS address you can use. Use that instead of your IP. Just enable it on the camera, here's an example with a Foscam camera:
Don't forget to use the hostname instead of the IP when you add that camera on Camcloud.