There are two ways to add a camera. One is with our Secure Tunnel or you can port forward. This article will cover the port forwarding option but see our Secure Tunnel Manager documentation if you need to add it without port forwarding.
Setup with Port Forwarding
Note: Before starting, make sure that you've port-forwarded your camera. If you're unsure how to start the port-forwarding process, take a look at our guide.
Step #1. Start the "Add Camera" Wizard
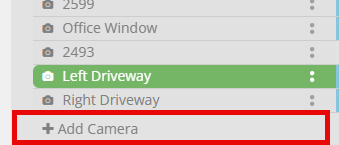
First, log in to account. You should be brought to your "Timeline" where your existing cameras are listed or go to the main menu to "Add Camera".
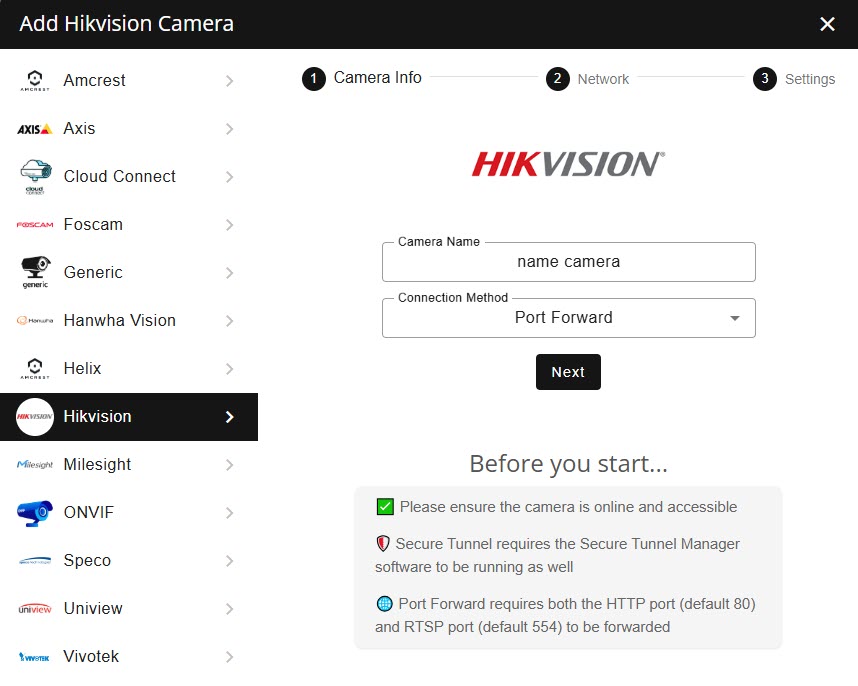
Click on "Add Camera", select "Hikvision", name your camera as desired, and choose "Port Forward".
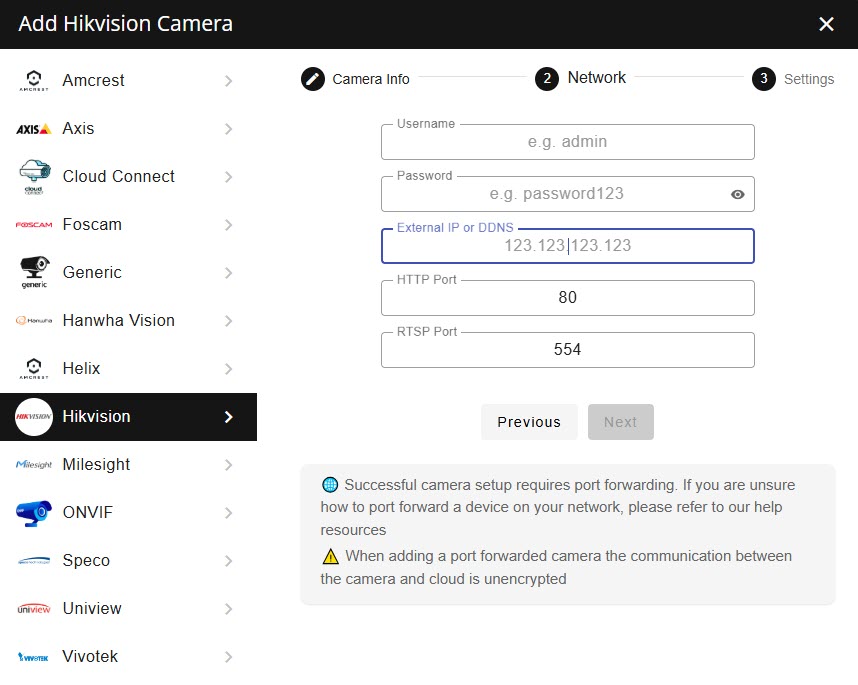
After clicking Next, enter your camera's username, password, IP address, RTSP port, and HTTP port. Ensure that your RTSP and HTTP ports are forwarded on your router. Make sure to use an "admin" user as other levels have no access to use the APIs.
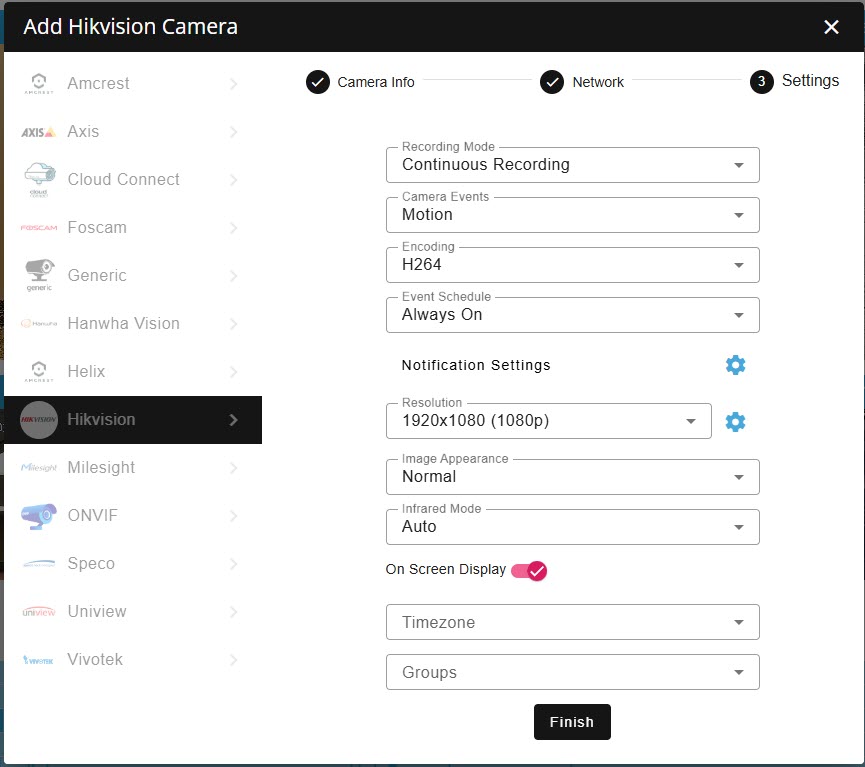
Click on Next. Here, you can change notification settings, encoding, resolution, and other details. When you're done, click "Finish".
The setup wizard will now run through its process and confirm that it completed the configuration successfully.
Troubleshooting
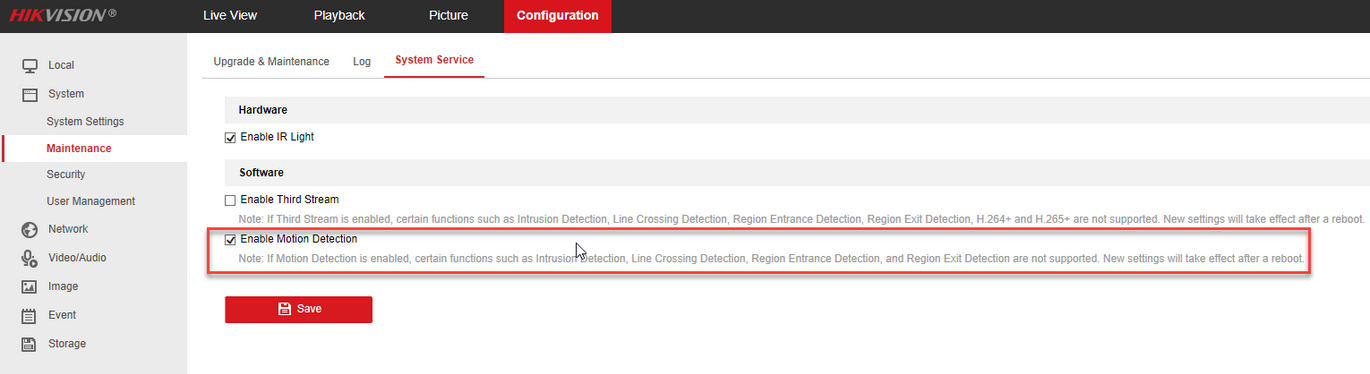
I'm not getting motion events
Newer cameras/firmware include an additional motion detection option. Ensure that the following is enabled:
Also, check out this guide.
No preview or image on my mobile device (Camera page)
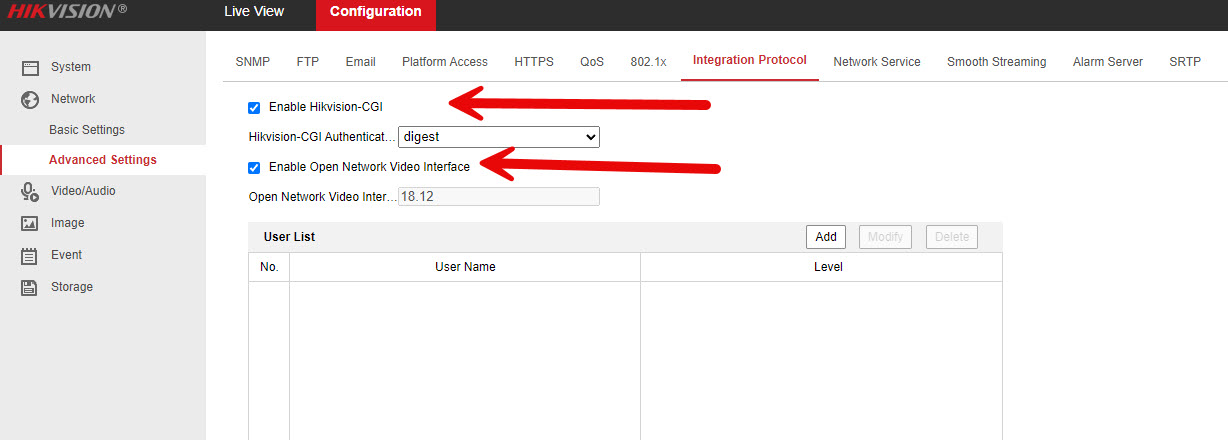
New firmware versions may disable the Hikvision CGI. Enable it by going to: Network > Advanced Settings > Integration Protocol.
Camera limit reached
Answer #1: This error may be misleading. Ensure you use an "admin" user when adding a camera, as the "operator" level typically lacks sufficient access.
Answer #2: This error might occur during the final step of adding the camera. It indicates that the process got stuck while writing the motion detection settings. Check the "Event" menu in the Hikvision interface. If it only shows Basic mode (with no Expert mode), the configuration may have failed.
Unable to change password or edit settings
If the camera has been factory reset or is in its default state, some models require that you enable Integration Protocols. Enable both:
- Enable Hikvision-CGI
- Enable Open Network Video Interface
I get images only with my Hikvision camera
If you decided to add your camera as a "Generic" type and added FTP for events. You won't get video. Hikvision models only send images on any event.