This article provides step-by-step instructions to configure your Milesight Plug & Play cameras, ensuring they are updated with the proper firmware, correctly configured for DNS and time settings, and successfully added to the Camcloud portal.
Step 1: Connect Camera and Activate
Connect your new Milesight camera to the network
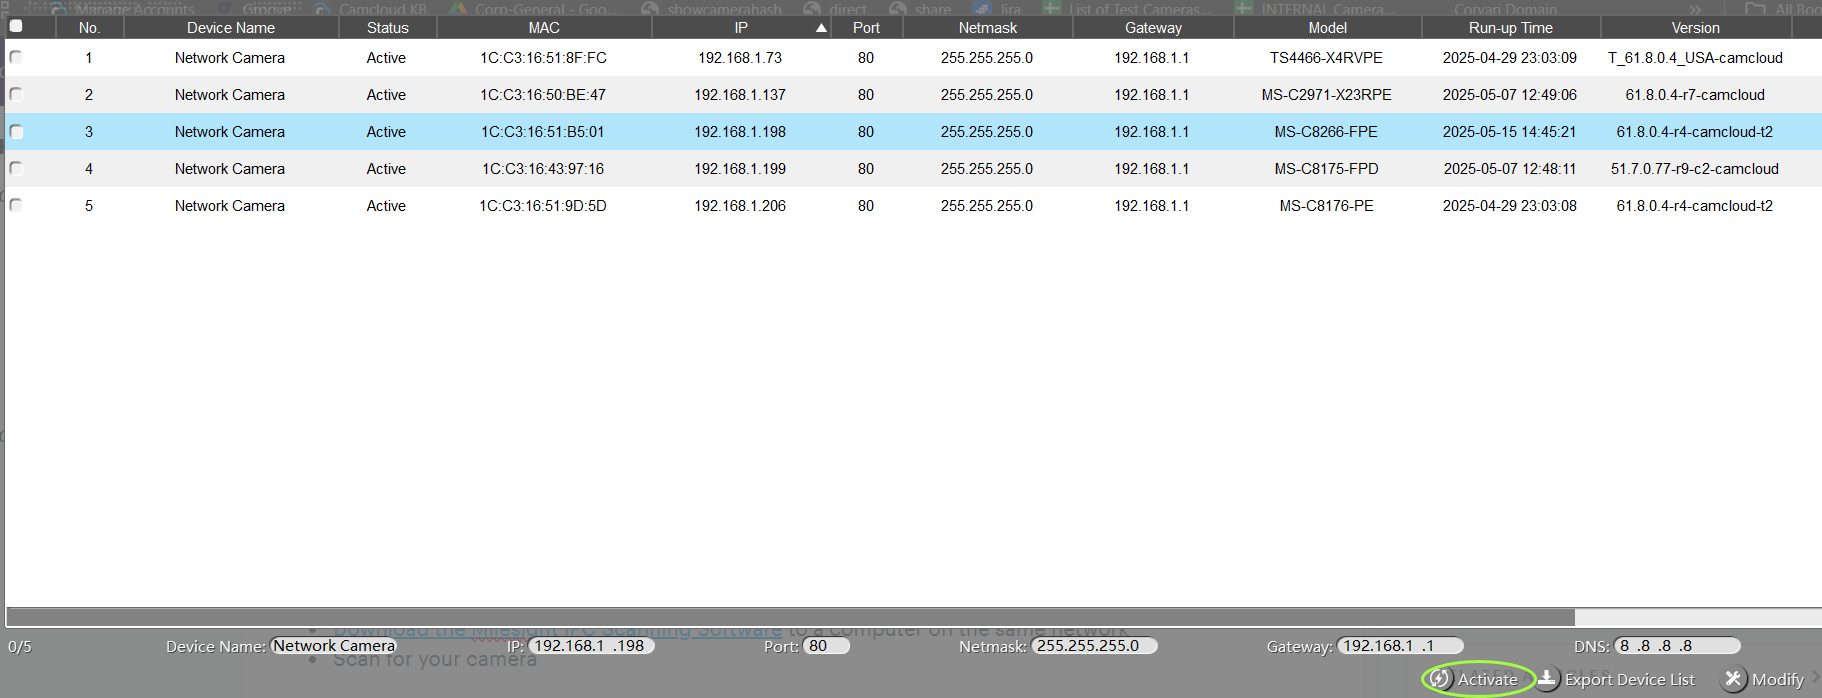
Download the Milesight Smart Tools software to a computer on the same network, run the "IPC Tools" and Scan for your camera.
Select the camera and click activate and set a password:
For more details on networking/camera activation please see the activation guide below.

Step 2: Verify Model and Firmware Version
Before proceeding with any setup, ensure that your camera is a supported model and is running the correct firmware.
Model support
PD Series
Dual-sensor Panoramic camera
Pro series, PTZ series and 5G camera
Q series, (expected to be next best seller)
Multi-directional camera
Model
Software Version
Firmware
Pro series, PTZ series and 5G camera
MS-Cxxxx-xxE
Dual-sensor
63.x.x.x
Q Series
MS-CQxxxx-xxPG1
Multi-directional
62.x.x.x
PD Series
N/A
LPR Cameras / Intelligent Traffic
T_61.x.x.x_<Region>-xx
4G Solar (SP111)
N/A
Step 3: Configure VMS, DNS and Date/Time Settings
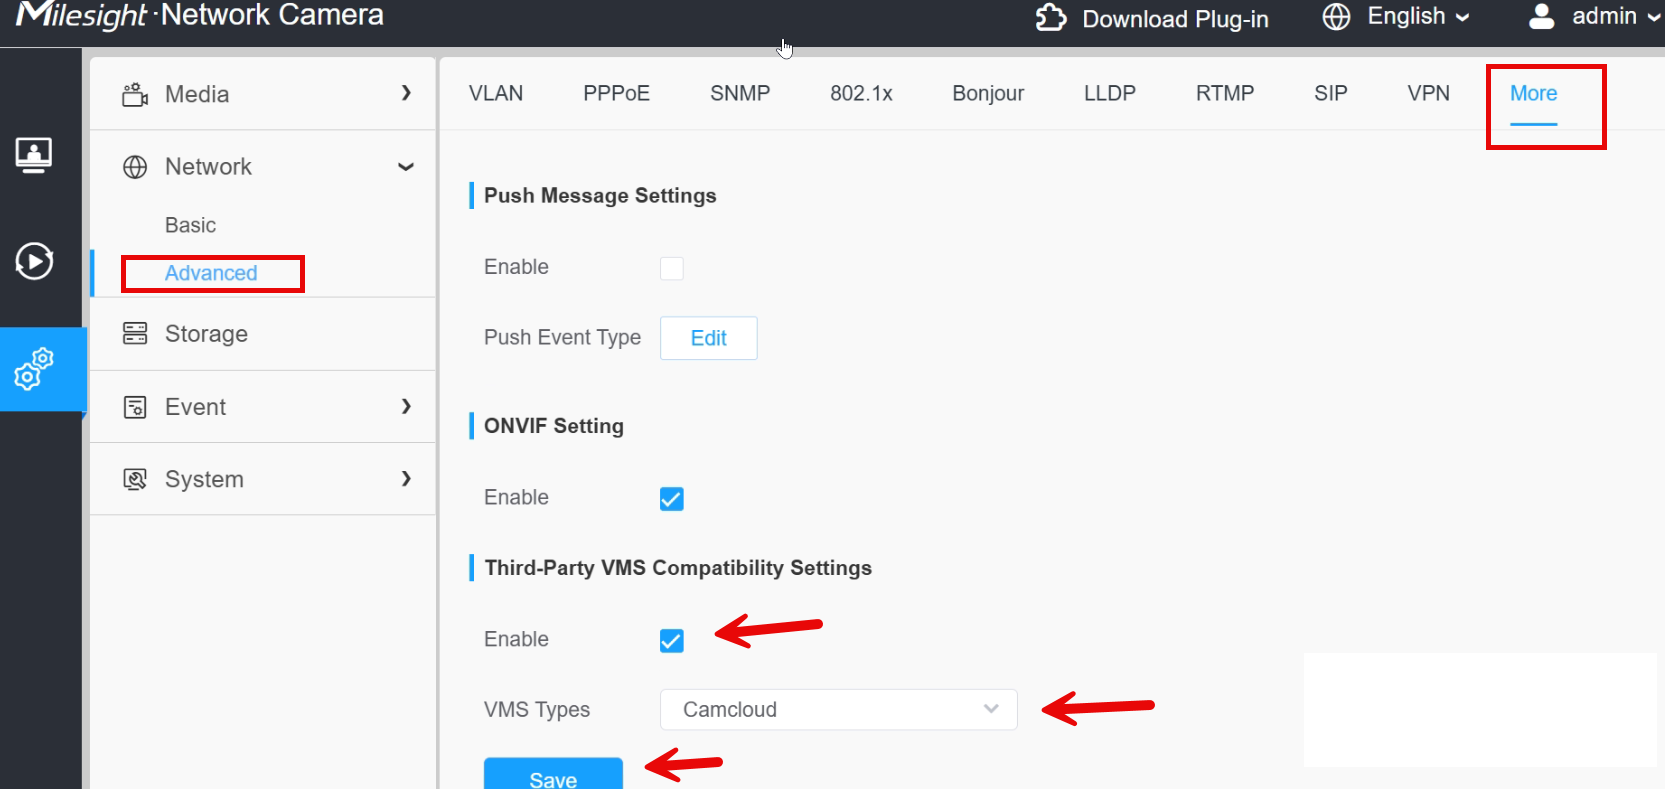
Ensure that the camera has VMS compatibility set to Camcloud.
Third-Party VMS Compatibility Settings
Verify that this is set to Camcloud. Settings -> Network -> Advanced -> More
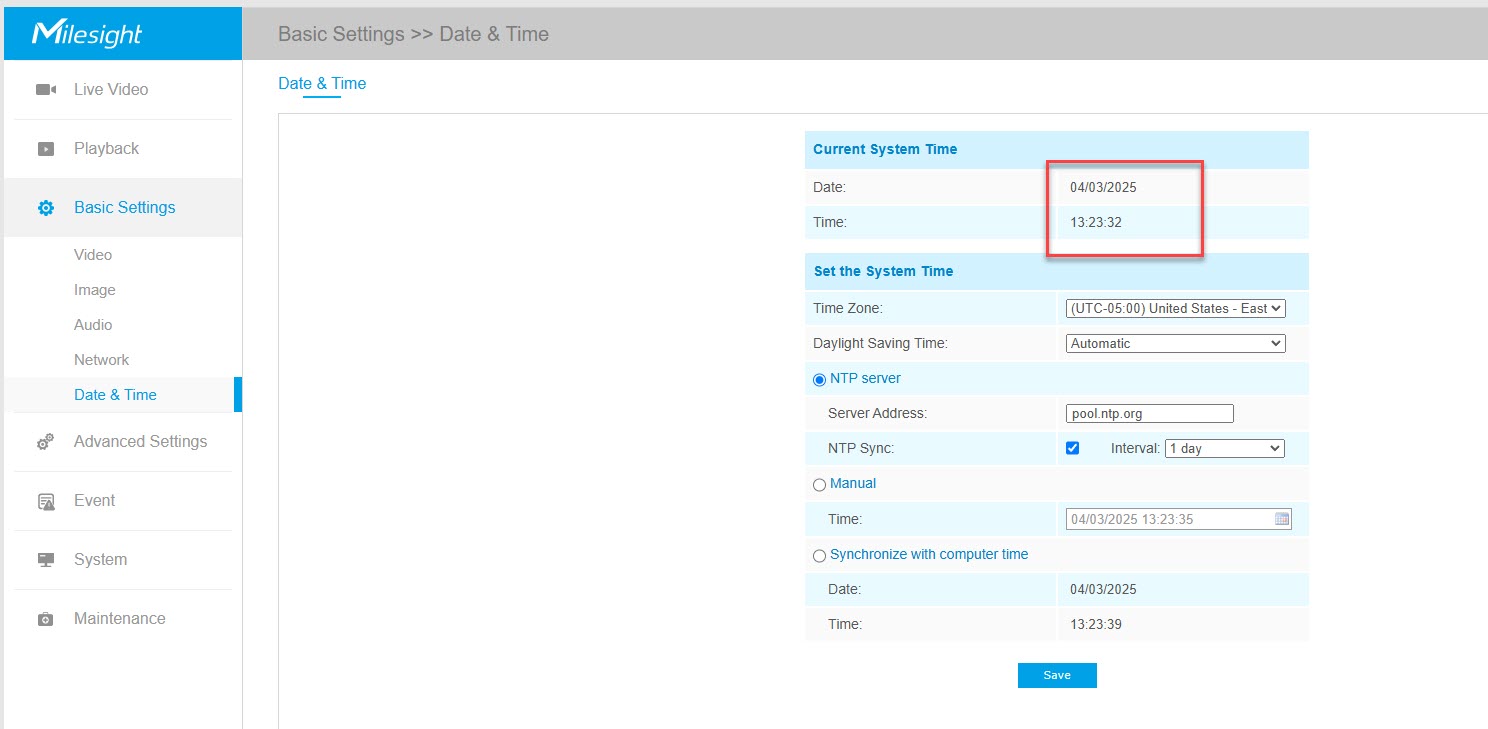
Ensure that the camera is properly configured for network and system time.
DNS Configuration:
Verify that the DNS settings are correctly entered. This ensures your camera can resolve domain names and connect to necessary services.Date/Timestamp Configuration:
Confirm that the date and time are set accurately. Incorrect timestamps may affect logging and TLS communication.

Step 4: Add the Camera to the Camcloud Portal
Once the camera’s firmware, DNS, and date/time settings are confirmed, add the camera to the Camcloud portal.
Log in to your Camcloud portal account.
Navigate to the "Add Camera" section.
Select "Milesight"
Enter the Camera name and make sure "Secure Tunnel" is selected. Port forward is an option as well but not recommended for Plug and Play supported cameras.
Enter the following details:
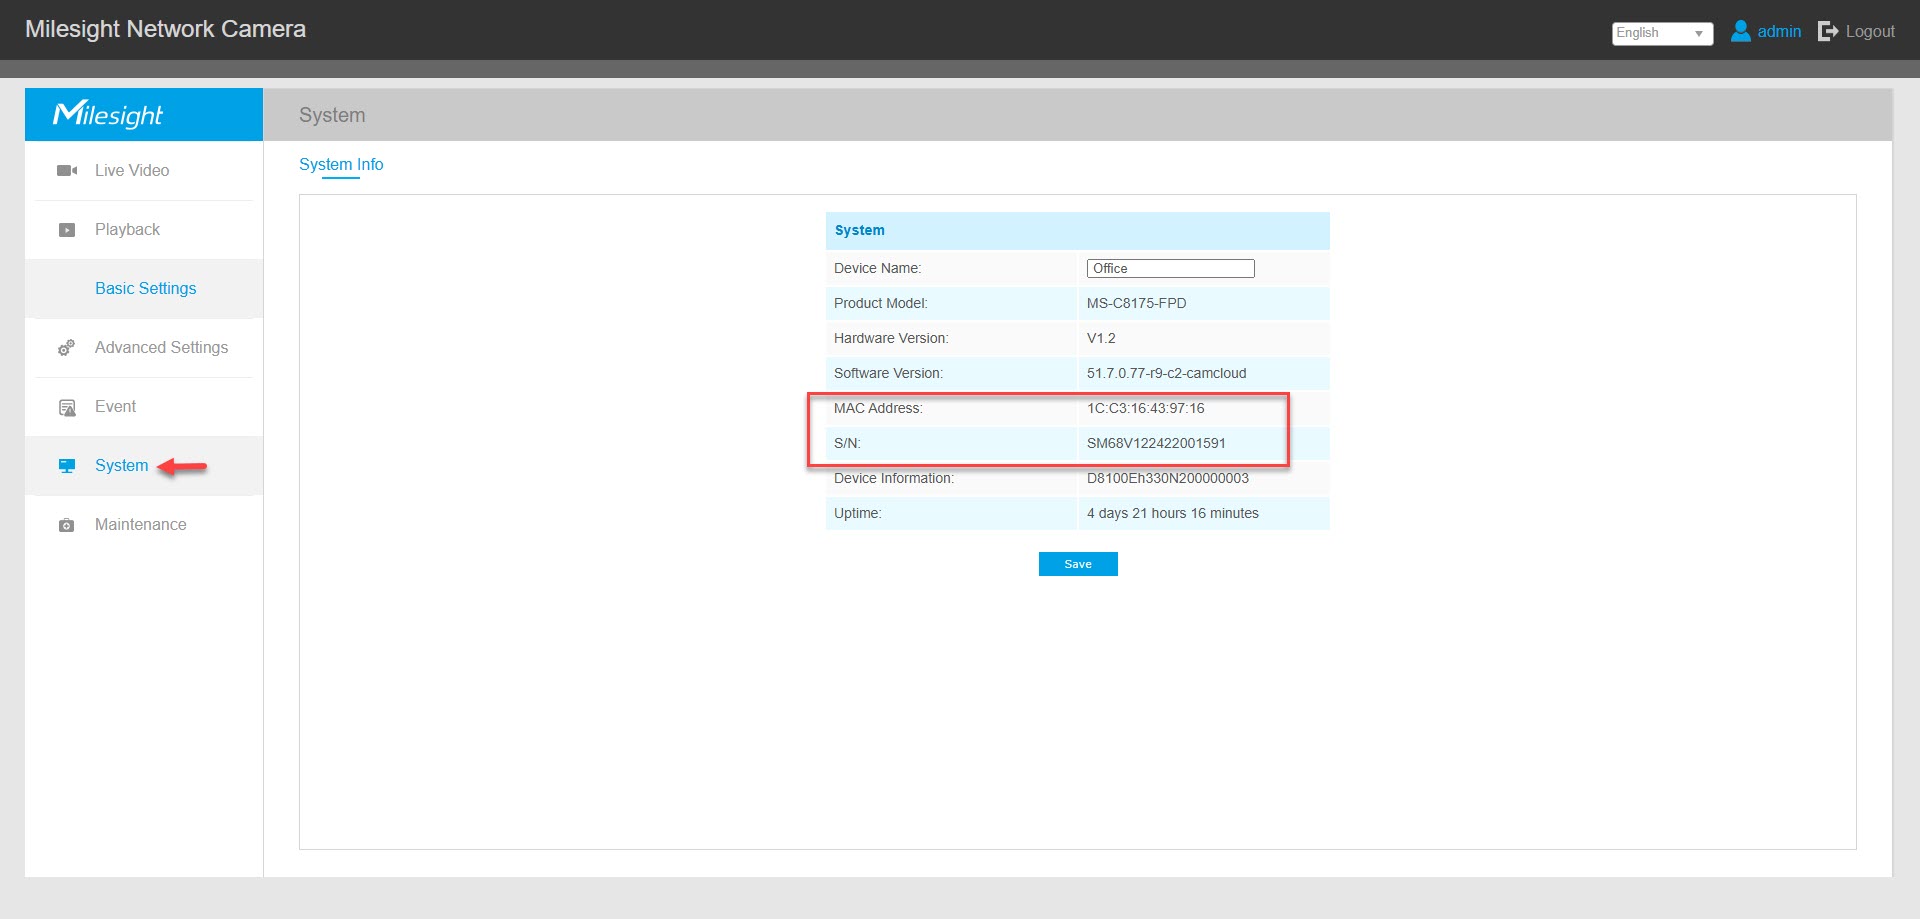
Serial Number: Enter the camera’s serial number.
MAC Address: Enter the camera’s MAC address.
Username/Password: Provide the camera's login credentials.
Click Next
Select your preferred camera settings and click Finish.
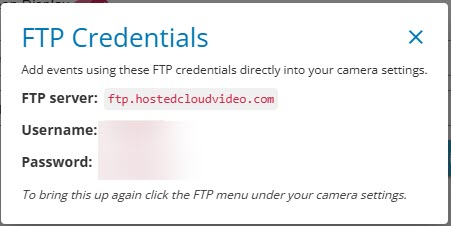
You will be provided with FTP credentials; they are used for Events configuration. Alternatively, and recommended an HTTPS address can be used for the same purpose.
Events Configuration
HTTP Configuration (RECOMMENDED)
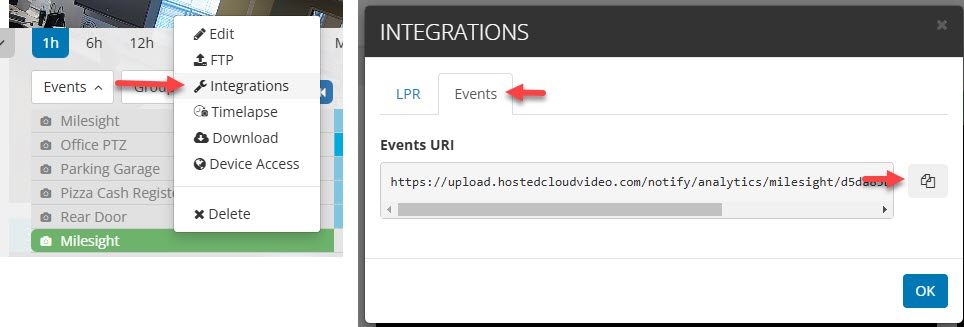
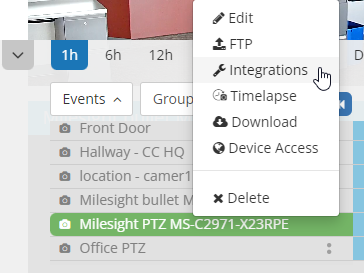
First get the Milesight VCA URL by clicking on y our camera and going to the Integrations menu:

In the Events tab, copy the Milesight VCA URL
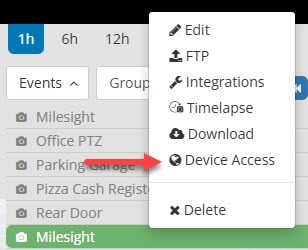
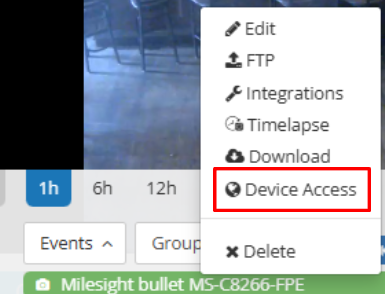
Access the camera via Device access menu:
Configure the event along with the Alarm Action
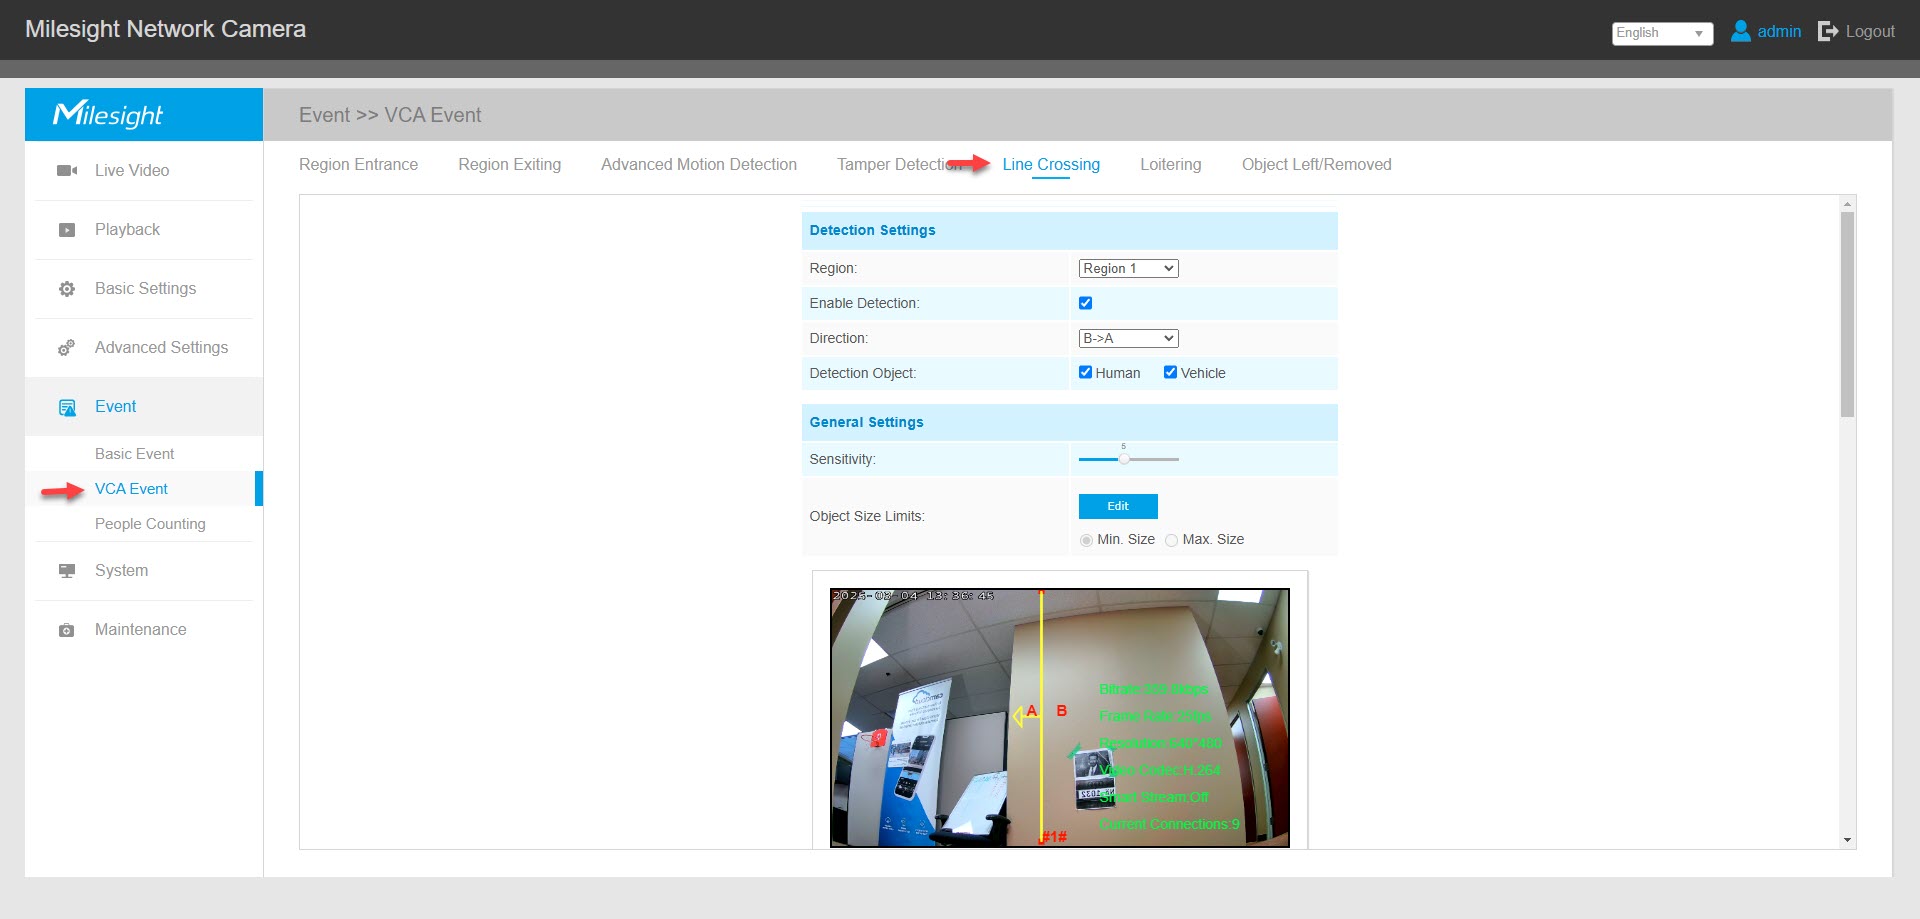
Here is an example of configuring Line Crossing Events:
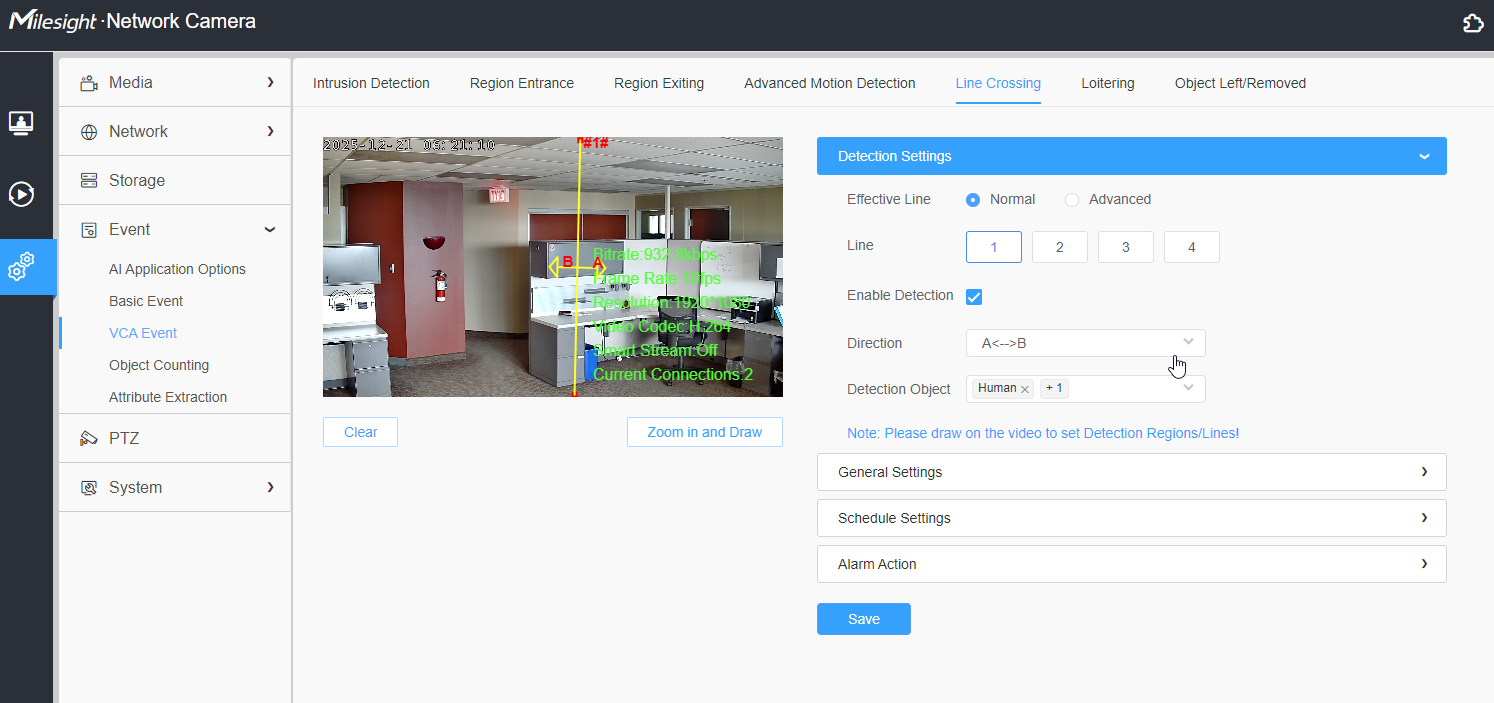
Choose any option here, but you must click the Enable checkbox. In this case we draw a line for the direction and we selected an alert going in both directions. By default it does Human and Vehicle detection.
Now the important part. Create an Alarm Action to Camcloud.
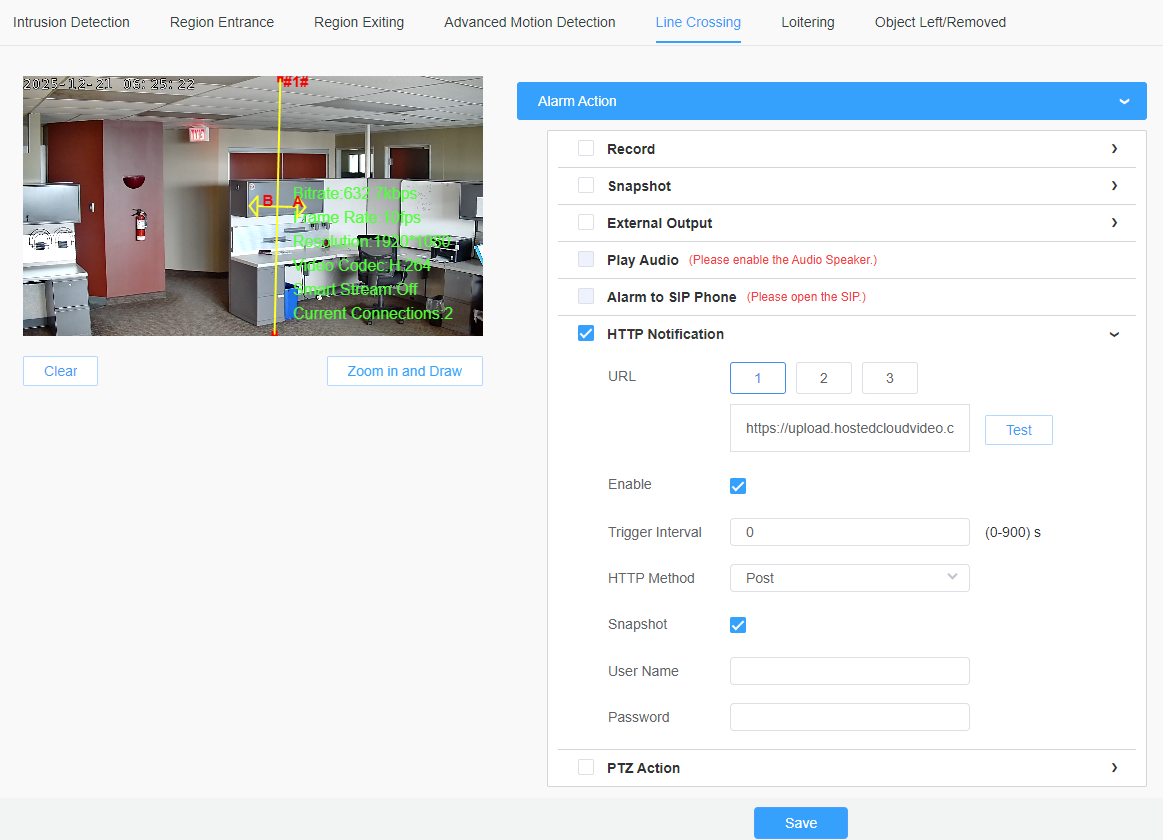
Select HTTP Notification
Paste the URL you copied in step #1
Enable
HTTP Method: Post
That's it, now you will get events on your Timeline.
FTP Configuration (NOT RECOMMENDED)
It's still possible to use FTP and you would only use this if you are using Event Triggered mode. Do not use this if you have Continuous Recording.
Go to the FTP menu and copy the host, username and password.
Using Line Crossing as an example again (see HTTP Configuration above). Select Upload to FTP
Image below shows both FTP and HTTP so only add FTP in this case:
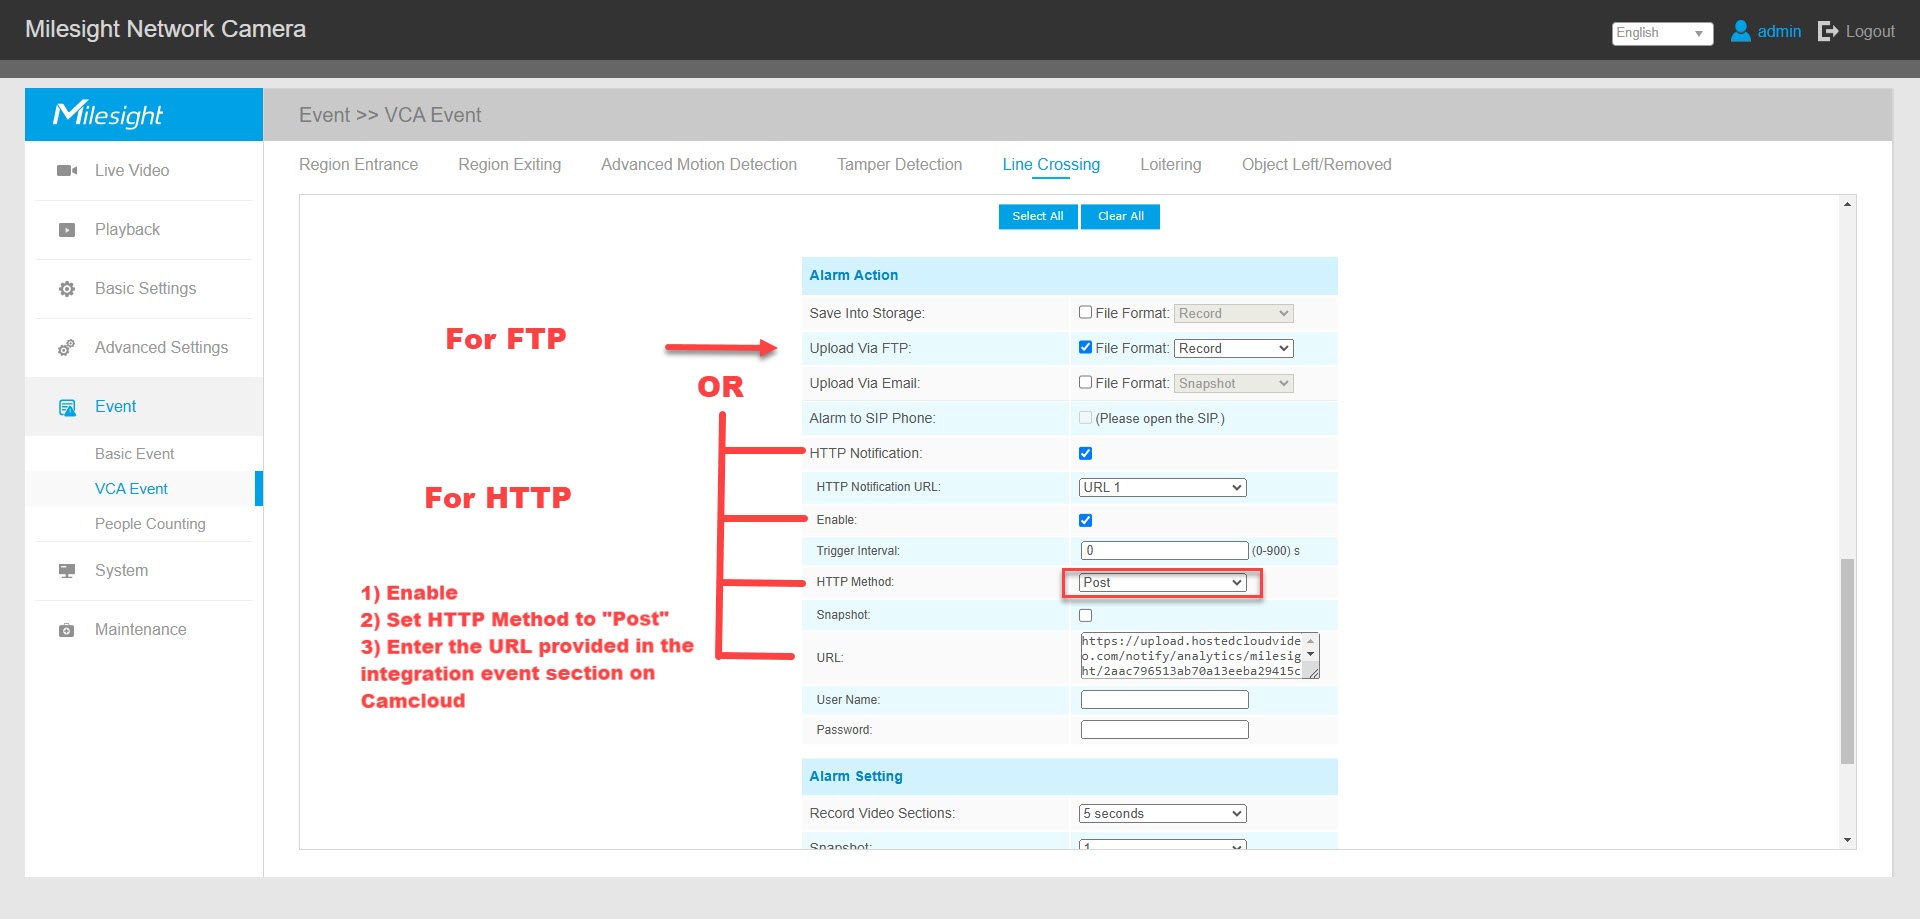
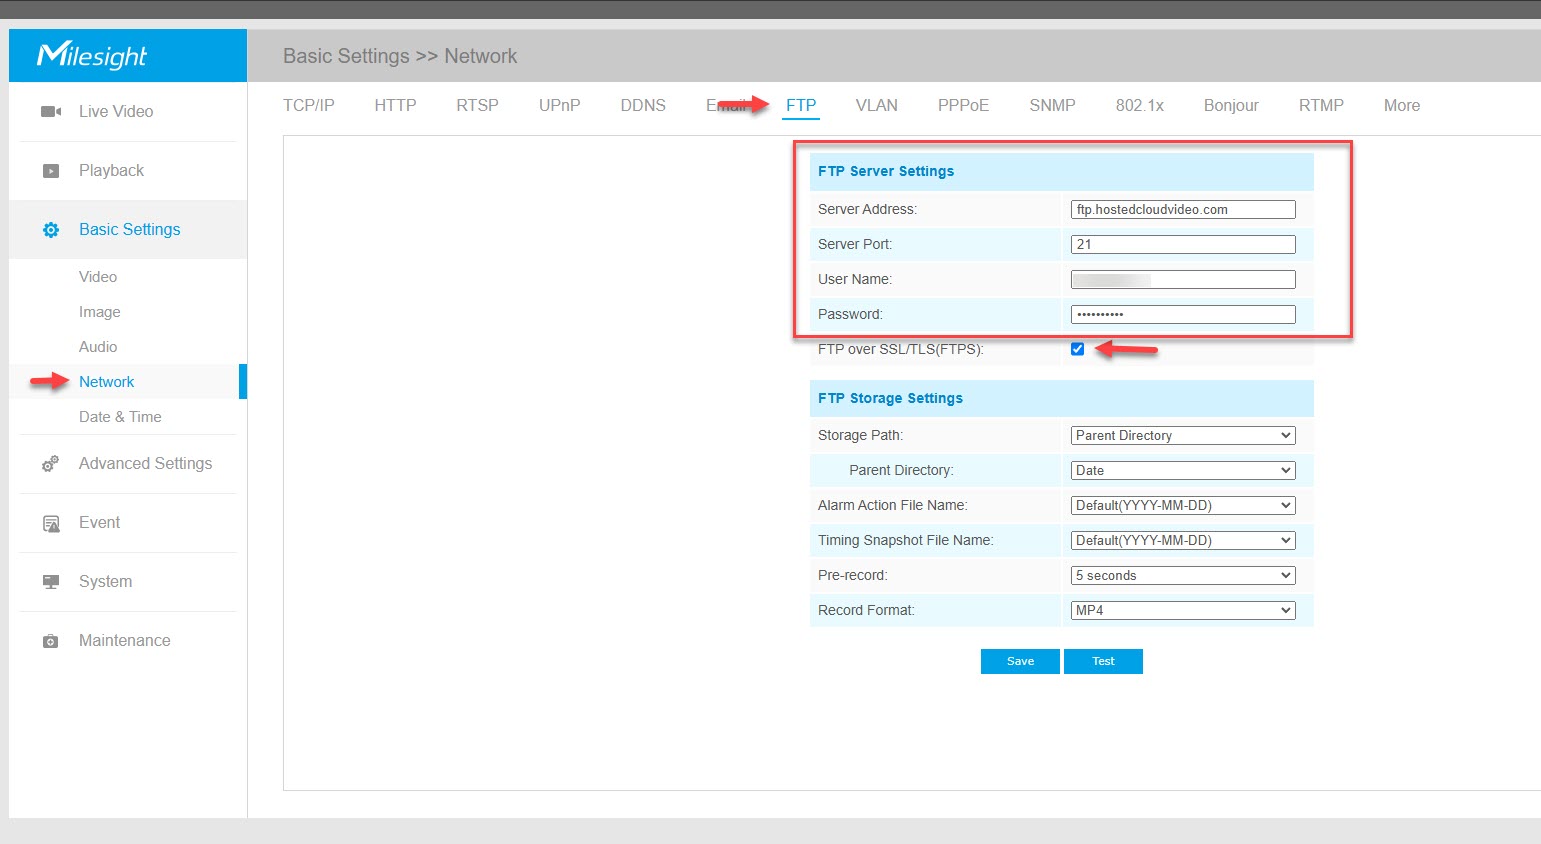
Input the FTP details you copied in step #1.
Milesight Activation Guide
We outline the detailed steps to connect and activate a Milesight camera. You'll need the Milesight Smart Tools.
Step A - Discover & Activate Camera
Launch Milesight Smart Tools → IPC Tools.
(Watch the video below for a step-by-step guide.)Click Search/Refresh. Detected cameras will appear even if they are on a different subnet (e.g., camera
192.168.5.xvs. PC192.168.1.x).If the camera is new, you must activate it by setting a strong admin password.
Note: New Milesight models have no default password.After activation, you can modify its network settings.
▶️ Watch: Step-by-step video guide
Step B - Change Camera IP (Preferred Method)
It is recommended to place the camera into your LAN subnet for normal access:
In Smart Tools, select the camera and click Modify.
Set a new IP in your LAN’s subnet (e.g., if router is 192.168.1.1, choose 192.168.1.50).
Subnet Mask: 255.255.255.0.
Gateway: your router’s IP (e.g., 192.168.1.1).
Save. The camera is now reachable via its new IP, and the web interface can be accessed normally.
Important: Only when the camera is on the same subnet can you enable DHCP from the Smart Tools Network tab.
Step C - Alternative: Add a Secondary IP to Your PC
If step B fails or you don't know available LAN IPs to work then you need to add a secondary IP.
OS | Instructions |
Windows | Control Panel -> Network and Sharing Center -> Change adapter settings -> Properties -> IPv4 -> Advanced -> Add -> |
MacOS | System Preferences -> Network -> Advanced -> TCP/IP tab -> Add secondary IP: |
Linux | Run: sudo ip addr add 192.168.5.100/24 dev eth0 |
Step D - Enable DHCP (Same Subnet Required)
Once the camera is in the same subnet as your PC:
In Smart Tools, go to the Network tab.
Select your camera and enable DHCP, then apply changes.
Refresh/Search in Smart Tools and the camera’s new DHCP-assigned IP will be displayed directly.
Additional Tips and Troubleshooting
Factory Reset
Factory resetting the camera will require you to delete and re-add it to our platform, if you are ok with that scenario (losing currently stored footage) than you may proceed as there will be no issue re-adding the camera.
Firmware upgrade
In addition to factory resetting you will also have to re-add the camera if you update firmware. Keep in mind you'll lose your current footage.
Get Logs
If you encounter any difficulties, please contact support for further assistance. It would be helpful to provide the logs of the camera if possible, they are located here:
http://<ip>:<port>/dataloader.cgi?dw=file&name=camcloudsecuretunnel.log
Get Logs Remotely
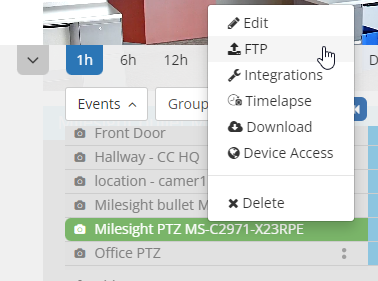
You can also access the logs via our Device Access from the customer portal.
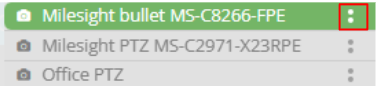
Click on the two dots next to the camera name
Click Device Access
It will open up a new tab. Copy the URL from the new tab.
<Paste Device Access URL here>/dataloader.cgi?dw=file&name=camcloudsecuretunnel.log
Copy and paste the full URL.
You will be prompted to input the camera username and password.
Log download will start.
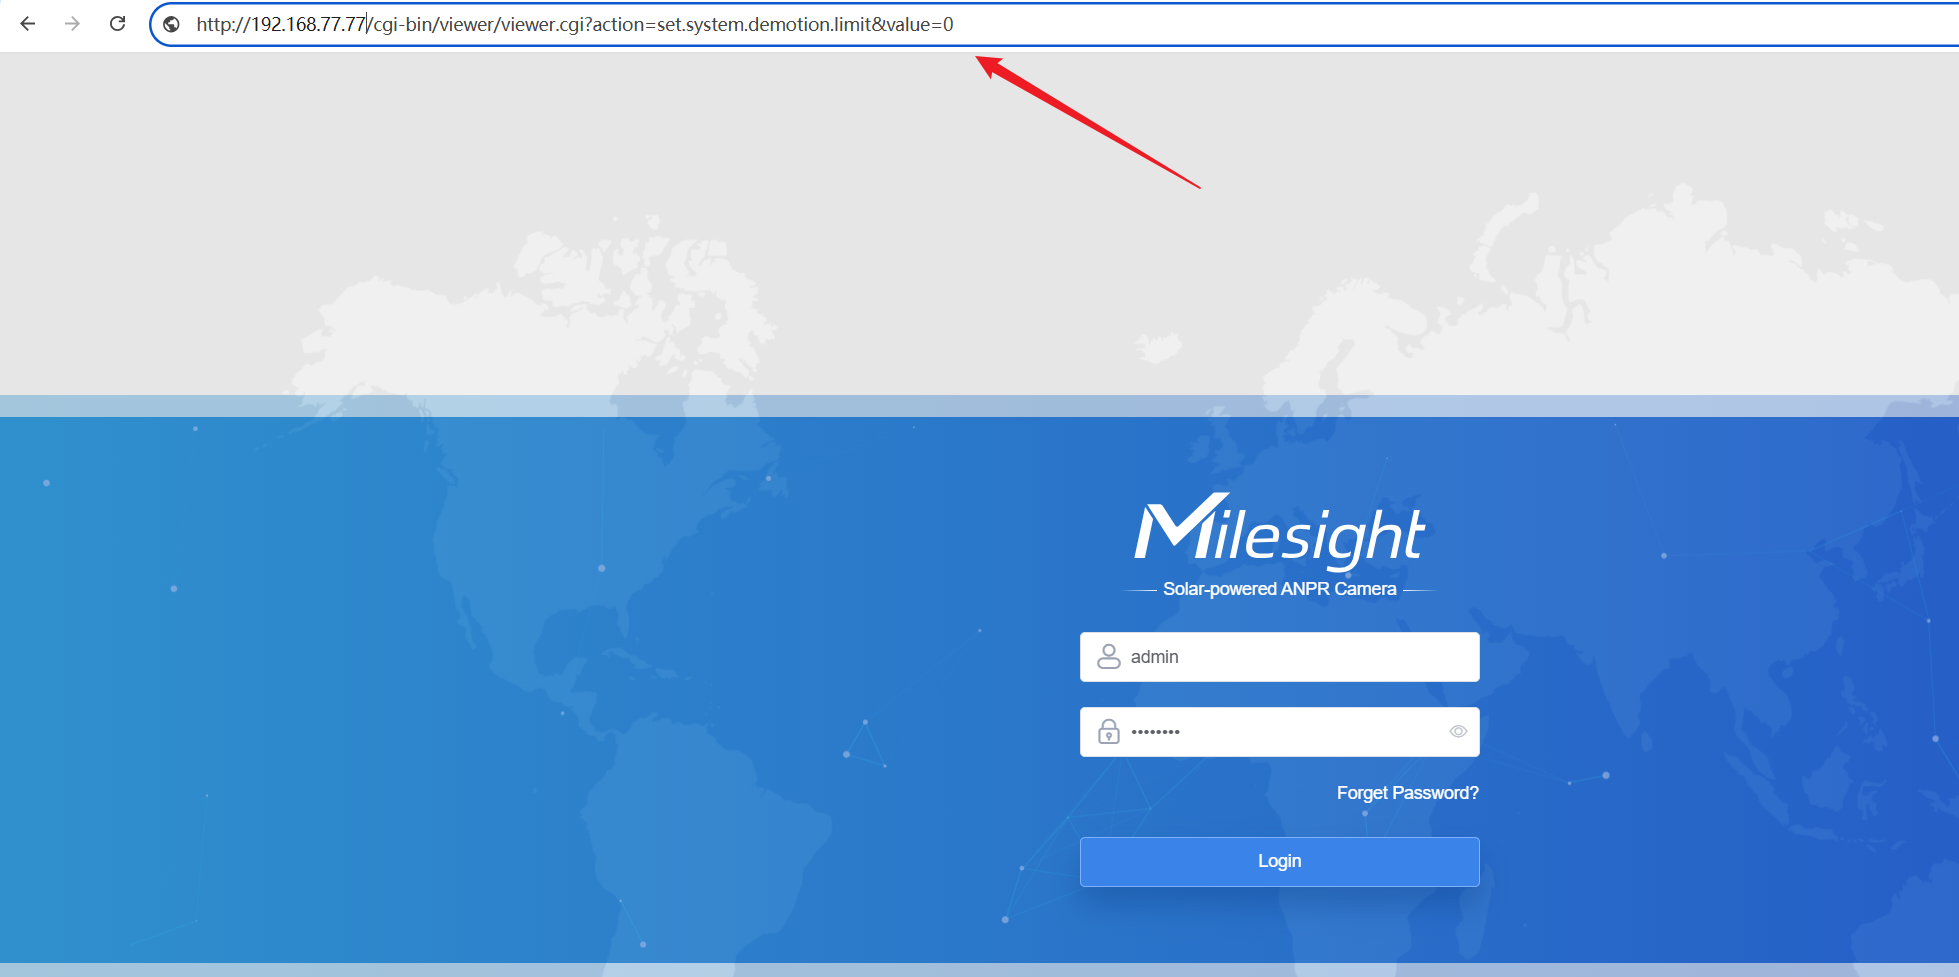
Downgrade restrictions
If you get an error "There are downgrade restrictions!" message (you are using specific firmware in our list above) then follow these steps.
First log in to the camera webpage
Open a new webpage before downgrading, enter the downgrade command:
http://IP/cgi-bin/viewer/viewer.cgi?action=set.system.demotion.limit&value=0 (replace with the local IP of the camera)Now you can install the intended firmware.
Note for 4G/5G Cellular Models
Initial Setup Still Required: All Milesight 4G/5G cameras must first be discovered and activated on LAN using Smart Tools, just like standard IP models.
Password Setup: You must complete activation and set an admin password locally before the camera can operate on cellular.
Cellular Configuration: Once activated and reachable on LAN, log into the camera’s web UI → Network → Cellular. Insert and configure the SIM (APN, PIN if required).
Standalone Cellular Use: After the SIM is configured and connected, the camera can function over 4G/5G only, without a LAN cable, but initial steps cannot be skipped.