There are two ways to add a camera. One is with our Secure Tunnel or you can port forward. This article will cover the port forwarding option but see our Secure Tunnel Manager documentation if you need to add it without port forwarding.
Setup with Port Forwarding
Note: Before starting, make sure that you've port-forwarded your camera. If you're unsure how to start the port-forwarding process, take a look at our guide for some guidance.
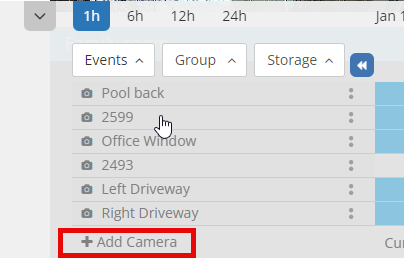
Step #1. Start the "Add Camera" Wizard: First login to you account. Click on the "Timeline" tab. This is where you'll have a list of any cameras you've already setup.
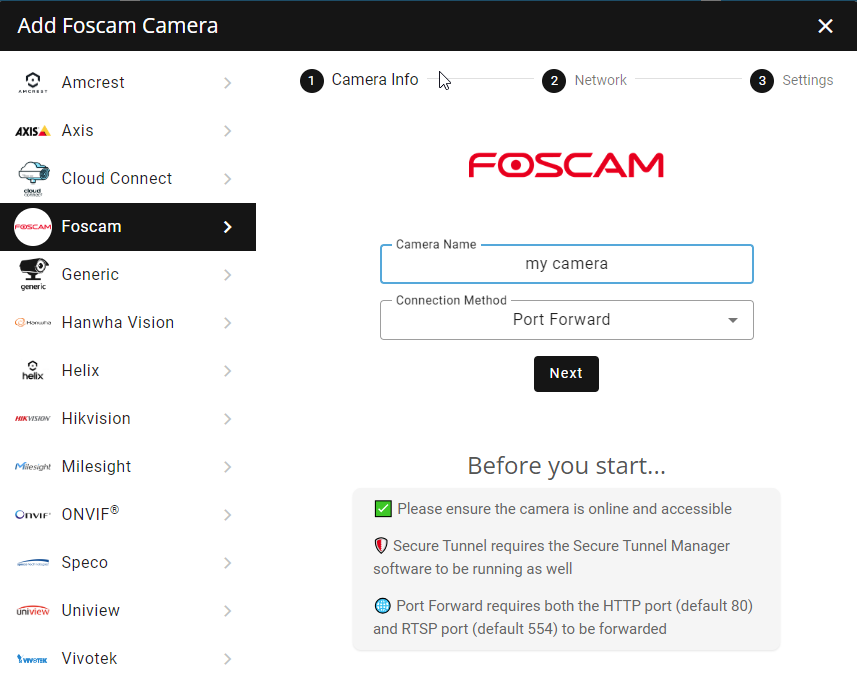
Click on "Add Camera" and pick "Foscam". Choose your camera model, then name your camera whatever you'd like.
Step #2. Enter Network information: Once you click on next, you'll have to add in your camera's username, password, IP address, and HTTP port (and in some models the RTSP port as well). This means your HTTP port needs be forwarded on your router. Note: To enable HTTP on a Foscam, go to Network -> Port, assign a port (e.g. default is 80). This is the port that must be forwarded on your router.
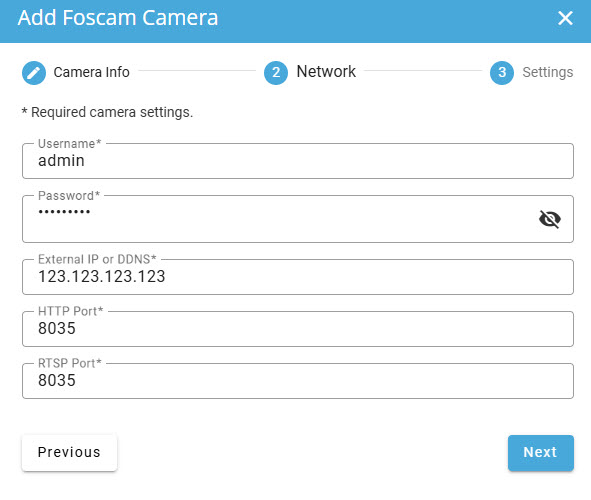
This example has a camera that has both an HTTP port and RTSP port, but in some cases it might just be the HTTP port required.
Click on Next.
Step #3. Adjust camera settings: This last step allows you too change the resolution or other settings. You can leave it at all the defaults and change it later if you like. Once you're done, click on "Finish".
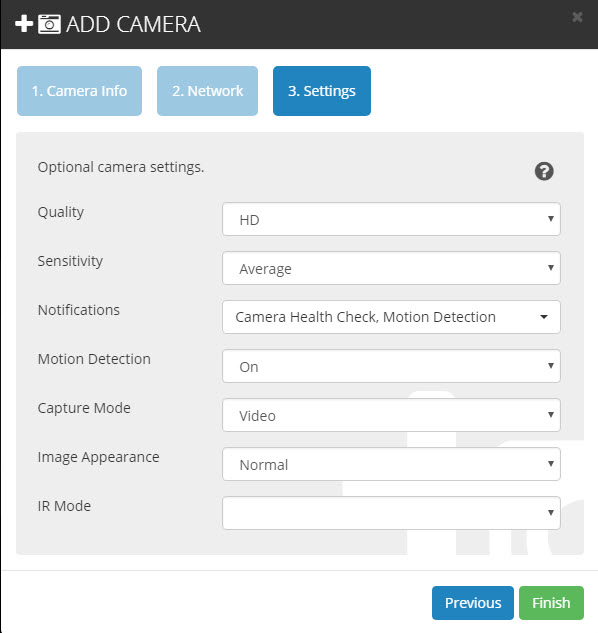
Now the setup wizard will configure your chosen settings and close. Verify you are getting a live view and that motion events are coming in when triggered.
Manual setup
This is never required but if you're a power user and want to setup the camera manually as a "Generic" type here are some tips.
Login to your Camera.
Enter your camera's IP address into your browser's address bar. You can download a Foscam IP utility to find the IP the camera is currently using. Now login using the camera's credentials.

Tip: If you're having trouble logging into your camera, try using Microsoft Edge as your browser. Sometimes you even need to use "compatibility mode".
If you want motion events - setup the FTP settings.
Under Network, click on FTP Settings. This example is for typical Foscam cameras.
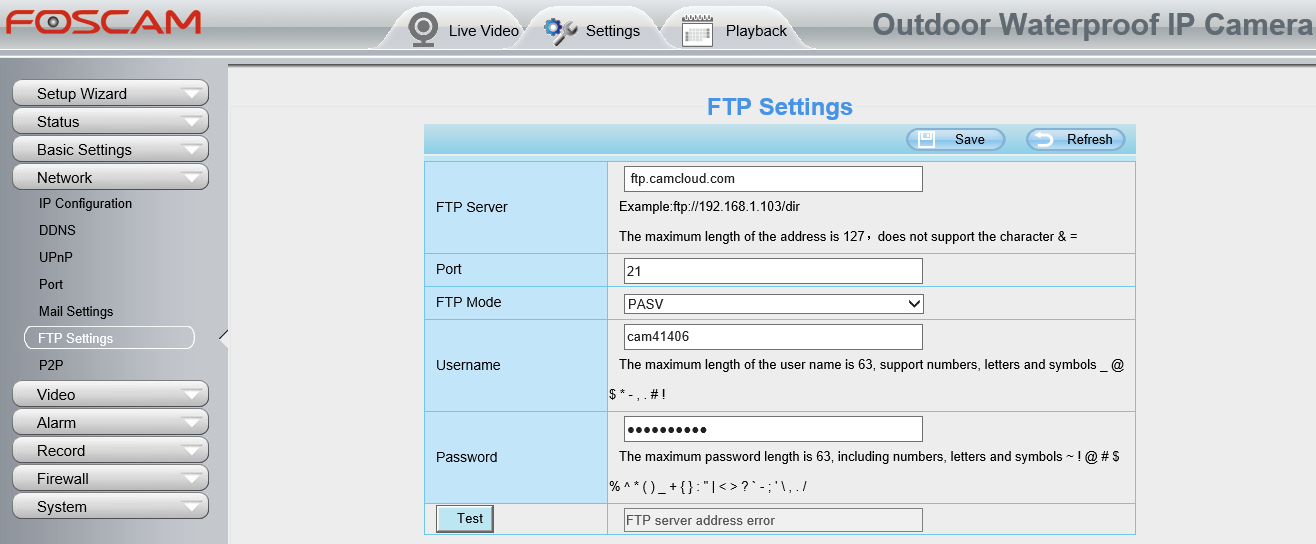
Replace the FTP server, username, and password with the information you received after setting up the camera. In the case of the newer Foscam cameras they have a strange syntax where you need to add the prefix like so: "ftp://<ftp server>". FTP Mode needs to be "PASV"
Setup the Recording
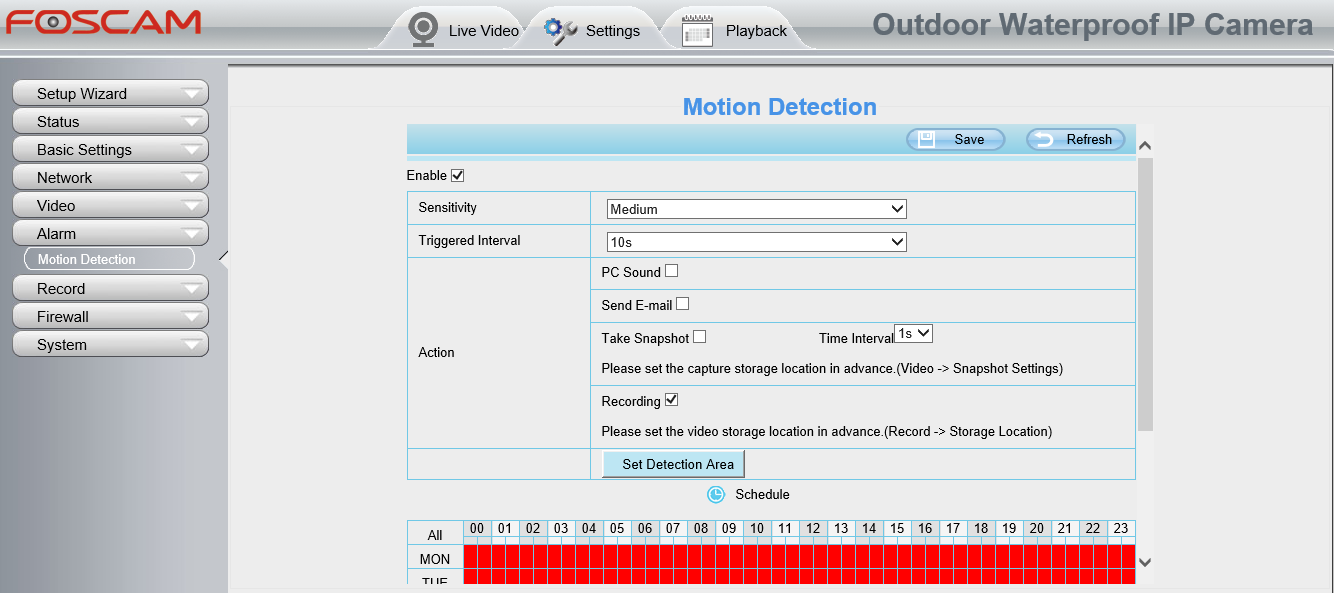
Click on Alarm, then Motion Detection, and make sure "Recording" is checked.
Note: Some Foscam user interfaces may slightly differ from others depending on your camera model. For example, your interface may have "Motion Detection" under "Alarm". Another version of the interface may have Action Detection under "Detector", as seen below.
Interface #1:
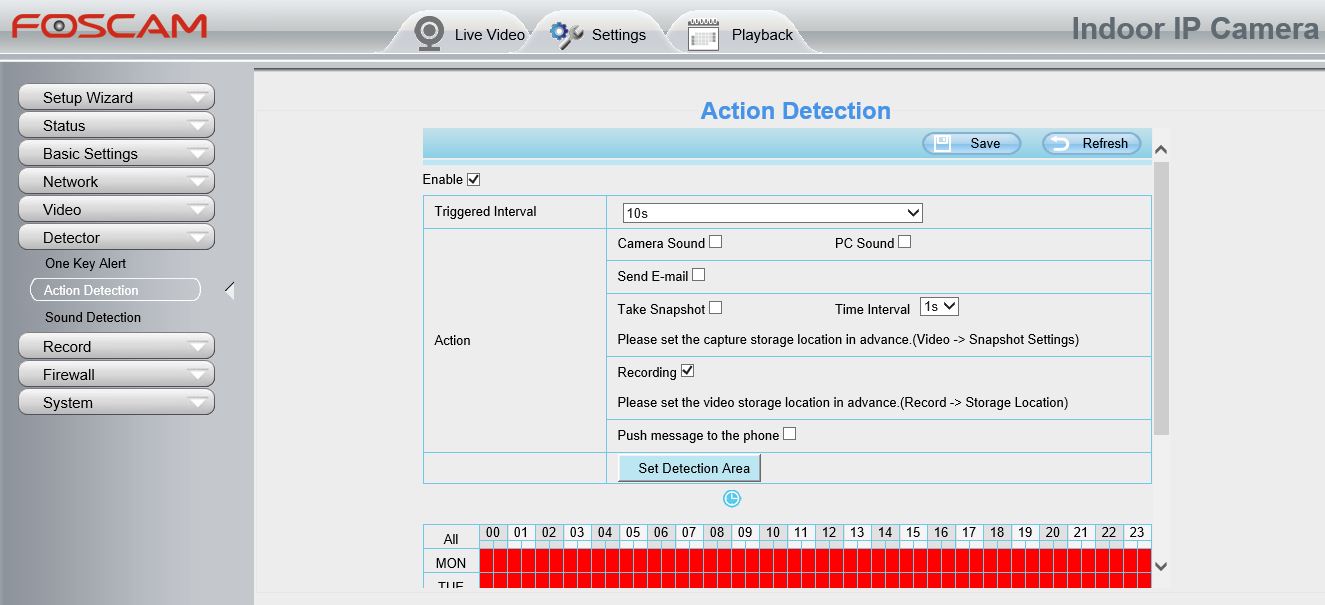
or Interface #2:
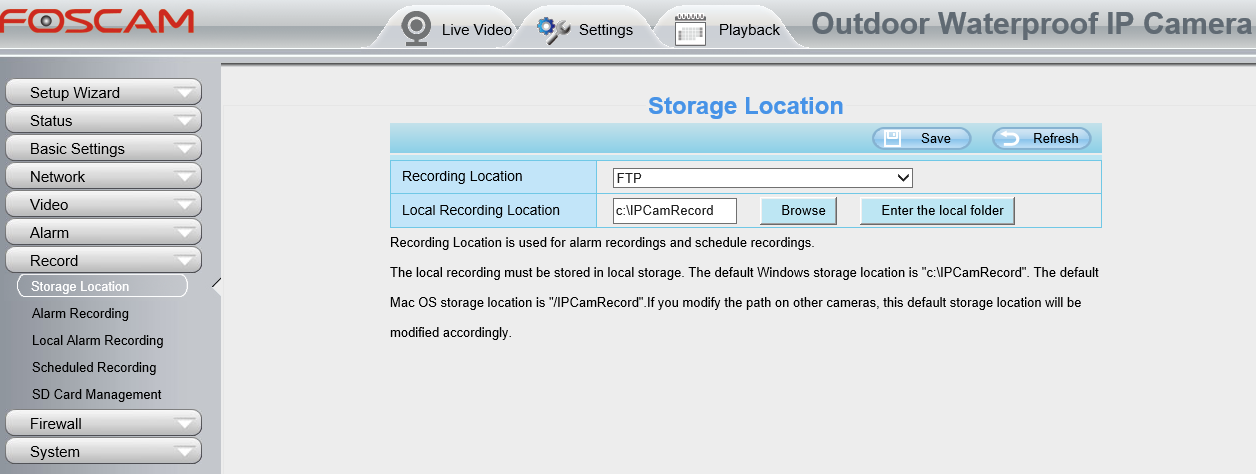
Now add the storage location
Under "Record", click on Storage Location, and make sure "FTP" is selected for Recording Location.
That should be it. Verify you are getting a live view and that motion events are coming in when triggered.