This article explains how to setup an IP camera that has no direct integration with Camcloud to enable cloud storage and other features.
First you want to get your IP camera on your network. Follow your camera's documentation to complete this step.
Generic or Open Standards
Login to camcloud.com and go to the “Timeline” page and select Add Camera.
There are 4 general steps required to setup an IP camera with Camcloud.
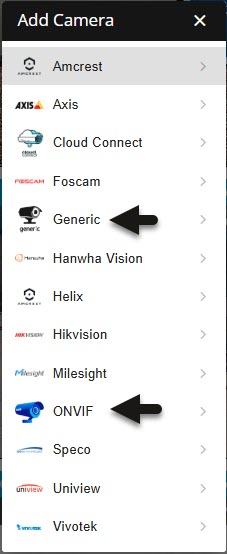
Camera Info. Select your camera type (in this case, Generic or Open Standards):
The Open Standard method relies on cameras that expose those services. Not all cameras implement Open Standards consistently, so functionality may vary depending on device implementation.
Camera Info. Select your camera name and the connection Method, we will cover the Port Forward method, but it can be added with "Secure Tunnel", see our Secure Tunnel Manager documentation if you need to add it without port forwarding.
Network. If you have not setup the camera on your network with port forwarding, please STOP HERE. Read our Port Forwarding Guide for instructions on this before proceeding further. This is where you give Camcloud the camera’s login credentials, IP address and ports. It requires port forwarding to work with IP cameras.
Generic Camera Method: This method only requires the RTSP port to be forward but you also need to specify the RTSP path, The RTSP path will look something like this: /videostream.cgi or /channel1. Your documentation might show a full path of the IP and port, but you only want to enter the path after that. For example if your documentation says: rtsp://xx.xx.xx.xx:554/channel1, you only want to enter the path of: /channel1 into the path field.
Open Standard: This method uses Open Standard services for device configuration. It typically requires:RTSP port for video streaming
Open Standard port (often the HTTP port; consult your camera documentation)
Some cameras require creating a dedicated Open Standard user account separate from the main login.
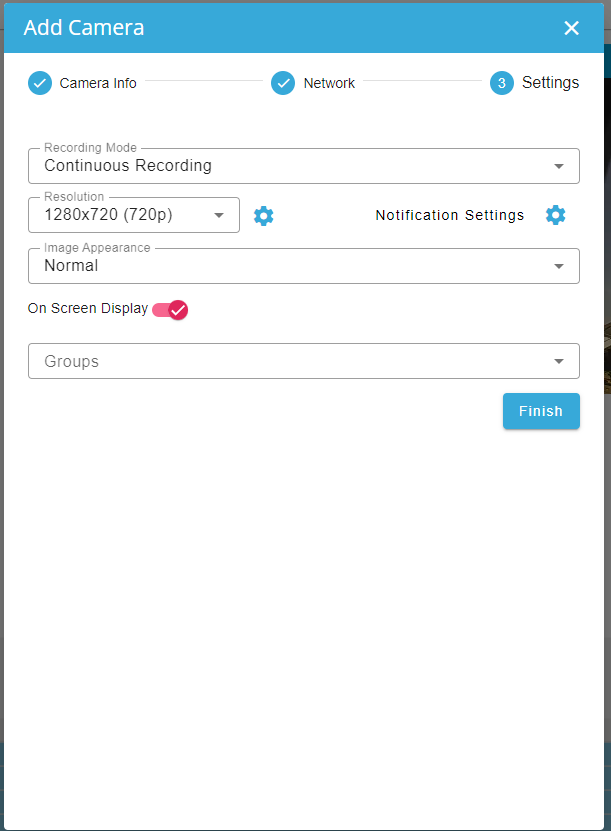
Settings. For Generic cameras you will only be able to select your Recording mode and notification settings, for Open Standard, additional video parameters such as resolution, bitrate, and framerate may be configurable depending on the device implementation:
Configuring Events
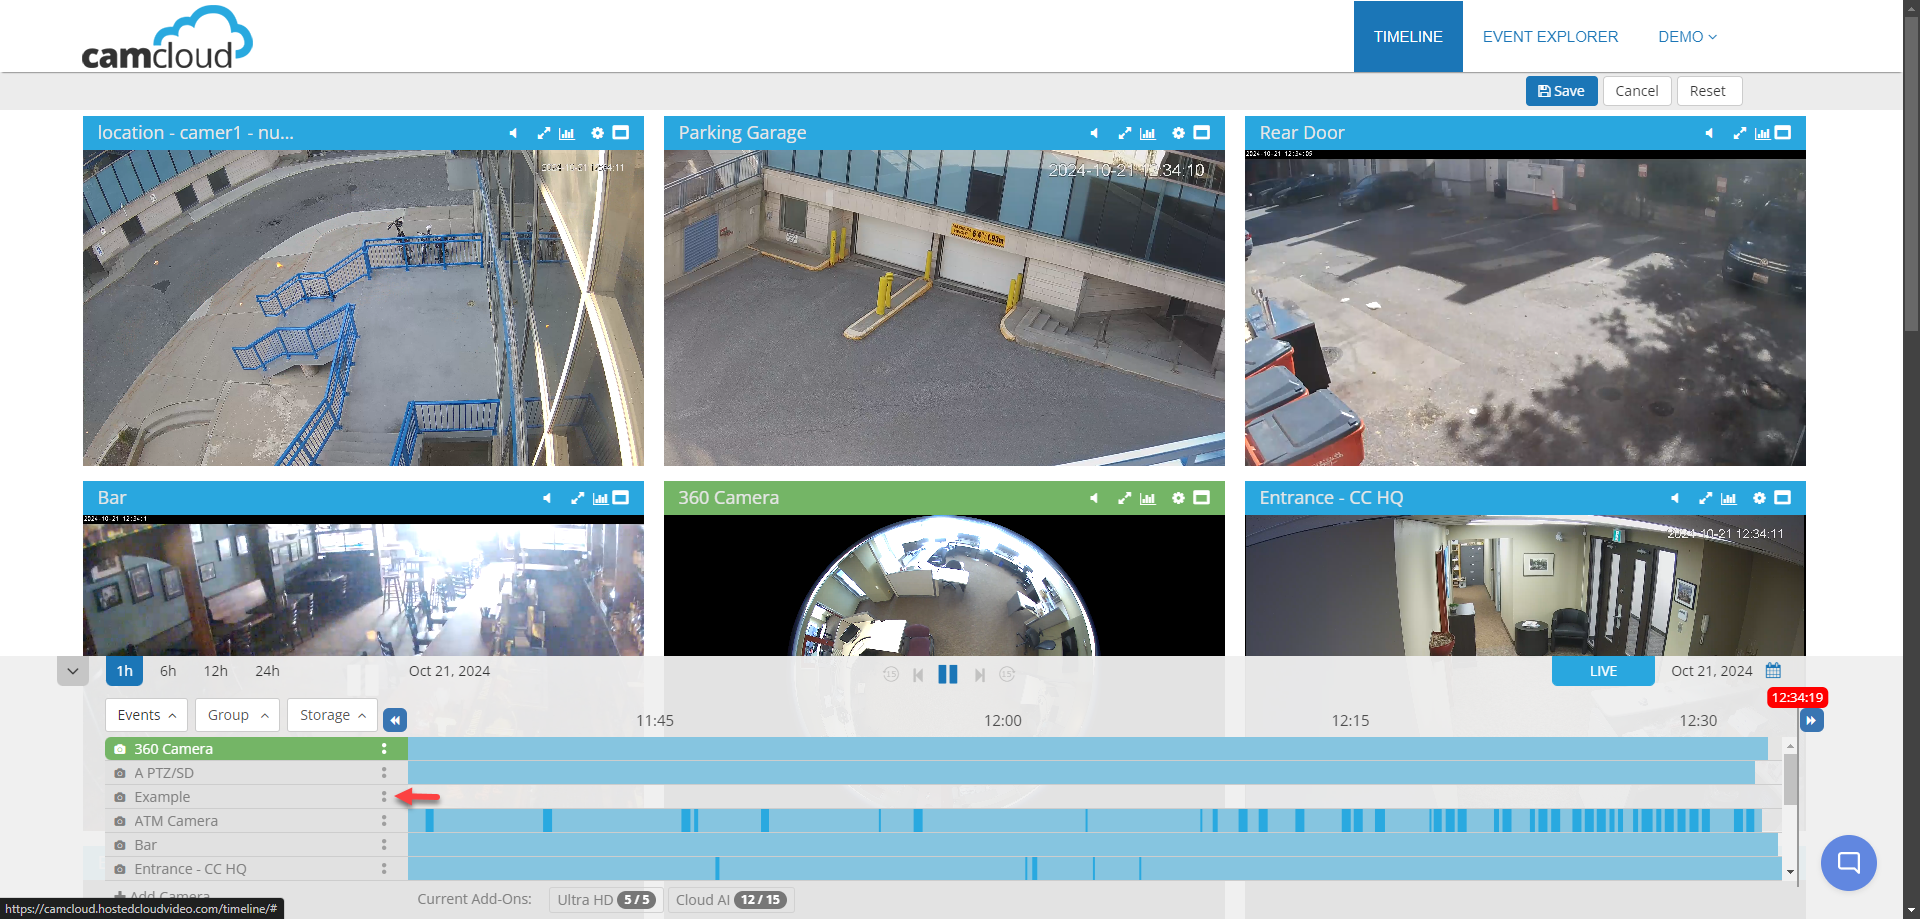
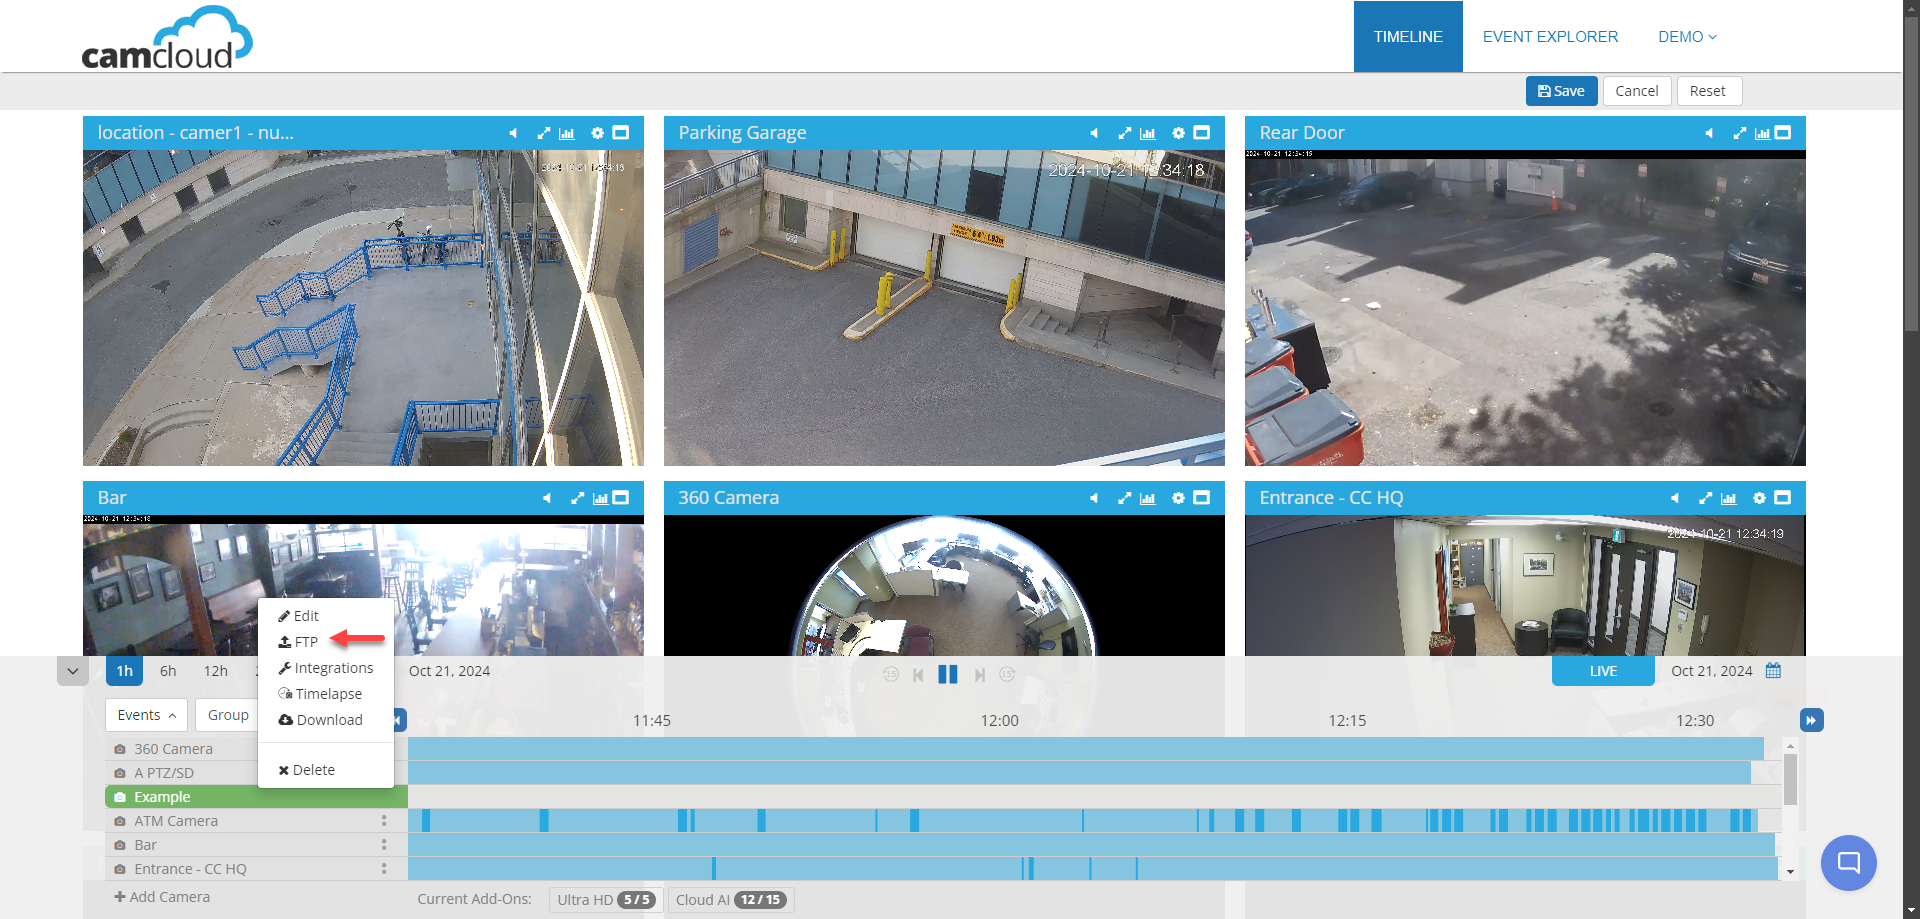
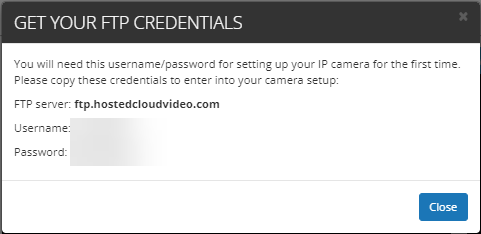
Once your camera is setup on your network there are a few remaining settings required in order to add cloud storage of your events. You will be provided FTP credentials specific to the camera. You can retrieve them any time by clicking the dropdown menu for the added camera and selecting "FTP":
First, configure your camera to send events. This varies per camera but typically involves three steps:
Input FTP credentials. Your camera will have a place to enter the FTP credentials. Take the credentials provided to you when you created the camera. Enter the address, your credentials, port (21) and make sure to select passive mode if you have that option.
Enable detection (usually motion) - most cameras simply have a checkmark or something that says: yes, please send events. Here you will create "events" or "Action" or "Snapshot" to trigger an event to that FTP. It varies per camera. You might also have something called "Interval" which must be set to specify the number of seconds between motion events, keep the number low.
Create detection area. Some cameras require you to draw the areas of where you want it to detect events. Many cameras don’t have this option but if you do you typically find it under the motion detection options.
Once you’ve added the supplied FTP credentials and turned on events in your camera’s configuration, you’re ready to start using your camera with Camcloud!